1. ບົດແນະນຳ
This manual provides essential information for the installation, operation, and maintenance of the ZDMTDKXT replacement motherboard compatible with the Hutt W66 Window Cleaning Robot. Please read this manual thoroughly before attempting any installation or repair to ensure proper function and safety.
2. ຂໍ້ມູນຄວາມປອດໄພ
Always observe the following safety precautions when handling electronic components:
- ຕັດການເຊື່ອມຕໍ່ພະລັງງານ: Ensure the window cleaning robot is completely powered off and unplugged from any power source before beginning installation.
- ໄຟຟ້າສະຖິດ: Electronic components are sensitive to static electricity. Wear an anti-static wrist strap or frequently touch a grounded metal object to discharge static electricity before handling the motherboard.
- ຈັດການດ້ວຍຄວາມລະມັດລະວັງ: Hold the motherboard by its edges to avoid touching components or connectors directly.
- ເຄື່ອງມື: Use appropriate, non-magnetic tools for disassembly and assembly.
- ການຕິດຕັ້ງແບບມືອາຊີບ: ຖ້າທ່ານບໍ່ແນ່ໃຈກ່ຽວກັບຂັ້ນຕອນໃດໆ, ໃຫ້ຂໍຄວາມຊ່ວຍເຫຼືອຈາກຊ່າງເຕັກນິກທີ່ມີຄຸນວຸດທິ.
3. ຜະລິດຕະພັນເກີນview
This replacement motherboard is designed for the Hutt W66 Window Cleaning Robot. It serves as the central control unit, managing the robot's various functions.
ຄຸນນະສົມບັດທີ່ສໍາຄັນ:
- ການຄວບຄຸມອັດສະລິຍະ: Equipped with a high-performance main control chip for accurate cleaning route planning and obstacle avoidance.
- Stable Compatibility: Designed for seamless integration with the robot's drive motor, vacuum fan, battery, and other components.
- Convenient Function Expansion: Supports voice control adaptation and includes reserved upgrade interfaces for future functionalities.
- Energy-saving and Efficient: Features an intelligent power management system to optimize power consumption and battery life.
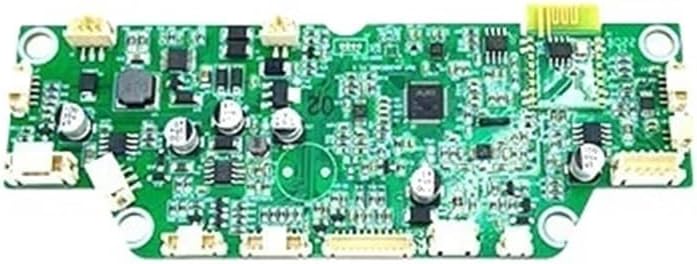
ຮູບທີ 3.1: ທາງເທິງ view of the ZDMTDKXT replacement motherboard, highlighting its intricate circuitry and connection points.
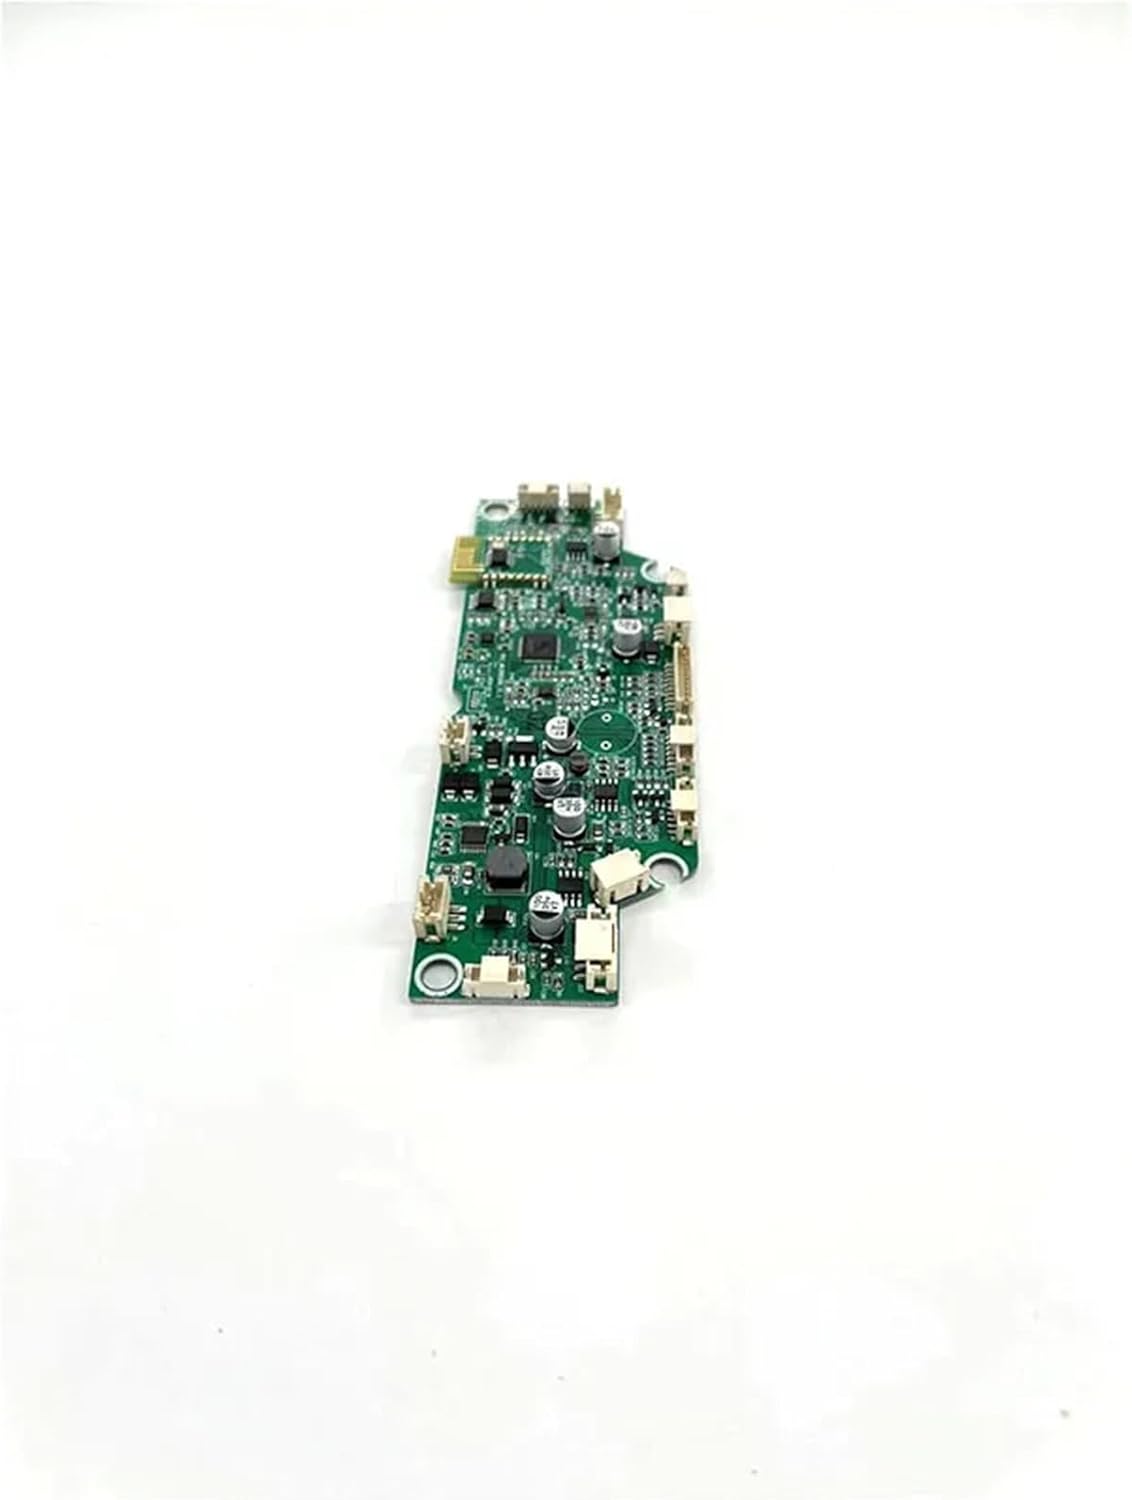
ຮູບທີ 3.2: ມຸມຂ້າງ view of the motherboard, illustrating its profile and connector arrangement.
4. ການຕິດຕັ້ງແລະການຕິດຕັ້ງ
This section outlines the general steps for replacing the motherboard. Specific disassembly instructions for the Hutt W66 robot may vary and should be referenced from the robot's original service manual if available.
ຂັ້ນຕອນການຕິດຕັ້ງ:
- ການກະກຽມ: Ensure the robot is turned off and disconnected from all power sources. Place the robot on a clean, static-free work surface.
- Access the Motherboard: Carefully disassemble the robot's casing to gain access to the existing motherboard. Document the location and connection of all cables and components (e.g., take photos).
- Disconnect Old Motherboard: Gently disconnect all cables, ribbons, and connectors from the old motherboard. Note their orientation and position.
- ເອົາ Motherboard ເກົ່າອອກ: Unscrew any fasteners securing the old motherboard and carefully remove it from the robot's chassis.
- ຕິດຕັ້ງເມນບອດໃໝ່: Position the ZDMTDKXT replacement motherboard in the chassis, ensuring it aligns correctly with mounting points. Secure it with the original fasteners.
- ເຊື່ອມຕໍ່ອົງປະກອບຄືນໃໝ່: Reconnect all cables, ribbons, and components to the new motherboard, matching them to their original positions. Refer to your documentation from step 2. Ensure all connections are firm and correctly oriented.
- Reassemble Robot: Carefully reassemble the robot's casing, ensuring no cables are pinched and all screws are tightened appropriately.
- ການເພີ່ມພະລັງງານເບື້ອງຕົ້ນ: Connect the robot to power and perform a test run to verify functionality.
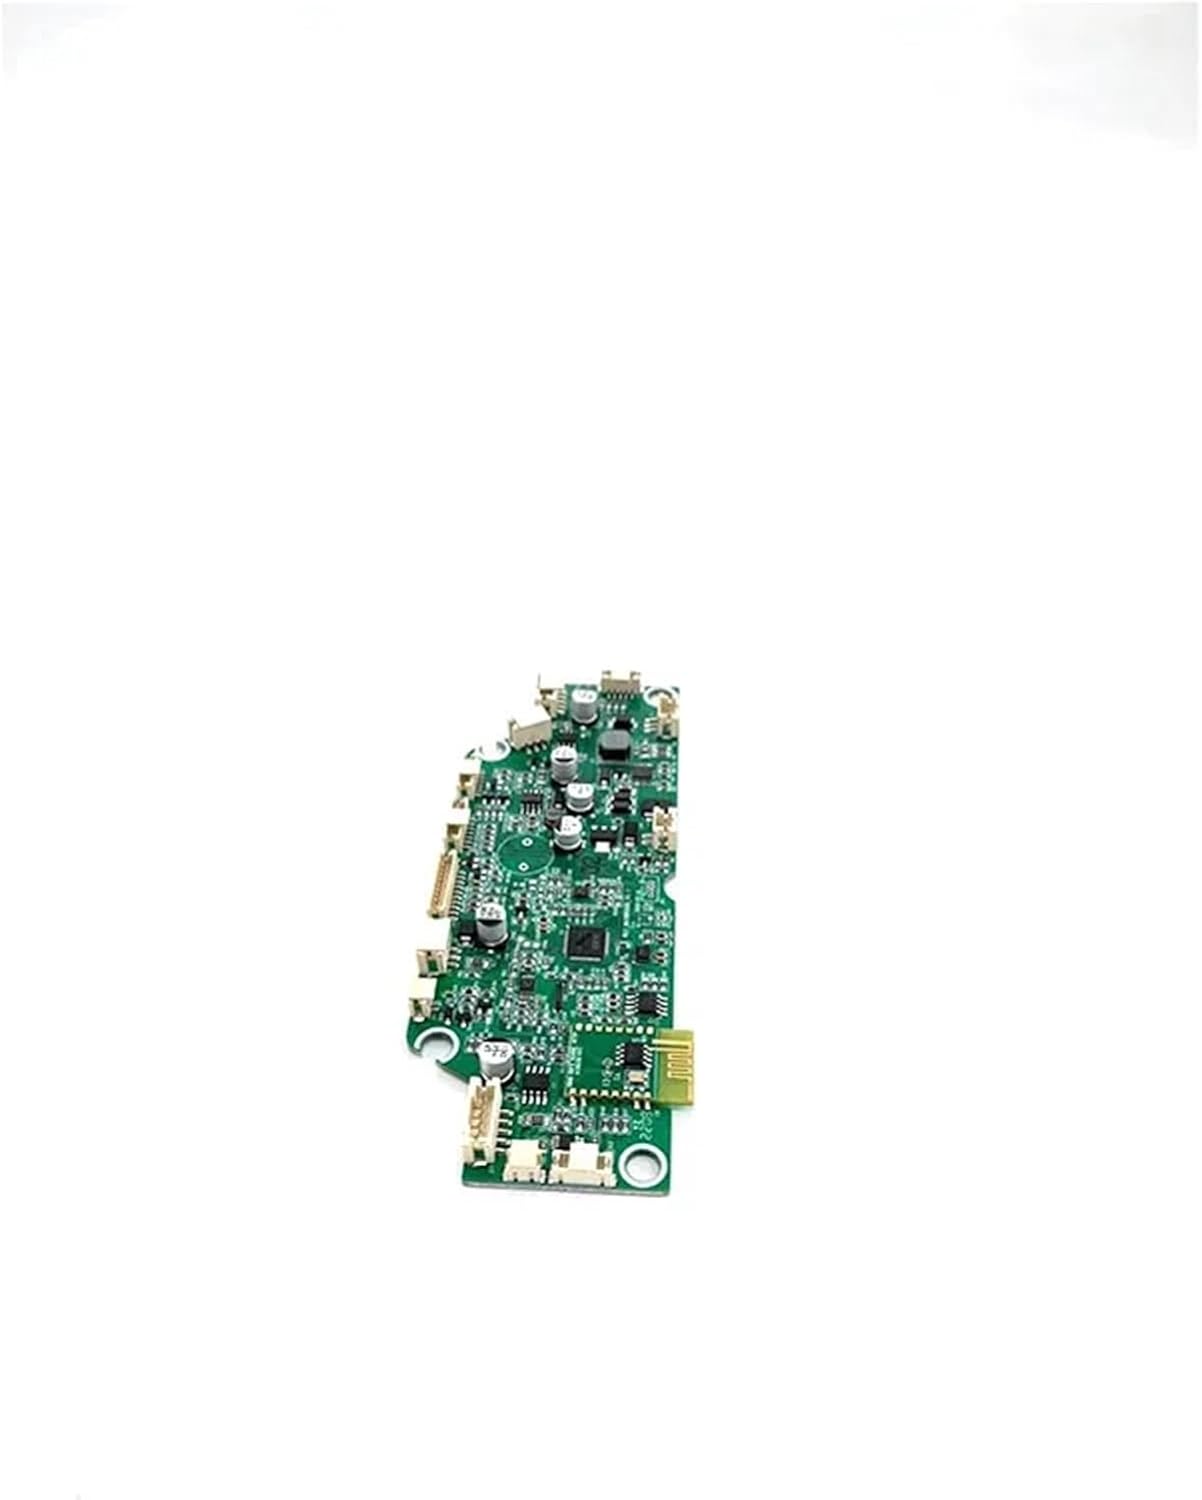
ຮູບທີ 4.1: ລາຍລະອຽດ view of the motherboard's connectors, crucial for correct reassembly.
5. ຄໍາແນະນໍາການດໍາເນີນງານ
Once the ZDMTDKXT replacement motherboard is correctly installed, the Hutt W66 Window Cleaning Robot should function as intended. The motherboard manages the robot's core operations.
- ເປີດ: Turn on the robot using its standard power button.
- ການທົດສອບຕົນເອງ: The robot may perform a brief self-test upon startup. Observe for any error indicators.
- ການດໍາເນີນງານປົກກະຕິ: Initiate a cleaning cycle as per the original Hutt W66 user manual. The new motherboard will control navigation, spraying, vacuuming, and obstacle detection.
- Voice Control (if applicable): If your robot supports voice control and the feature is enabled, test its responsiveness.
Refer to your Hutt W66 Window Cleaning Robot's original user manual for detailed operating procedures.
6. ບໍາລຸງຮັກສາ
The motherboard itself requires minimal maintenance. However, proper care of the robot can extend the life of all its components, including the motherboard.
- ຮັກສາແຫ້ງ: Ensure the robot's internal components, especially the motherboard, remain dry. Avoid exposure to liquids.
- ການກຳຈັດຂີ້ຝຸ່ນ: Periodically clean the robot's interior (when disassembled for other maintenance) with compressed air or a soft brush to remove dust accumulation from the motherboard and other components.
- ການເກັບຮັກສາ: ເກັບຮັກສາຫຸ່ນຍົນໄວ້ໃນບ່ອນທີ່ເຢັນ, ແຫ້ງໃນເວລາທີ່ບໍ່ໄດ້ໃຊ້.
7. ການແກ້ໄຂບັນຫາ
If the robot does not function correctly after motherboard replacement, consider the following:
- ບໍ່ມີພະລັງງານ:
- Check all power connections to the motherboard and battery.
- ໃຫ້ແນ່ໃຈວ່າໄດ້ສາກໄຟແລ້ວ.
- Robot Not Moving/Responding:
- Verify all motor and sensor cables are securely connected to the motherboard.
- Ensure no cables are pinched or damaged during reassembly.
- ລະຫັດຄວາມຜິດພາດ/ພຶດຕິກຳຜິດປົກກະຕິ:
- Refer to the original Hutt W66 user manual for specific error code interpretations.
- Double-check all connections on the motherboard for proper seating.
- Water Spray Malfunction:
- Inspect the water pump and spray nozzle connections to the motherboard.
If issues persist, it is recommended to consult a professional technician or contact the product seller for further assistance.
8. ຂໍ້ມູນຈໍາເພາະ
| ຄຸນສົມບັດ | ລາຍລະອຽດ |
|---|---|
| ຄວາມເຂົ້າກັນໄດ້ | Hutt W66 Window Cleaning Robot |
| Vacuum Component Type | Motor (Control) |
| ຂະໜາດແພັກເກັດ | 1.18 x 0.79 x 0.39 ນິ້ວ |
| ນ້ໍາຫນັກລາຍການ | 1.76 ອອນ |
| ຜູ້ຜະລິດ | hongxkai |
| ASIN | B0F222K7TM |
9. ການຮັບປະກັນແລະການສະຫນັບສະຫນູນ
For warranty information, please refer to the terms provided by your original retailer or the manufacturer, ZDMTDKXT. Keep your purchase receipt as proof of purchase.
For technical support or further inquiries, please contact the seller through the platform where the product was purchased.


