1. ບົດແນະນຳ
This manual provides essential information for the safe and effective use of your Ortur LU2-10A 10000mW Laser Module. Please read these instructions carefully before installation and operation. This laser module is designed for high-precision engraving and cutting with Ortur Laser Engravers.
2. ເນື້ອໃນຊຸດ
ກວດສອບວ່າອົງປະກອບທັງຫມົດທີ່ລະບຸໄວ້ຂ້າງລຸ່ມນີ້ແມ່ນມີຢູ່ໃນຊຸດຂອງທ່ານ:

ຮູບພາບ: ລາຍລະອຽດ view of all components included in the Ortur LU2-10A Laser Module package, such as the laser module, laser shield, air assist, various screws, cables, and tools.
- LU2-10A Laser Module
- Laser Shield
- ການຊ່ວຍເຫຼືອທາງອາກາດ
- ສະຫນັບສະຫນູນ Block
- ຕົວເລື່ອນ
- OUC2.0
- Small Coupling
- ອະແດບເຕີໄຟຟ້າ 24V 2A
- Dedicated LaserWire
- ທໍ່ທາງອາກາດ
- ຕົວເຊື່ອມຕໍ່ທໍ່
- Normal Adapter Cable
- Laser Backboard
- M3x5mm Screws*6 (Used for Slider)
- Thumb Screws*2
- M3x8mm Screws*4 (Used for OLM2S2)
- M3x12mm Screws*4 (Used for OLM2)
- ສາຍມັດ*10
- M3 Gasket*1
- ປະແຈ
- ເລນ
- ລະບຽບການໄຫຼວຽນຂອງອາກາດ
- OLM2/S2 OUC Exclusive Adapter Cable
3. ການຕິດຕັ້ງແລະການຕິດຕັ້ງ
This section guides you through the assembly and installation of the LU2-10A Laser Module onto your Ortur Laser Engraver. Ensure the engraver is powered off and disconnected from the power source before beginning installation.
3.1. ວິດີໂອສອນການຕິດຕັ້ງ
Video: A detailed installation tutorial for the Ortur Laser Master 2 Pro S2 LU2-10A, demonstrating step-by-step assembly and connection procedures.
3.2. Laser Module Installation Steps
- Attach the laser module to the engraver's carriage.
- Secure the laser module using the provided thumbscrews.
- Insert the 5-pin terminal of the dedicated laser line into the laser module's port.
- Connect the other end of the laser line to the appropriate port on the engraver's control board.
- Install the laser shield onto the laser module to ensure eye protection during operation.
- Connect the air assist hose to the air intake port on the laser module and to an external air pump (not included).

Image: The Ortur LU2-10A Laser Module actively cutting a piece of wood, demonstrating its operational capability.
4. ຄໍາແນະນໍາການດໍາເນີນງານ
The Ortur LU2-10A Laser Module offers powerful and precise capabilities for various materials.
4.1. ຄຸນນະສົມບັດທີ່ສໍາຄັນ
- ຄວາມເຂົ້າກັນໄດ້ຢ່າງກວ້າງຂວາງ: Compatible with Ortur Laser Master 2, Ortur Laser Master 2 S2, Ortur Laser Master 2Pro S2, and Ortur Laser Master 3 Laser Engravers.
- ຄວາມຫຼາກຫຼາຍຂອງວັດສະດຸ: Engrave and cut acrylic, metal, wood, stainless steel, glass, ceramics, leather, food, paper, fabric, and more.
- ຜົນຜະລິດທີ່ມີປະສິດທິພາບ: True 10000mW laser output for effective cutting and engraving.
- ຄວາມແມ່ນຍໍາສູງ: Compressed spot size of 0.05mm x 0.1mm for detailed work.
- ປະສິດທິພາບສູງ: Lightweight design (235g) allows for engraving speeds up to 15000mm/min.
- ພັດລົມສອງເທົ່າ: Optimized cooling system ensures stable long-term operation without overheating.
- ການດໍາເນີນງານຄວາມຫມັ້ນຄົງ: 24V electrical system and high-quality cables support 24 hours of uninterrupted, consistent engraving.
4.2. Engraving and Cutting Capabilities
The LU2-10A module is capable of cutting various materials with significant thickness:
- Up to 30mm acrylic.
- Up to 20mm wood.

Image: An internal diagram illustrating how two 5.5W laser beams are combined using light combing lenses to achieve a true 10W output with a precise 0.05 x 0.1mm compressed spot.

Image: The Ortur LU2-10A Laser Module highlighting its air intake for cooling and its lightweight design (only 235g), contributing to high engraving speeds.

ຮູບພາບ: ໂປ່ງໃສ view of the Ortur LU2-10A Laser Module, showing the internal arrangement of two 5.5W lasers combining to form a single 10W output beam.

Image: The Ortur LU2-10A Laser Module featuring its built-in air assist system, with an example showing a cleaner cut (labeled "Ours") compared to a cut without air assist (labeled "Other").
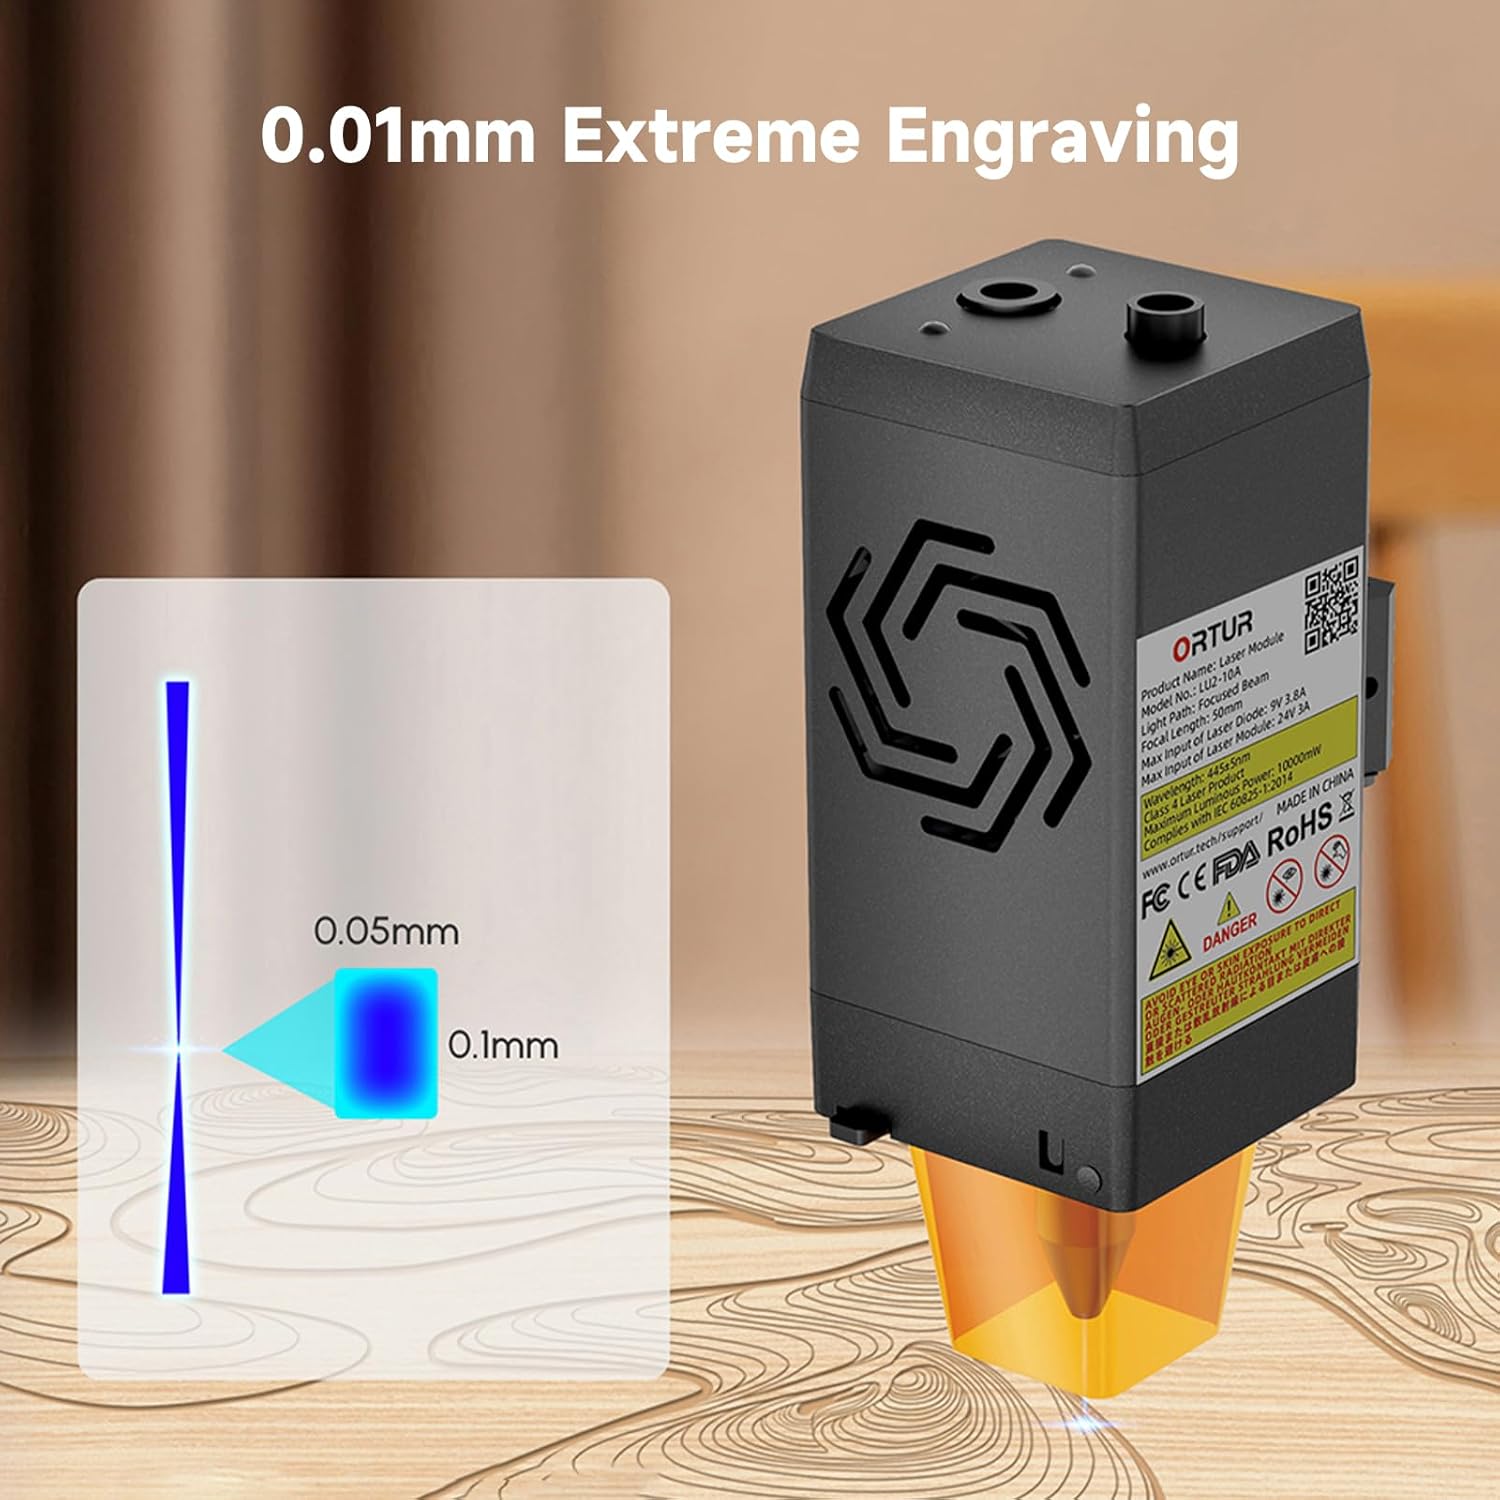
Image: A visual representation of the laser's compressed spot, showing its dimensions of 0.05mm x 0.1mm, which enables extreme precision in engraving.
5. ບໍາລຸງຮັກສາ
Regular maintenance ensures optimal performance and extends the lifespan of your laser module.
- ການອະນາໄມເລນ: Periodically clean the laser lens with a soft, lint-free cloth and appropriate lens cleaning solution to prevent residue buildup that can affect laser performance.
- Air Assist Nozzle: Ensure the air assist nozzle is clear of debris to maintain effective airflow during cutting and engraving.
- ພັດລົມເຢັນ: Check the dual cooling fans for dust accumulation and clean them gently to ensure proper heat dissipation.
- ການກວດສອບສາຍ: Regularly inspect all cables for any signs of wear, damage, or loose connections.
6. ການແກ້ໄຂບັນຫາ
This section addresses common issues you might encounter with your Ortur LU2-10A Laser Module.
| ບັນຫາ | ສາເຫດທີ່ເປັນໄປໄດ້ | ການແກ້ໄຂ |
|---|---|---|
| ເລເຊີບໍ່ຍິງຫຼືຜົນຜະລິດທີ່ອ່ອນແອ. |
|
|
| Inconsistent engraving/cutting results. |
|
|
| Air assist not functioning. |
|
|
7. ຂໍ້ມູນຈໍາເພາະ
| ຄຸນສົມບັດ | ລາຍລະອຽດ |
|---|---|
| ຂະໜາດສິນຄ້າ | 4.72 x 1.97 x 1.73 ນິ້ວ |
| ໝາຍເລກຕົວແບບ | Ortur-LaserMaster2-ProS2 (LU2-10A variant) |
| ນ້ໍາຫນັກລາຍການ | 1.54 ປອນ |
| ພະລັງງານອອກເລເຊີ | 10000mW (10W) |
| Compressed Spot Size | 0.05mm x 0.1mm |
| ຄວາມໄວການແກະສະຫຼັກ | ສູງສຸດ 15000 ມມ/ນາທີ |
| ລະບົບເຮັດຄວາມເຢັນ | Dual Fan Cooling |
| ລະບົບໄຟຟ້າ | 24V |
| ຄວາມເຂົ້າກັນໄດ້ | Ortur Laser Master 2, 2 S2, 2Pro S2, 3 |
8. ການຮັບປະກັນແລະການສະຫນັບສະຫນູນ
For warranty information, technical support, or further assistance, please refer to the official Ortur webເວັບໄຊ ຫຼືຕິດຕໍ່ບໍລິການລູກຄ້າຂອງເຂົາເຈົ້າໂດຍກົງ. ຮັກສາໃບຮັບເງິນການຊື້ຂອງທ່ານໄວ້ເປັນຫຼັກຖານການຊື້.
Official Ortur Webເວັບໄຊ: www.ortur.net


