ແນະນຳ
This manual provides essential information for the safe and efficient operation of your Promethean PRM-30 LCD Projector. Please read these instructions thoroughly before using the projector and retain them for future reference.
ຂໍ້ມູນຄວາມປອດໄພ
- ຢ່າອຸດຕັນຊ່ອງລະບາຍອາກາດ. ຮັບປະກັນໃຫ້ມີກະແສລົມໄຫຼວຽນພຽງພໍອ້ອມຮອບໂປເຈັກເຕີ.
- ຫຼີກເວັ້ນການສໍາຜັດກັບຕາໂດຍກົງກັບເລນໂປເຈັກເຕີໃນເວລາທີ່ lamp ແມ່ນຢູ່.
- ຫ້າມວາງໂປເຈັກເຕີໃສ່ກະຕ່າ, ຂາຕັ້ງ, ຫຼືໂຕະທີ່ບໍ່ໝັ້ນຄົງ.
- Unplug the projector from the power outlet before cleaning.
- ອ້າງອີງການບໍລິການທັງໝົດໃຫ້ກັບພະນັກງານບໍລິການທີ່ມີຄຸນວຸດທິ.
ເນື້ອໃນຊຸດ
ກວດສອບວ່າລາຍການທັງຫມົດແມ່ນມີຢູ່ໃນຊຸດ:
- Promethean PRM-30 LCD Projector
- ການຄວບຄຸມໄລຍະໄກ
- ສາຍໄຟ
- ສາຍ HDMI
- ຄູ່ມືຜູ້ໃຊ້ (ເອກະສານນີ້)
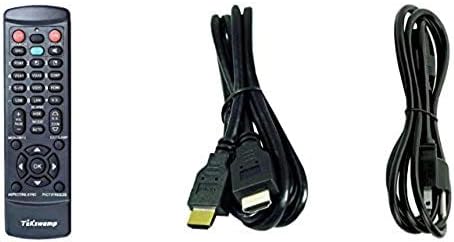
Image: Included accessories, showing the remote control, HDMI cable, and power cable.
ໂປເຈັກເຕີເກີນview
ດ້ານ ໜ້າ ແລະດ້ານຂ້າງ View
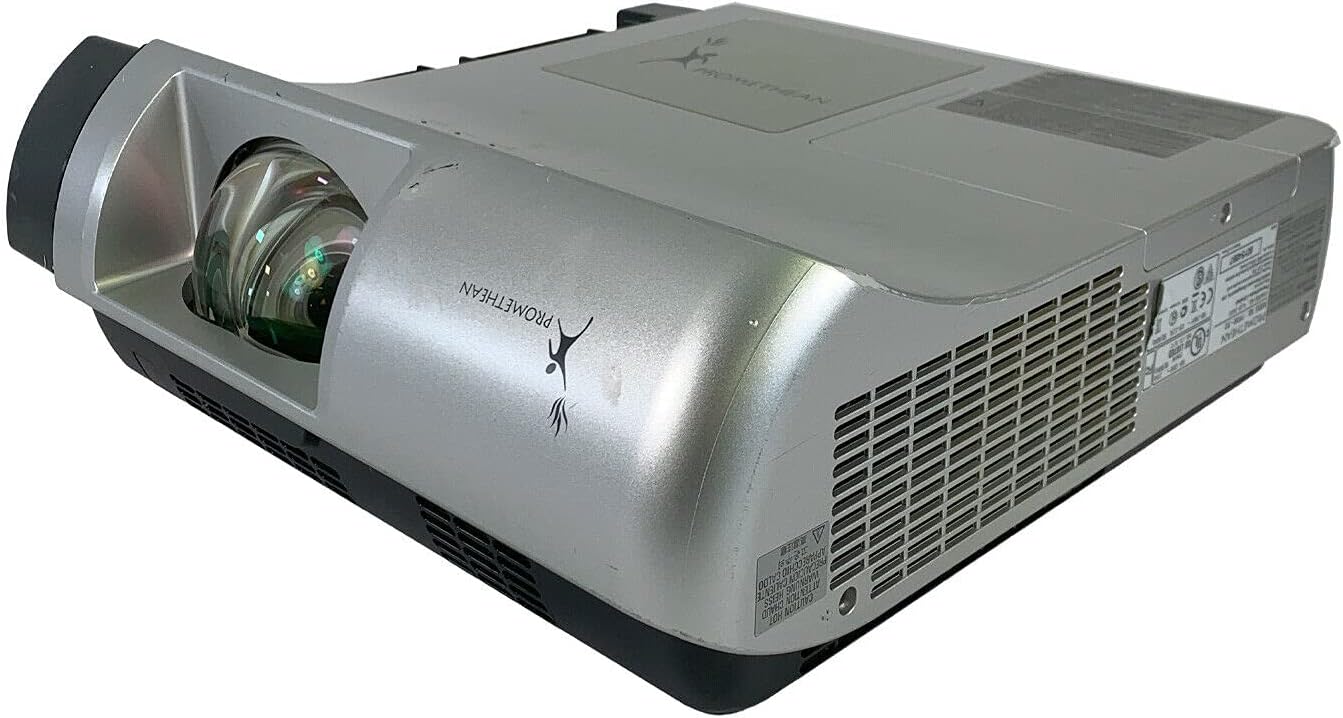
ຮູບພາບ: ດ້ານຫນ້າແລະດ້ານຂ້າງ view of the Promethean PRM-30 projector, highlighting the lens and ventilation.
ການເຊື່ອມຕໍ່ແຜງດ້ານຫລັງ

Image: Rear panel of the projector, showing various input and output ports including HDMI, VGA, Composite, LAN, and RS232.
The rear panel provides various connectivity options for your audio and video sources. Refer to the "Connecting Devices" section for detailed instructions.
Top Panel Controls and Indicators

ຮູບພາບ: ເທິງ view of the projector, displaying the control panel buttons and indicator lights for power, lamp, and warning.
The top panel features buttons for power, menu navigation, input selection, and focus/zoom adjustment. Indicator lights provide status information for power, lamp life, and warnings.
ຕັ້ງຄ່າ
1. ການຈັດວາງໂປຣເຈັກເຕີ
Position the projector on a stable, flat surface or mount it securely for ceiling projection. Ensure the projector is within the optimal throw distance for your screen size. The PRM-30 supports front, rear, ceiling, and table-top projection.
- Table Top Projection: ວາງໂປເຈັກເຕີໃສ່ພື້ນຮາບພຽງຢູ່ທາງໜ້າຂອງໜ້າຈໍ.
- Ceiling Projection: Mount the projector inverted from the ceiling. Adjust settings in the menu for correct image orientation.
- ການຄາດຄະເນດ້ານຫຼັງ: Place the projector behind a translucent screen. Adjust settings in the menu for correct image orientation.
2. ອຸປະກອນເຊື່ອມຕໍ່
Connect your video and audio sources to the appropriate ports on the projector's rear panel.
- HDMI: For high-definition digital video and audio. Use an HDMI cable to connect to your source device.
- VGA/SVGA D-Sub (Computer In): For analog computer signals. Connect using a VGA cable.
- Composite (RCA): For standard definition video. Connect using RCA cables (yellow for video, red/white for audio).
- S-Video: For enhanced standard definition video.
- ເຄືອຂ່າຍ LAN (RJ-45): ສໍາລັບການຄວບຄຸມເຄືອຂ່າຍແລະການຕິດຕາມ.
- RS232 (DB-9pin): ສໍາລັບການຄວບຄຸມ serial.
- ຫູຟັງ Jack: ສຳລັບສຽງອອກໄປຫາຫູຟັງ ຫຼື ລຳໂພງພາຍນອກ.
3. ການເຊື່ອມຕໍ່ພະລັງງານ
Connect the power cable to the projector's power inlet and then to a suitable electrical outlet.
ຄໍາແນະນໍາການດໍາເນີນງານ
ເປີດ/ປິດ
- ເພື່ອເປີດເຄື່ອງ: Press the Power button on the projector's control panel or the remote control. The power indicator light will turn on.
- ປິດເຄື່ອງ: Press the Power button again. The projector will enter a cooling down cycle before completely shutting off. Do not unplug the projector during the cooling cycle.
ການເລືອກແຫຼ່ງປ້ອນຂໍ້ມູນ
Press the "Input" or "Source" button on the projector or remote control to cycle through available input sources (HDMI, VGA, Composite, S-Video, etc.) until your desired source is displayed.
ການປັບຮູບ
- ຈຸດສຸມ: ໝຸນວົງການໂຟກັສໃສ່ເລນໂປເຈັກເຕີຈົນກວ່າພາບຈະຄົມຊັດ ແລະຊັດເຈນ.
- ຊູມ: Adjust the zoom ring on the projector lens to change the image size without moving the projector.
- ການແກ້ໄຂ Keystone: If the image appears trapezoidal, use the keystone correction function (usually via menu or dedicated buttons) to square the image.
- ການແກ້ໄຂສີ: Access the projector's on-screen display (OSD) menu to adjust color settings, brightness, and contrast for optimal image quality.
ສຽງອອກ
The projector has built-in speakers. For external audio, connect speakers or headphones to the Headphone Jack or use the audio output from your source device.
ບໍາລຸງຮັກສາ
Lamp ການທົດແທນ
When the "LAMP REPLACE" indicator illuminates, it is time to replace the projector lamp. Refer to the specific lamp ຄຳແນະນຳໃນການທົດແທນທີ່ສະໜອງໃຫ້ພ້ອມກັບ l ທົດແທນຂອງທ່ານamp or consult a qualified technician. Always allow the projector to cool down completely before attempting lamp ການທົດແທນ.
ການເຮັດຄວາມສະອາດການກັ່ນຕອງອາກາດ
Regularly clean the air filter to maintain optimal performance and prevent overheating. While this specific unit is noted as having "No Filter Cover", general projector maintenance often involves cleaning air intake areas. Use a soft brush or vacuum cleaner to remove dust from the ventilation grilles.

ຮູບພາບ: ຂ້າງ view of the projector showing the ventilation grille, which should be kept clear of dust.
ທໍາຄວາມສະອາດທົ່ວໄປ
ເຊັດໂປເຈັກເຕີ ຄasing ມີອ່ອນ, damp cloth. Do not use abrasive cleaners or solvents. For the lens, use a specialized lens cleaning cloth and solution to avoid scratching.
ການແກ້ໄຂບັນຫາ
| ບັນຫາ | ສາເຫດທີ່ເປັນໄປໄດ້ | ການແກ້ໄຂ |
|---|---|---|
| ບໍ່ມີຮູບພາບໃນ ໜ້າ ຈໍ |
|
|
| ຮູບພາບແມ່ນມືດມົວ ຫຼື ຄຸນນະພາບບໍ່ດີ |
|
|
| ບໍ່ມີສຽງ |
|
|
| ການຄວບຄຸມໄລຍະໄກບໍ່ເຮັດວຽກ |
|
|
ຂໍ້ມູນຈໍາເພາະ
| ຍີ່ຫໍ້ | PROMETHAN |
| ຕົວແບບ | PRM-30 |
| ປະເພດການສະແດງ | ຈໍ LCD |
| ຄວາມສະຫວ່າງ | 2500 ລິດຂອງ ANSI |
| ອັດຕາສ່ວນກົງກັນຂ້າມ | 500:1 |
| ຄວາມລະອຽດເດີມ | 1280x800 |
| ໂໝດວິດີໂອ HD | 1080i |
| ນ້ຳໜັກໂປເຈັກເຕີ | 12.57 ປອນ. |
| ການເຊື່ອມຕໍ່ | LAN, Composite: RCA, Network: RJ-45, RS232: DB-9pin, S-Video, Headphone Jack, HDMI Standard, VGA/SVGA D-Sub, Wired |
| ຄຸນນະສົມບັດພິເສດ | Built-in Speakers, Ceiling Projection, Color Correction, HD Ready, Projection Tilt, Rear Projection, Short Throw Projection, Table Top Projection, Portable |
| ຂະໜາດແພັກເກັດ | 16 x 16 x 8 ນິ້ວ |
ການຮັບປະກັນແລະການສະຫນັບສະຫນູນ
This Promethean PRM-30 projector is offered as a renewed product. Please refer to the seller's (PR Renewed) specific return and warranty policies for details. Typically, renewed products come with a limited warranty or return period.
- ນະໂຍບາຍການສົ່ງຄືນ: This product typically includes a 90-day refund or replacement policy.
- ສະຫນັບສະຫນູນດ້ານວິຊາການ: For technical assistance or warranty claims, please contact the seller, PR Renewed, directly.
- ແຜນການປົກປ້ອງ: Optional extended protection plans may be available for purchase separately.


