1. ບົດແນະນຳ
This manual provides detailed instructions for the safe and effective use of your xTool Mini Heat Press Machine. Please read this manual thoroughly before operating the device and retain it for future reference. The xTool Mini Heat Press is designed for heat transfer applications on various materials, including fabrics, wood, and ceramics.
2. ຂໍ້ມູນຄວາມປອດໄພ
ເພື່ອຮັບປະກັນການປະຕິບັດງານທີ່ປອດໄພ, ໃຫ້ສັງເກດການລະມັດລະວັງຕໍ່ໄປນີ້:
- Always place the heat press on a heat-resistant surface.
- Do not touch the hot plate during or immediately after use. Use the insulated safety base provided.
- ຮັກສາໃຫ້ໄກຈາກເດັກນ້ອຍ ແລະສັດລ້ຽງ.
- ຖອດປລັກອຸປະກອນໃນເວລາທີ່ບໍ່ໄດ້ໃຊ້ຫຼືກ່ອນທີ່ຈະທໍາຄວາມສະອາດ.
- ຫ້າມນຳອຸປະກອນຈຸ່ມໃສ່ນ້ຳຫຼືຂອງແຫຼວອື່ນໆ.
- ໃຫ້ແນ່ໃຈວ່າສາຍໄຟບໍ່ເສຍຫາຍ ແລະ ຫຼີກລ່ຽງການວາງວັດຖຸໜັກໄວ້ເທິງມັນ.
- The device features an automatic shut-off function after 11 minutes of inactivity for enhanced safety.
- ໃຊ້ໃນບ່ອນທີ່ມີລົມລ່ວງດີ.

ຮູບພາບ: The xTool Mini Heat Press highlights its safety features, including an 11-minute auto-off, V0 flame-retardant materials, an insulated safety base, and overheat protection, ensuring safe operation for users.
3. ເນື້ອໃນຊຸດ
ກວດສອບວ່າລາຍການທັງຫມົດແມ່ນມີຢູ່ໃນຊຸດ:
- xTool Mini Heat Press Machine
- ຖານຄວາມປອດໄພ insulated
- ສາຍໄຟ
- ຄູ່ມືຜູ້ໃຊ້ (ເອກະສານນີ້)
4. ຜະລິດຕະພັນເກີນview
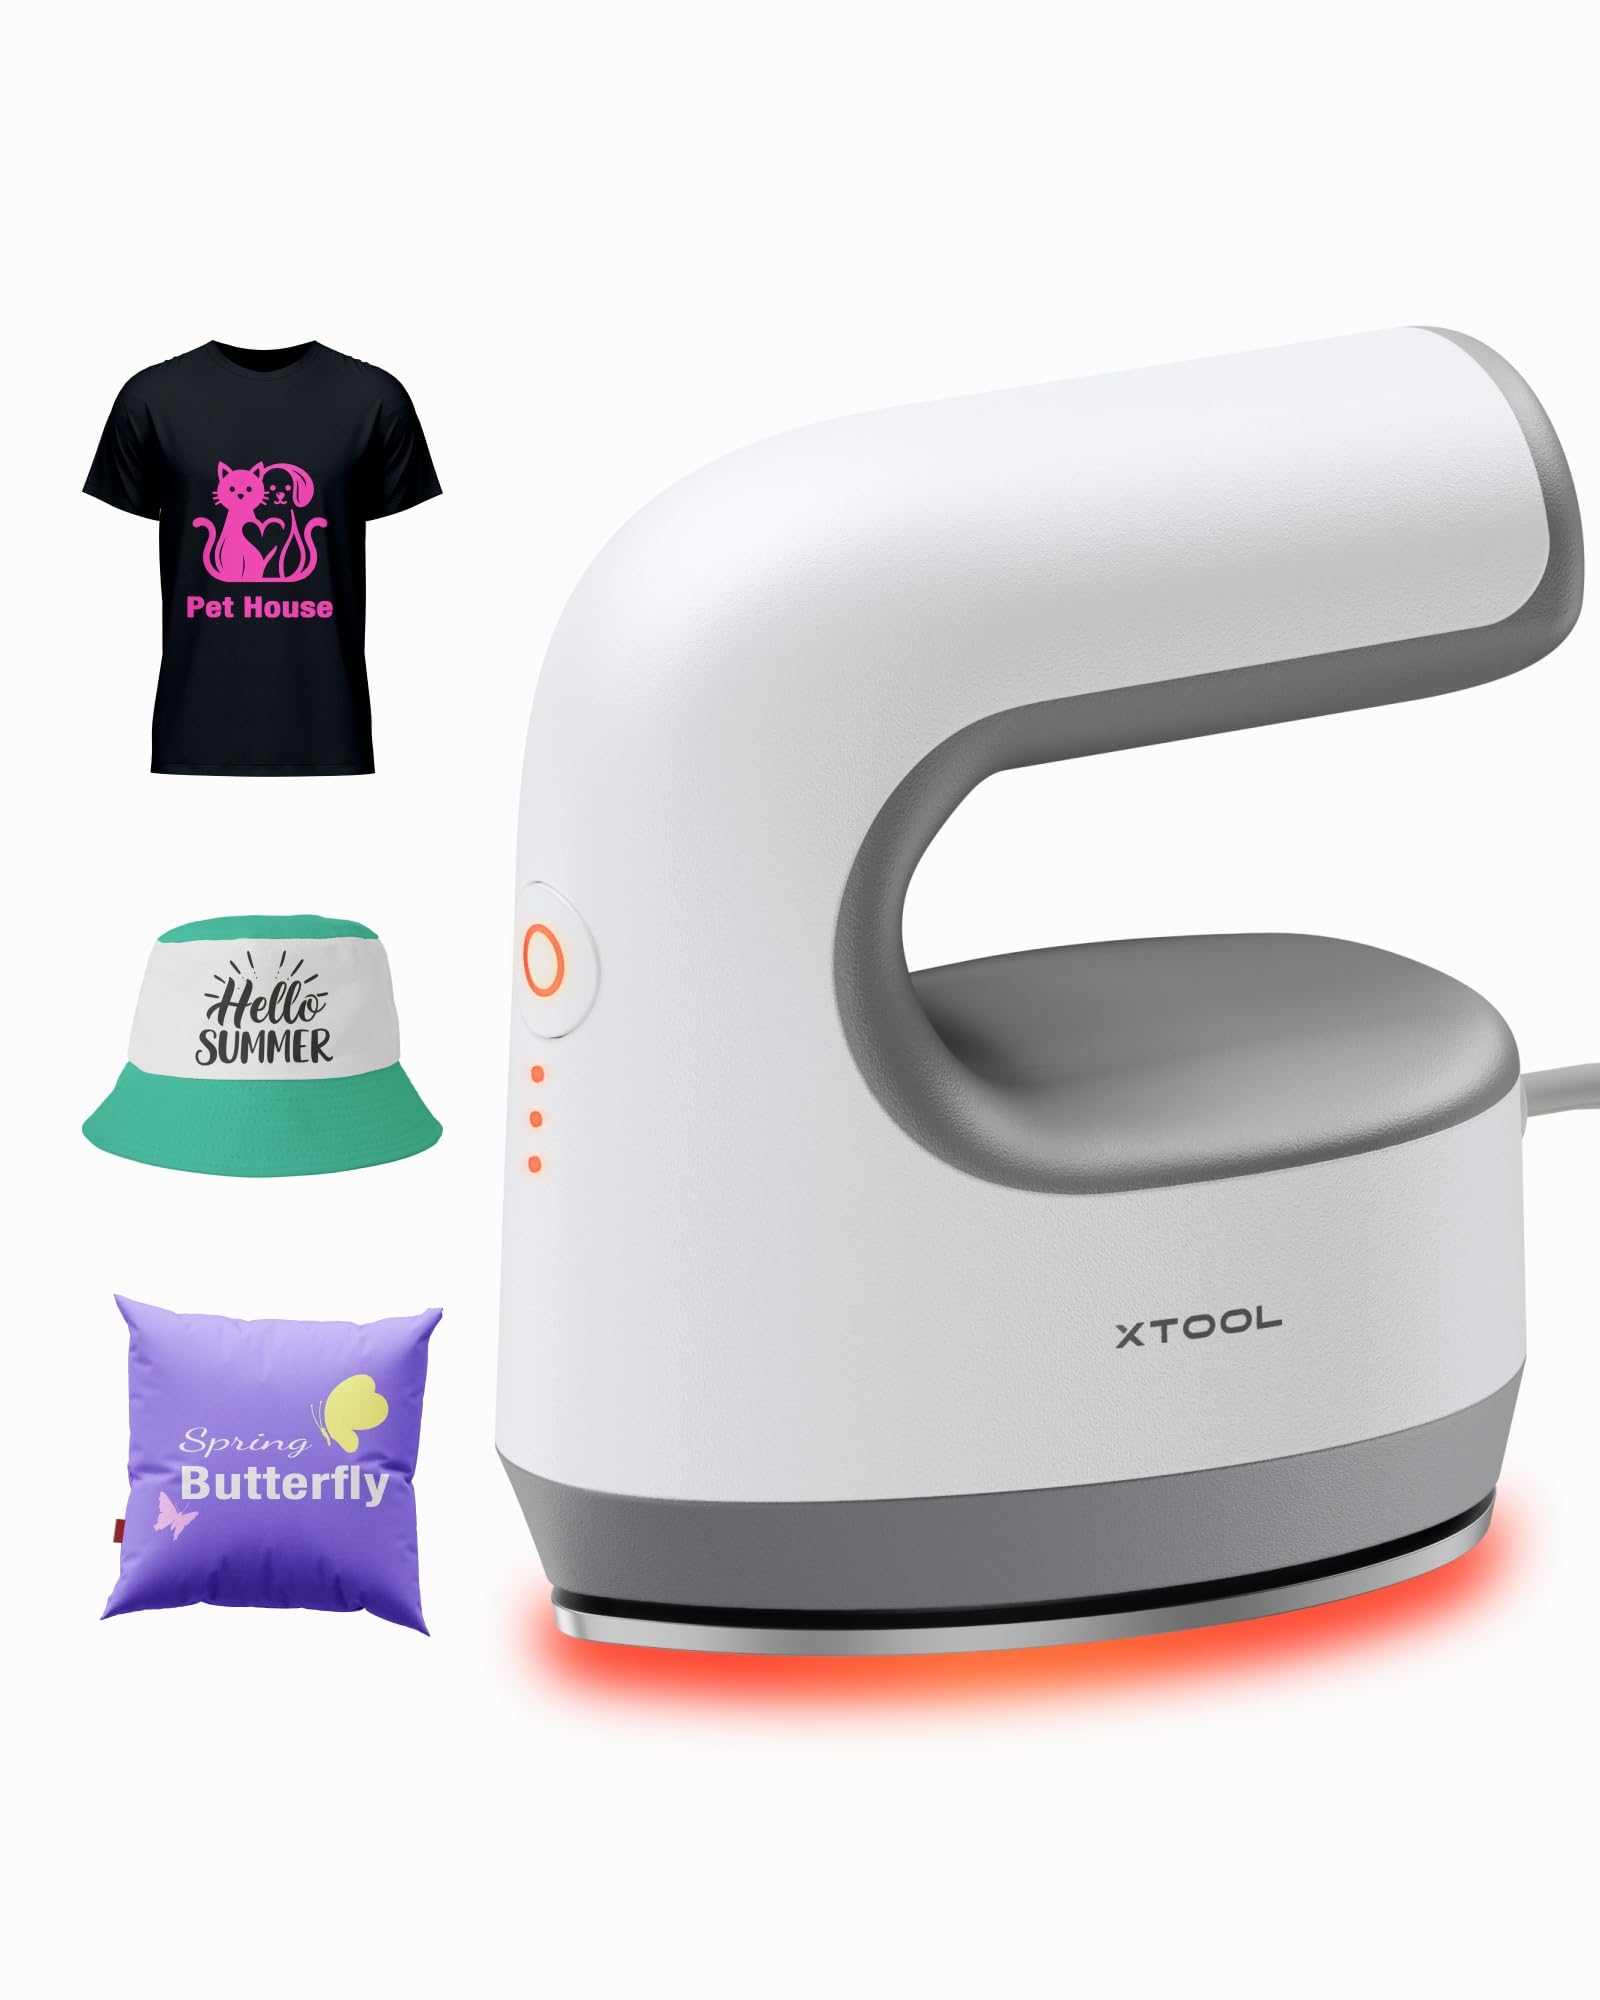
Familiarize yourself with the components of your xTool Mini Heat Press:
- ແຜ່ນຄວາມຮ້ອນ: The heating surface for transfers.
- ມືຈັບ: Ergonomically designed for comfortable grip and pressure application.
- ປຸ່ມເປີດປິດ: Controls power on/off and temperature settings.
- ແສງຕົວຊີ້ວັດ: Display current temperature level and heating status.
- Insulated Safety Base: Provides a safe resting place for the hot press.
ຮູບພາບ: The xTool Mini Heat Press Machine shown resting on its insulated safety base, highlighting its compact design.

ຮູບພາບ: A visual comparison illustrating the ergonomic open handle of the xTool Mini Heat Press, designed for easier and more comfortable holding compared to a closed-handle design.

ຮູບພາບ: A visual comparison showing the xTool Mini Heat Press with a larger heat plate (platen) compared to another mini press, indicating its suitability for a wider range of project sizes.
5. ຕັ້ງຄ່າ
Follow these steps to set up your xTool Mini Heat Press:
- Unpack the xTool Mini Heat Press and its accessories.
- Place the insulated safety base on a stable, heat-resistant surface.
- Plug the power cord into the heat press and then into a standard electrical outlet. The device will beep once, and the power indicator light will illuminate.
- If using the optional Control Pod (not included), insert the transceiver from the Control Pod into the designated port on the Mini Heat Press. The Control Pod allows for precise temperature and time control.
ວິດີໂອ: This video demonstrates the compatibility of the xTool Mini Heat Press with an optional Control Pod (not included), showing how to connect the transceiver for advanced temperature and time control.
6. ຄໍາແນະນໍາການດໍາເນີນງານ
6.1. Power On and Temperature Selection
- Press the Power Button once to turn on the device. The orange indicator light will show, indicating low-level preheating.
- Press the Power Button repeatedly to cycle through the three temperature settings:
- ລະດັບຕໍ່າ: 295°F (145°C)
- Middle Level: 355°F (180°C)
- ລະດັບສູງ: 400°F (205°C)
- The indicator lights will change to green when the selected temperature is reached.

ຮູບພາບ: A visual representation of the xTool Mini Heat Press's three heat settings, indicating the corresponding temperatures for Low, Medium, and High levels.
ວິດີໂອ: This video demonstrates the rapid heating capability of the xTool Mini Heat Press, showing it reaches operating temperature in approximately 2 minutes.
6.2. Heat Transfer Application
The xTool Mini Heat Press is suitable for various heat transfer materials, including HTV, DTF, and sublimation projects. Always refer to the specific instructions for your transfer material for optimal temperature and time settings.
- Prepare your material (e.g., T-shirt, shoe, hat) by ensuring it is clean and wrinkle-free.
- Place your transfer design onto the material in the desired position.
- Cover the design with a protective sheet (e.g., parchment paper, Teflon sheet).
- Once the Mini Heat Press reaches the desired temperature, place it firmly over the design. Apply even pressure.
- Hold the press in place for the recommended time (typically 10-60 seconds, depending on the material and transfer type). For larger designs, move the press in sections, overlapping slightly to ensure full coverage.
- Carefully lift the heat press and place it back on its safety base.
- Allow the material to cool according to your transfer material's instructions (cold peel or warm peel).
- Gently peel off the protective sheet and transfer film.

ຮູບພາບ: A visual guide illustrating the simple three-step process for heat transfer using the xTool Mini Heat Press: Set the design, Press with the device, and achieve a successful transfer on a plush toy.

ຮູບພາບ: A collage showcasing the wide range of applications for the xTool Mini Heat Press, including customizing shoes, acrylic keychains, canvas bags, socks, stuffed toys, t-shirts, and earrings.
ວິດີໂອ: ວິດີໂອນີ້ສະໜອງໃຫ້view of the xTool Mini Heat Press, demonstrating its ease of use and effectiveness for various heat transfer projects.
ວິດີໂອ: This video illustrates the process of using the xTool Mini Heat Press to create custom fall-themed shirts, showcasing its application on fabric.
7. ບໍາລຸງຮັກສາ
Proper maintenance ensures the longevity and performance of your heat press:
- ທໍາຄວາມສະອາດ: After the device has cooled completely, wipe the heat plate with a soft, damp ຜ້າ. ຢ່າໃຊ້ເຄື່ອງເຮັດຄວາມສະອາດຂັດຫຼືສານລະລາຍ.
- ການເກັບຮັກສາ: Store the Mini Heat Press on its insulated safety base in a dry, cool place, away from direct sunlight and moisture.
- ການດູແລສາຍໄຟ: Avoid wrapping the power cord tightly around the device. Store it loosely to prevent damage.
8. ການແກ້ໄຂບັນຫາ
ຖ້າຫາກທ່ານພົບບັນຫາ, ເບິ່ງບັນຫາທົ່ວໄປດັ່ງຕໍ່ໄປນີ້ແລະການແກ້ໄຂ:
| ບັນຫາ | ສາເຫດທີ່ເປັນໄປໄດ້ | ການແກ້ໄຂ |
|---|---|---|
| ອຸປະກອນບໍ່ເປີດ. | ບໍ່ໄດ້ເຊື່ອມຕໍ່ສາຍໄຟຢ່າງຖືກຕ້ອງ; ບໍ່ມີໄຟຟ້າຈາກປລັກສຽບ. | ກວດເບິ່ງການເຊື່ອມຕໍ່ສາຍໄຟ; ທົດສອບຊ່ອງສຽບກັບອຸປະກອນອື່ນ. |
| Heat plate not heating up. | Incorrect temperature setting; device malfunction. | Ensure correct temperature level is selected; contact customer support if issue persists. |
| ການໂອນຍ້າຍບໍ່ຕິດແໜ້ນຢ່າງຖືກຕ້ອງ. | Insufficient heat or pressure; incorrect time; material incompatibility. | Increase temperature/time/pressure as per transfer material instructions; ensure material is suitable for heat transfer. |
| ອຸປະກອນປິດໂດຍອັດຕະໂນມັດ. | 11-minute inactivity safety feature activated. | This is normal operation. Press the power button to restart. |
9. ຂໍ້ມູນຈໍາເພາະ
| ຄຸນສົມບັດ | ລາຍລະອຽດ |
|---|---|
| ໝາຍເລກຕົວແບບ | xTool Mini Heat Press |
| ຍີ່ຫໍ້ | xTool |
| ອຸນຫະພູມສູງສຸດ | 400°F (205°C) |
| ການຕັ້ງຄ່າຄວາມຮ້ອນ | 3 (Low: 295°F, Mid: 355°F, High: 400°F) |
| ເວລາເຮັດຄວາມຮ້ອນ | Approx. 2 minutes to 400°F |
| ນ້ໍາຫນັກລາຍການ | 0.77 lbs (1.94 lbs with packaging) |
| ຂະໜາດສິນຄ້າ | 7.48 x 5.12 x 8.66 ນິ້ວ |
| ຄຸນນະສົມບັດຄວາມປອດໄພ | 11-min Auto-off, V0 Flame-retardant materials, Overheat Protection, Insulated Safety Base |
| ການນໍາໃຊ້ທີ່ແນະນໍາ | T-shirts, bags, ceramic coasters, wood, acrylic, hats, shoes, keychains, socks, stuffed toys |
10. ການຮັບປະກັນແລະການສະ ໜັບ ສະ ໜູນ
ສຳລັບຂໍ້ມູນການຮັບປະກັນ ແລະ ການຊ່ວຍເຫຼືອດ້ານເຕັກນິກ, ກະລຸນາອ້າງອີງເຖິງ xTool ຢ່າງເປັນທາງການ webເວັບໄຊ ຫຼືຕິດຕໍ່ບໍລິການລູກຄ້າຂອງເຂົາເຈົ້າໂດຍກົງ. ຮັກສາໃບຮັບເງິນການຊື້ຂອງທ່ານໄວ້ເປັນຫຼັກຖານການຊື້ສໍາລັບການຮ້ອງຂໍການຮັບປະກັນ.
- ສະຫນັບສະຫນູນອອນໄລນ໌: Visit the xTool official webເວັບໄຊທ໌ສຳລັບຄຳຖາມທີ່ຖືກຖາມເລື້ອຍໆ, ບົດແນະນຳ ແລະ ຂໍ້ມູນຕິດຕໍ່.
- ສະຫນັບສະຫນູນອີເມວ: Reach out via email for assistance with product issues.
- ສະຫນັບສະຫນູນໂທລະສັບ: Contact the dedicated support line for immediate help.


