1. ບົດແນະນຳ
This manual provides instructions for the safe operation, maintenance, and troubleshooting of your FLEX 24V Brushless Cordless 1/2-Inch Hammer Drill Turbo Mode Kit, model FX1271T-2B. Please read this manual thoroughly before using the tool to ensure proper and safe operation.
The FLEX FX1271T-2B is a powerful 24V brushless cordless hammer drill designed for demanding drilling and driving applications. It features a 1/2-inch full-metal ratcheting chuck, two-speed settings, a Turbo Mode for increased speed, and an anti-kickback safety feature. This kit includes the drill, a 2.5Ah Lithium-Ion Battery, a 5.0Ah Lithium-Ion Battery, and a 160W Fast Charger.
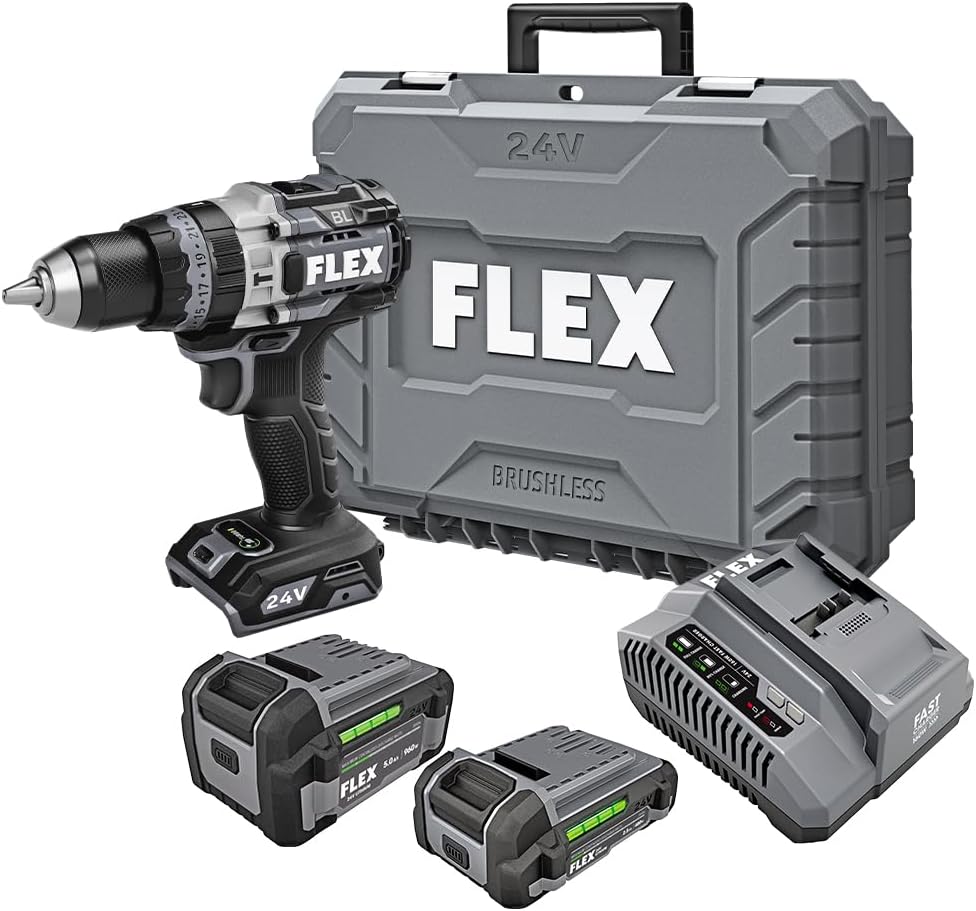
Figure 1: FLEX 24V Brushless Cordless 1/2-Inch Hammer Drill Kit (FX1271T-2B) including drill, two batteries, charger, and carrying case.
2. ຄໍາແນະນໍາກ່ຽວກັບຄວາມປອດໄພທົ່ວໄປ
ຄຳເຕືອນ: ອ່ານຄຳເຕືອນຄວາມປອດໄພທັງໝົດ, ຄຳແນະນຳ, ຮູບປະກອບ, ແລະຂໍ້ສະເພາະທີ່ສະໜອງໃຫ້ກັບເຄື່ອງມືໄຟຟ້ານີ້. ການບໍ່ປະຕິບັດຕາມຄໍາແນະນໍາທັງຫມົດທີ່ລະບຸໄວ້ຂ້າງລຸ່ມນີ້ອາດຈະເຮັດໃຫ້ໄຟຟ້າຊ໊ອກ, ໄຟໄຫມ້, ແລະ / ຫຼືການບາດເຈັບທີ່ຮ້າຍແຮງ.
2.1 ຄວາມປອດໄພຂອງພື້ນທີ່ເຮັດວຽກ
- ຮັກສາພື້ນທີ່ເຮັດວຽກໃຫ້ສະອາດ ແລະ ມີແສງສະຫວ່າງດີ. ພື້ນທີ່ວຸ້ນວາຍ ຫຼືບ່ອນມືດພາໃຫ້ເກີດອຸປະຕິເຫດ.
- ຫ້າມໃຊ້ເຄື່ອງມືໄຟຟ້າໃນບັນຍາກາດທີ່ລະເບີດ, ເຊັ່ນໃນທີ່ປະທັບຂອງຂອງແຫຼວ, ອາຍແກັສ, ຫຼືຝຸ່ນ. ເຄື່ອງມືພະລັງງານສ້າງປະກາຍໄຟທີ່ອາດຈະຕິດເຊື້ອຂີ້ຝຸ່ນຫຼືຄວັນ.
- ຮັກສາເດັກນ້ອຍ ແລະຜູ້ຢືນຢູ່ຫ່າງໆ ໃນຂະນະທີ່ໃຊ້ເຄື່ອງມືໄຟຟ້າ. ສິ່ງລົບກວນສາມາດເຮັດໃຫ້ເຈົ້າສູນເສຍການຄວບຄຸມ.
2.2 ຄວາມປອດໄພທາງໄຟຟ້າ
- ປລັກເຄື່ອງມືໄຟຟ້າຕ້ອງກົງກັບປລັກສຽບໄຟ. ບໍ່ເຄີຍດັດແປງປລັກສຽບໃນທາງໃດກໍ່ຕາມ. ຫ້າມໃຊ້ປລັກສຽບອະແດບເຕີໃດໆກັບເຄື່ອງມືໄຟຟ້າທີ່ມີພື້ນດິນ. ປລັກສຽບແລະປລັກສຽບທີ່ບໍ່ໄດ້ດັດແປງຈະຫຼຸດຜ່ອນຄວາມສ່ຽງຕໍ່ການຊ໊ອກໄຟຟ້າ.
- ຫຼີກເວັ້ນການສໍາຜັດກັບຮ່າງກາຍກັບພື້ນດິນຫຼືຫນ້າດິນ, ເຊັ່ນ: ທໍ່, radiators, ຂອບເຂດ, ແລະຕູ້ເຢັນ. ມີຄວາມສ່ຽງສູງຕໍ່ການເກີດໄຟຟ້າຊັອດ ຖ້າຮ່າງກາຍຂອງເຈົ້າຖືກດິນ ຫຼືດິນ.
- ຫ້າມບໍ່ໃຫ້ເຄື່ອງໃຊ້ໄຟຟ້າຖືກຝົນ ຫຼືສະພາບທີ່ປຽກ. ນ້ໍາເຂົ້າໄປໃນເຄື່ອງມືໄຟຟ້າຈະເພີ່ມຄວາມສ່ຽງຕໍ່ການຊ໊ອກໄຟຟ້າ.
2.3 ຄວາມປອດໄພສ່ວນບຸກຄົນ
- ໃສ່ເຄື່ອງປ້ອງກັນຕາສະເໝີ. ໃຊ້ແວ່ນຕານິລະໄພ, ແວ່ນຕາ, ຫຼືຜ້າປ້ອງກັນໜ້າ.
- ໃສ່ເຄື່ອງປ້ອງກັນການໄດ້ຍິນເມື່ອໃຊ້ເຄື່ອງມືເປັນເວລາດົນ.
- ແຕ່ງຕົວໃຫ້ຖືກຕ້ອງ. ຢ່າໃສ່ເຄື່ອງນຸ່ງຫລູຫລາຫຼືເຄື່ອງປະດັບ. ຮັກສາຜົມ ແລະເຄື່ອງນຸ່ງຂອງເຈົ້າໃຫ້ຫ່າງຈາກພາກສ່ວນທີ່ເຄື່ອນຍ້າຍ.
- ຕື່ນຕົວ, ສັງເກດເບິ່ງສິ່ງທີ່ເຈົ້າກໍາລັງເຮັດ, ແລະໃຊ້ຄວາມຮູ້ສຶກທົ່ວໄປໃນເວລາທີ່ໃຊ້ເຄື່ອງມືພະລັງງານ.
2.4 ການນໍາໃຊ້ເຄື່ອງມືແລະການດູແລ
- ຢ່າບັງຄັບເຄື່ອງມືພະລັງງານ. ໃຊ້ເຄື່ອງມືພະລັງງານທີ່ຖືກຕ້ອງສໍາລັບຄໍາຮ້ອງສະຫມັກຂອງທ່ານ.
- ຖອດຊຸດແບັດເຕີລີ່ອອກຈາກເຄື່ອງມືໄຟຟ້າກ່ອນທີ່ຈະເຮັດການປັບປ່ຽນ, ປ່ຽນອຸປະກອນເສີມ, ຫຼືເກັບຮັກສາເຄື່ອງມືພະລັງງານ.
- ເກັບຮັກສາເຄື່ອງໃຊ້ໄຟຟ້າທີ່ບໍ່ໄດ້ໃຊ້ໄວ້ໃຫ້ໄກຈາກມືຂອງເດັກນ້ອຍ ແລະບໍ່ໃຫ້ບຸກຄົນທີ່ບໍ່ຄຸ້ນເຄີຍກັບເຄື່ອງມືໄຟຟ້າ ຫຼືຄໍາແນະນໍາເຫຼົ່ານີ້ເພື່ອໃຊ້ເຄື່ອງມືໄຟຟ້າ.
- ຮັກສາເຄື່ອງມືໄຟຟ້າ ແລະອຸປະກອນເສີມ. ກວດເບິ່ງຄວາມຜິດປົກກະຕິຫຼືການຜູກມັດຂອງຊິ້ນສ່ວນເຄື່ອນທີ່, ການແຕກຫັກຂອງຊິ້ນສ່ວນ, ແລະເງື່ອນໄຂອື່ນໆທີ່ອາດຈະສົ່ງຜົນກະທົບຕໍ່ການເຮັດວຽກຂອງເຄື່ອງມືໄຟຟ້າ.
2.5 ການນໍາໃຊ້ແລະການດູແລເຄື່ອງມືຫມໍ້ໄຟ
- ເຕີມເງິນດ້ວຍເຄື່ອງສາກທີ່ລະບຸໂດຍຜູ້ຜະລິດເທົ່ານັ້ນ. ເຄື່ອງສາກທີ່ເໝາະສົມກັບແບັດເຕີລີຊະນິດໜຶ່ງອາດຈະເຮັດໃຫ້ເກີດຄວາມສ່ຽງໄຟໄໝ້ເມື່ອໃຊ້ກັບແບັດເຕີລີອື່ນ.
- ໃຊ້ເຄື່ອງມືພະລັງງານກັບຊຸດຫມໍ້ໄຟທີ່ກໍານົດໂດຍສະເພາະ. ການນໍາໃຊ້ຫມໍ້ໄຟອື່ນໆອາດຈະສ້າງຄວາມສ່ຽງຕໍ່ການບາດເຈັບແລະໄຟໄຫມ້.
- ເມື່ອແບັດເຕີລີບໍ່ໄດ້ໃຊ້, ໃຫ້ເກັບຮັກສາມັນໄວ້ຫ່າງຈາກວັດຖຸໂລຫະອື່ນໆ, ເຊັ່ນ: ກະດາດກະດາດ, ຫຼຽນ, ກະແຈ, ຕະປູ, ສະກູ ຫຼືວັດຖຸໂລຫະຂະຫນາດນ້ອຍອື່ນໆ, ເຊິ່ງສາມາດເຮັດໃຫ້ການເຊື່ອມຕໍ່ຈາກສະຖານີຫນຶ່ງໄປຫາອີກ. ການສຽບປ້ຳແບັດເຕີຣີໃຫ້ສັ້ນເຂົ້າກັນອາດເຮັດໃຫ້ເກີດການເຜົາໄໝ້ ຫຼືໄຟໄໝ້ໄດ້.
- ພາຍໃຕ້ເງື່ອນໄຂທີ່ສວຍໃຊ້, ຂອງແຫຼວອາດຈະຖືກຂັບໄລ່ອອກຈາກຫມໍ້ໄຟ; ຫຼີກເວັ້ນການຕິດຕໍ່. ຖ້າການຕິດຕໍ່ເກີດຂື້ນໂດຍບັງເອີນ, ໃຫ້ລ້າງດ້ວຍນ້ໍາ. ຖ້າຂອງແຫຼວຕິດຕໍ່ກັບຕາ, ນອກຈາກນັ້ນ, ໃຫ້ຊອກຫາການຊ່ວຍເຫຼືອທາງການແພດ. ທາດແຫຼວທີ່ຂັບອອກມາຈາກແບັດເຕີຣີອາດເຮັດໃຫ້ເກີດການລະຄາຍເຄືອງ ຫຼືບາດແຜ.
3. ອົງປະກອບລວມ
Your FLEX 24V Brushless Cordless 1/2-Inch Hammer Drill Kit (FX1271T-2B) includes the following items:
- FLEX 24V Brushless Cordless 1/2-Inch Hammer Drill
- (1) FLEX 24V 2.5Ah Lithium-Ion Battery (FX0111-1)
- (1) FLEX 24V 5.0Ah Lithium-Ion Battery (FX0121-1)
- ເຄື່ອງສາກໄຟໄວ FLEX 160W
- ມືຈັບຕົວຊ່ວຍ
- ກະເປົາຖື

Figure 2: The FLEX Advantage highlights the included 2.5Ah and 5.0Ah Lithium-Ion batteries, emphasizing their power, runtime, and fast charging capabilities.
4. ການຕິດຕັ້ງແລະການນໍາໃຊ້ເບື້ອງຕົ້ນ
4.1 ການສາກແບັດເຕີຣີ
- Connect the 160W Fast Charger to a standard power outlet.
- ເລື່ອນຊຸດຫມໍ້ໄຟໃສ່ເຄື່ອງສາກຈົນກ່ວາມັນກົດໃສ່ບ່ອນ.
- The charger's indicator lights will show the charging status. A fully charged battery will be indicated by a solid green light.
- ເມື່ອສາກເຕັມແລ້ວ, ເອົາແບັດເຕີຣີອອກຈາກເຄື່ອງສາກ.
4.2 ການຕິດຕັ້ງແບັດເຕີຣີ
- Align the battery pack with the battery port on the base of the drill handle.
- ເລື່ອນແບດເຕີລີ່ເຂົ້າໄປໃນຜອດຈົນກ່ວາມັນລັອກເຂົ້າໄປໃນທີ່ປອດໄພ. ໃຫ້ແນ່ໃຈວ່າມັນຖືກນັ່ງຢ່າງເຕັມສ່ວນເພື່ອປ້ອງກັນການໄຫຼອອກໂດຍບັງເອີນໃນລະຫວ່າງການປະຕິບັດງານ.
- ເພື່ອຖອດແບັດເຕີຣີອອກ, ໃຫ້ກົດປຸ່ມປ່ອຍຢູ່ດ້ານຂ້າງຂອງຊຸດແບັດເຕີຣີ ແລະ ເລື່ອນມັນອອກ.
4.3 ການຕິດຕົວຈັບຕົວຊ່ວຍ
For improved control and safety, especially during high-torque applications or hammer drilling, attach the auxiliary handle.
- ຖອດມືຈັບຊ່ວຍ clamp ໂດຍການໝຸນມັນທວນກັບເຂັມໂມງ.
- Slide the handle over the front of the drill body, positioning it to your preferred angle.
- ແຫນ້ນ clamp ໂດຍການໝຸນມັນຕາມເຂັມໂມງຈົນກວ່າດ້າມຈັບຈະຖືກມັດຢ່າງແໜ້ນໜາ.

Figure 3: The drill with the auxiliary handle attached, providing enhanced control and stability, particularly when the anti-kickback feature engages.
4.4 Installing Drill Bits or Accessories
- ກວດໃຫ້ແນ່ໃຈວ່າເຄື່ອງເຈາະປິດຢູ່ ແລະຖອດແບັດເຕີຣີອອກເພື່ອຄວາມປອດໄພ.
- Grip the rear collar of the 1/2-inch full-metal ratcheting chuck and rotate the front collar counter-clockwise to open the chuck jaws.
- Insert the drill bit or accessory fully into the chuck jaws.
- Rotate the front collar clockwise to tighten the chuck jaws firmly around the bit. The ratcheting mechanism will provide an audible click when securely tightened.
- Gently pull on the bit to ensure it is properly secured.

Figure 4: Detail of the 1/2-inch full-metal ratcheting chuck, designed for secure bit retention and durability.
5. ຄໍາແນະນໍາການດໍາເນີນງານ
5.1 ການເປີດ/ປິດ ແລະການຄວບຄຸມຄວາມໄວ
- Trigger Switch: Squeeze the trigger switch to turn the drill on. Release it to turn the drill off.
- ຄວາມໄວຕົວແປ: The trigger switch is pressure-sensitive, allowing for variable speed control. Pressing the trigger further increases the speed.
- Forward/Reverse Selector: Located above the trigger, push the selector left for forward rotation (drilling/driving) and right for reverse rotation (removing screws). Center position locks the trigger for safety.
5.2 Gear Selection (2-Speed)
The drill features a 2-speed gearbox for optimal performance across various applications.
- ເກຍ 1 (ຄວາມໄວຕ່ຳ, ແຮງບິດສູງ): Slide the gear selector switch to position '1'. Ideal for driving screws, drilling large holes, or applications requiring maximum torque.
- ເກຍ 2 (ຄວາມໄວສູງ, ແຮງບິດຕ່ຳ): Slide the gear selector switch to position '2'. Suitable for fast drilling of smaller holes in wood or metal.
NOTE: Always ensure the drill is stopped before changing gear settings to prevent damage to the gearbox.
5.3 Mode Selection (Drill, Drive, Hammer Drill)
Rotate the collar behind the chuck to select the desired operating mode:
- ໂໝດເຈາະ (ໄອຄອນເຈາະ): ສຳລັບການເຈາະຮູໃນໄມ້, ໂລຫະ ແລະ ພາດສະຕິກ.
- Drive Mode (Screw Icon): For driving screws. The clutch settings (numbered ring) allow you to adjust the torque to prevent over-driving screws or damaging materials.
- ໂໝດເຈາະດ້ວຍຄ້ອນ (ຮູບສັນຍາລັກຄ້ອນ): For drilling into masonry, brick, and concrete. This mode combines rotary action with a hammering motion.
5.4 ໂຫມດ Turbo
The Turbo Mode button, located on top of the drill, provides an immediate increase in speed for faster results when needed.
- ກົດ TURBO button during operation to engage maximum speed.
- Release the button to return to the previously selected speed setting.

Figure 5: The Turbo Mode button, when pressed, provides increased speed for rapid task completion.
5.5 Anti-Kickback Feature
The drill is equipped with an advanced anti-kickback braking technology. If the drill bit binds during operation, the system will detect the sudden rotational force and rapidly stop the motor to reduce the risk of kickback and potential injury.
5.6 ໄຟ LED ປະສົມປະສານ
An LED light is integrated into the drill to illuminate the work area, improving visibility in dimly lit conditions. The light activates when the trigger is pressed.

Figure 6: The integrated LED light provides illumination for improved visibility in dark work environments.
5.7 Drilling into Masonry (Hammer Drill Mode)
When drilling into masonry, brick, or concrete:
- Select Hammer Drill Mode.
- Ensure the auxiliary handle is securely attached and held firmly with both hands.
- Use appropriate masonry drill bits.
- Apply steady, firm pressure to the drill, allowing the hammering action to break up the material.

Figure 7: The FLEX hammer drill in action, demonstrating its capability to drill into tough materials with 1,400 in-lbs of torque.
6. ບໍາລຸງຮັກສາ
6.1 ການທໍາຄວາມສະອາດ
- Always disconnect the battery pack before performing any cleaning or maintenance.
- ໃຊ້ແປງອ່ອນ ຫຼືອາກາດອັດແໜ້ນເພື່ອເຮັດຄວາມສະອາດຂີ້ຝຸ່ນ ແລະສິ່ງເສດເຫຼືອອອກຈາກຊ່ອງລະບາຍອາກາດ.
- ເຊັດທີ່ຢູ່ອາໄສເຄື່ອງມືທີ່ມີໂຄສະນາamp ຜ້າ. ຢ່າໃຊ້ສານເຄມີທີ່ຮຸນແຮງຫຼືເຄື່ອງເຮັດຄວາມສະອາດຂັດ.
- ຮັກສາຄາງກະໄຕຂອງຫົວຈັບໃຫ້ສະອາດ ແລະ ບໍ່ມີສິ່ງເສດເຫຼືອເພື່ອຮັບປະກັນການຈັບດອກສະຫວ່ານຢ່າງຖືກຕ້ອງ.
6.2 ການເກັບຮັກສາ
- Store the tool, batteries, and charger in a cool, dry place, away from direct sunlight and moisture.
- Ensure batteries are partially charged (not fully depleted or fully charged for long-term storage) before storing.
- Store the tool in its carrying case to protect it from damage.
7. ການແກ້ໄຂບັນຫາ
| ບັນຫາ | ສາເຫດທີ່ເປັນໄປໄດ້ | ການແກ້ໄຂ |
|---|---|---|
| ເຈາະບໍ່ເລີ່ມຕົ້ນ. | ແບັດເຕີຣີບໍ່ໄດ້ສາກ ຫຼືຕິດຕັ້ງບໍ່ຖືກຕ້ອງ. Forward/Reverse selector in center (locked) position. | ສາກແບັດເຕີຣີ ແລະໃຫ້ແນ່ໃຈວ່າມັນຖືກຕິດຕັ້ງຢ່າງປອດໄພ. Move selector to forward or reverse position. |
| ການສູນເສຍພະລັງງານໃນລະຫວ່າງການປະຕິບັດງານ. | ການສາກແບັດເຕີຣີຕໍ່າ. ເປີດໃຊ້ການປ້ອງກັນການໂຫຼດເກີນແລ້ວ. | ສາກແບັດເຕີຣີຄືນໃໝ່. ຫຼຸດຜ່ອນຄວາມກົດດັນໃສ່ເຄື່ອງມື; ປ່ອຍໃຫ້ມັນເຢັນລົງ. |
| ບິດບ້ຽວໃນ chuck. | Chuck ບໍ່ tightened ພຽງພໍ. ຄາງຂອງຈັກເປື້ອນ ຫຼື ເກົ່າ. | ຮັດຄໍໃຫ້ແໜ້ນ. ເຮັດຄວາມສະອາດຂາຂອງຫົວຈັບ. ຖ້າບັນຫາຍັງຄົງຢູ່, ຫົວຈັບອາດຈະຕ້ອງໄດ້ປ່ຽນໃໝ່. |
| ການສັ່ນສະເທືອນຫຼືສຽງດັງເກີນໄປ. | Damaged or bent drill bit. ອົງປະກອບວ່າງ. | Replace drill bit. Check for loose screws or parts. If problem persists, discontinue use and contact service. |
8. ຂໍ້ມູນຈໍາເພາະ
| ຄຸນສົມບັດ | ລາຍລະອຽດ |
|---|---|
| ໝາຍເລກຕົວແບບ | FX1271T-2B |
| ສະບັບtage | 24 ໂວນ |
| ຂະ ໜາດ Chuck | 1/2-ນິ້ວ |
| ປະເພດ Chuck | Full-Metal Ratcheting |
| ແຮງບິດສູງສຸດ | ປອນ 1400 ນິ້ວ |
| ຄວາມໄວການຫມຸນສູງສຸດ | 2500 RPM |
| ຈໍານວນຄວາມໄວ | 2 |
| ຄວາມຈຸຂອງແບັດເຕີຣີ (ລວມຢູ່) | 2.5 Ah, 5.0 Ah Lithium-Ion |
| Charger Type (Included) | ເຄື່ອງສາກໄວ 160W |
| ຄຸນນະສົມບັດພິເສດ | Turbo Mode, Anti-Kickback, LED Light, Brushless Motor |
| ນ້ໍາຫນັກລາຍການ | 15.37 ປອນ (ຊຸດ) |
| ຂະໜາດສິນຄ້າ | 7.2"L x 4"W x 10"H (Tool) |
| ຄວາມອາດສາມາດເຈາະ (ໄມ້) | 2 ນິ້ວ |
| ຄວາມອາດສາມາດເຈາະ (ໂລຫະ) | 2 ນິ້ວ |
9. ການຮັບປະກັນແລະການສະຫນັບສະຫນູນ
ການຮັບປະກັນຕະຫຼອດຊີວິດ 9.1 FLEX ທີ່ຈຳກັດ
This FLEX tool is protected by the FLEX Limited Lifetime Warranty. To qualify for this warranty, you must register your new FLEX tool, battery, or charger within 30 days of purchase through December 31, 2025. Registration can be completed at registermyFLEX.com.
Please refer to the official FLEX website or your product packaging for full terms and conditions of the warranty.
9.2 ສະຫນັບສະຫນູນລູກຄ້າ
For technical assistance, replacement parts, or warranty claims, please contact FLEX customer support. Contact information can typically be found on the FLEX official webເວັບໄຊ ຫຼືການຫຸ້ມຫໍ່ຜະລິດຕະພັນຂອງທ່ານ.
When contacting support, please have your model number (FX1271T-2B) and purchase date available.


