1. ບົດແນະນຳ
Thank you for choosing the iProda 15.6-inch Portable Monitor. This device is designed to enhance your productivity and entertainment by providing a versatile second screen for your laptop, PC, smartphone, and gaming consoles. This manual will guide you through the setup, operation, and maintenance of your new monitor.
2. ຄຸນລັກສະນະຂອງຜະລິດຕະພັນ
- 15.6-inch Full HD (1080p) IPS Display: ປະສົບການສີສັນສົດໃສ ແລະກວ້າງ viewມຸມ.
- ອັດຕາການສົດຊື່ນ 60Hz: Ensures smooth visuals for work and entertainment.
- ໜ້າຈໍຕ້ານແສງສະທ້ອນ: ຫຼຸດຜ່ອນການສະທ້ອນເພື່ອຄວາມສະດວກສະບາຍ viewຢູ່ໃນສະພາບແສງສະຫວ່າງຕ່າງໆ.
- ນ້ຳໜັກເບົາ ແລະ ແບບພົກພາ: Weighing approximately 1.2 kg (2.6 lbs) and only 0.6 cm (0.24 inches) thick, it's ideal for on-the-go use.
- ການເຊື່ອມຕໍ່ແບບ Plug and Play: Simple setup with USB-C or HDMI.
- ລຳໂພງໃນຕົວ: Integrated audio for convenience.
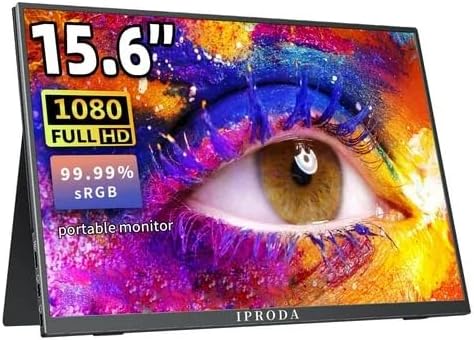
Figure 2.1: iProda 15.6-inch Portable Monitor showcasing its 1080 Full HD resolution and sRGB color accuracy.

Figure 2.2: Close-up of the iProda portable monitor screen highlighting IPS technology and a 178-degree super wide viewing angle for an excellent visual experience.
3. ຄູ່ມືການຕິດຕັ້ງ
The iProda portable monitor is designed for easy plug-and-play setup. Follow these steps to connect your device:
- ການເຊື່ອມຕໍ່ພະລັງງານ: Connect the monitor to a power source using the provided USB-C cable and a compatible power adapter (not always included, check packaging).
- ການເຊື່ອມຕໍ່ວິດີໂອ:
- USB-C (ໜ້າທີ່ເຕັມຮູບແບບ): If your device (laptop, smartphone) has a full-function USB-C port that supports video output and power delivery, simply connect a single USB-C cable from your device to one of the monitor's USB-C ports.
- Mini HDMI: Connect a mini HDMI to HDMI cable from the monitor's mini HDMI port to your device's HDMI port. You will also need to connect a USB-C cable for power.
- ສຽງ (ທາງເລືອກ): If you prefer to use external headphones or speakers, connect them to the 3.5mm audio jack on the monitor.
- ການຕັ້ງຄ່າອຸປະກອນ: Your device should automatically detect the monitor. If not, you may need to adjust display settings in your operating system (e.g., Windows Display Settings, macOS System Preferences).
4. ຄໍາແນະນໍາການດໍາເນີນງານ
The monitor features intuitive controls for adjusting settings:
- Power Button / Return Button: Press and hold to power on/off. Short press to return to the previous menu in OSD settings.
- Dial-wheel Switch (OSD Settings):
- ກົດ: Enter the On-Screen Display (OSD) menu.
- ເລື່ອນຂຶ້ນ/ລົງ: ທ່ອງໄປຫາຕົວເລືອກເມນູ ຫຼືປັບຄ່າ.
- Press (while in menu): ຢືນຢັນການເລືອກ.
The OSD menu allows you to adjust brightness, contrast, color settings, input source, and other display parameters.
5. Connectivity and Compatibility
The iProda portable monitor offers broad compatibility with various devices:
- USB-C (x2, Full Function): Connects to laptops, PCs, tablets, and smartphones that support DisplayPort Alternate Mode and Power Delivery.
- Mini HDMI (x1): Connects to devices with an HDMI output, including laptops, PCs, gaming consoles (Xbox, PlayStation, Nintendo Switch), and media players.
- ຊ່ອງສຽບຫູຟັງ 3.5 ມມ (x1): ສໍາລັບການເຊື່ອມຕໍ່ອຸປະກອນສຽງພາຍນອກ.
ອຸປະກອນທີ່ເຂົ້າກັນໄດ້ປະກອບມີ:
- ຄອມພິວເຕີຕັ້ງໂຕະ
- Laptops (Windows, macOS)
- ເມັດ
- Smartphones (with full-function USB-C)
- Nintendo Switch
- PlayStation 4/5
- Xbox One/Series X|S

Figure 5.1: Port layout and compatible devices for the iProda portable monitor.
6. ຮູບແບບການນຳໃຊ້
When connected to a laptop or PC, the iProda portable monitor supports various display modes:
- ໂໝດຊໍ້າກັນ: Displays the same content on both your primary screen and the portable monitor. Ideal for presentations or sharing content.
- ຂະຫຍາຍໂໝດ: Extends your desktop across both screens, providing more screen real estate for multitasking. Drag windows between screens.
- Second Screen Only Mode: Displays content only on the portable monitor, with your primary screen turned off. Useful for focusing on a single display or when using the portable monitor as the main display.

Figure 6.1: Display modes (Duplicate, Extend, Second Screen Only) with a laptop.
7. ແອັບພລິເຄຊັນ ແລະ ກໍລະນີການນຳໃຊ້
The iProda portable monitor is versatile for various scenarios:
- Daily Work & Business: Enhance productivity by extending your workspace for spreadsheets, documents, and presentations.
- Phone Extension: Transform your smartphone into a larger display for media consumption or light productivity tasks.
- On-the-GO: Its lightweight design makes it perfect for travel, remote work, or mobile presentations.
- ເກມ: Connect to your favorite gaming consoles for an immersive gaming experience anywhere.

Figure 7.1: Various applications of the iProda portable monitor.

Figure 7.2: iProda portable monitor used for gaming with various consoles.
8. ບໍາລຸງຮັກສາ
To ensure the longevity and optimal performance of your iProda portable monitor, follow these maintenance guidelines:
- ທໍາຄວາມສະອາດຫນ້າຈໍ: ໃຊ້ຜ້າແພທີ່ອ່ອນໆ ທີ່ບໍ່ມີເສັ້ນດ່າງ dampened with water or a screen-cleaning solution. Do not spray liquid directly onto the screen. Avoid using harsh chemicals or abrasive materials.
- ທໍາຄວາມສະອາດ Casing: ເຊັດຈໍສະແດງຜົນ casing ດ້ວຍຜ້າອ່ອນ, ແຫ້ງ.
- ການເກັບຮັກສາ: ເມື່ອບໍ່ໄດ້ໃຊ້ງານ, ໃຫ້ເກັບຮັກສາຈໍພາບໄວ້ໃນບ່ອນທີ່ເຢັນແລະແຫ້ງ, ດີກວ່າຄວນເກັບໄວ້ໃນກ່ອງບັນຈຸເດີມ ຫຼື ໃສ່ຊຸດປ້ອງກັນເພື່ອປ້ອງກັນຝຸ່ນ ແລະ ຮອຍຂີດຂ່ວນ.
- ການຈັດການ: ໃຫ້ຈັບຈໍພາບດ້ວຍຂອບສະເໝີ. ຫຼີກລ່ຽງການໃຊ້ແຮງກົດດັນໃສ່ໜ້າຈໍ.
9. ການແກ້ໄຂບັນຫາ
If you encounter issues with your iProda portable monitor, refer to the following common problems and solutions:
| ບັນຫາ | ສາເຫດທີ່ເປັນໄປໄດ້ | ການແກ້ໄຂ |
|---|---|---|
| ບໍ່ມີສັນຍານ / ຫນ້າຈໍສີດໍາ | Incorrect input source selected; Loose cable connection; Insufficient power; Device not outputting video. | Check cable connections; Ensure monitor is powered; Select correct input source via OSD; Verify device's video output settings. |
| ບໍ່ມີພະລັງງານ | Power cable not connected; Power adapter faulty; USB-C port on device not providing enough power. | Ensure power cable is securely connected; Try a different power adapter/USB-C port; Use an external power source if needed. |
| ໜ້າຈໍກະພິບ | Faulty cable; Interference; Graphics driver issue. | Try a different cable; Ensure no strong electromagnetic interference; Update graphics drivers on your connected device. |
| No Audio from Monitor | Monitor volume too low; Audio output not set to monitor; External speakers/headphones connected. | Adjust monitor volume via OSD; Set audio output to the monitor in your device's sound settings; Disconnect external audio devices if using monitor speakers. |
If the problem persists after trying these solutions, please contact iProda customer support for further assistance.
10. ຂໍ້ມູນຈໍາເພາະ
| ຄຸນສົມບັດ | ຂໍ້ມູນຈໍາເພາະ |
|---|---|
| ຂະໜາດໜ້າຈໍ | 15.6 ນິ້ວ |
| ປະເພດການສະແດງ | IPS, Anti-glare |
| ຄວາມລະອຽດ | ຄວາມລະອຽດ Full HD (1920 x 1080) |
| ອັດຕາການໂຫຼດຂໍ້ມູນຄືນໃໝ່ | 60Hz |
| ອັດຕາສ່ວນ | 16:9 |
| ການເຊື່ອມຕໍ່ | 2x USB-C (Full Function), 1x Mini HDMI, 1x 3.5mm Audio Jack |
| ນ້ຳໜັກ | ປະມານ. 1.2 ກິໂລ (2.6 ປອນ) |
| ຄວາມຫນາ | ປະມານ. 0.6 ຊມ (0.24 ນິ້ວ) |
| ລຳໂພງໃນຕົວ | ແມ່ນແລ້ວ |
11. ການຮັບປະກັນແລະການສະຫນັບສະຫນູນ
Your iProda portable monitor comes with a standard manufacturer's warranty. Please refer to the warranty card included in your product packaging for specific terms and conditions.
For technical support, troubleshooting assistance, or warranty claims, please contact iProda customer service through the contact information provided on the official iProda webເວັບໄຊ ຫຼືເວທີການຊື້ຂອງທ່ານ.
ກະລຸນາກຽມຮຸ່ນຜະລິດຕະພັນ ແລະ ລາຍລະອຽດການຊື້ຂອງທ່ານໃຫ້ພ້ອມເມື່ອຕິດຕໍ່ຝ່າຍຊ່ວຍເຫຼືອ.


