1. ບົດແນະນຳ
Thank you for choosing the CREATE NETBOT S40 Robot Vacuum and Mop. This manual provides essential information for the safe operation, maintenance, and troubleshooting of your device. Please read it thoroughly before first use and retain it for future reference.
2. ຄໍາແນະນໍາຄວາມປອດໄພ
ເພື່ອຫຼຸດຜ່ອນຄວາມສ່ຽງຕໍ່ການບາດເຈັບຫຼືຄວາມເສຍຫາຍ, ໃຫ້ສັງເກດເບິ່ງຄວາມລະມັດລະວັງດ້ານຄວາມປອດໄພຕໍ່ໄປນີ້:
- ເຄື່ອງໃຊ້ນີ້ສາມາດໃຊ້ໄດ້ກັບເດັກນ້ອຍອາຍຸ 8 ປີຂຶ້ນໄປ ແລະຜູ້ທີ່ມີຄວາມສາມາດທາງຮ່າງກາຍ, ຄວາມຮູ້ສຶກ ຫຼື ຈິດໃຈຫຼຸດລົງ ຫຼື ຂາດປະສົບການ ແລະ ຄວາມຮູ້ ຖ້າພວກເຂົາໄດ້ຮັບການຊີ້ນຳ ຫຼື ຄຳແນະນຳກ່ຽວກັບການນຳໃຊ້ເຄື່ອງດັ່ງກ່າວຢ່າງປອດໄພ ແລະ ເຂົ້າໃຈເຖິງອັນຕະລາຍທີ່ກ່ຽວຂ້ອງ. .
- ເດັກນ້ອຍບໍ່ຄວນຫຼີ້ນກັບເຄື່ອງໃຊ້. ການທໍາຄວາມສະອາດແລະການບໍາລຸງຮັກສາຜູ້ໃຊ້ຈະຕ້ອງບໍ່ເຮັດໂດຍເດັກນ້ອຍໂດຍບໍ່ມີການຊີ້ນໍາ.
- Ensure the robot is placed on a stable, level surface.
- ຫ້າມບໍ່ໃຫ້ຫຸ່ນຍົນໃສ່ນໍ້າ ຫຼືຂອງແຫຼວອື່ນໆ.
- ຮັກສາຜົມ, ເຄື່ອງນຸ່ງວ່າງ, ນິ້ວມື, ແລະທຸກພາກສ່ວນຂອງຮ່າງກາຍໃຫ້ຫ່າງຈາກຊ່ອງເປີດ ແລະພາກສ່ວນທີ່ເຄື່ອນຍ້າຍ.
- ຫ້າມໃຊ້ຫຸ່ນຍົນຢູ່ໃນພື້ນທີ່ທີ່ມີແປວໄຟ ຫຼືວັດຖຸລະເບີດ.
- Use only the original charging adapter and battery provided by the manufacturer.
- Before cleaning or maintenance, always switch off the robot and unplug it from the power source.
3. ເນື້ອໃນຊຸດ
ກວດສອບວ່າລາຍການທັງຫມົດແມ່ນມີຢູ່ໃນຊຸດຂອງທ່ານ:
- CREATE NETBOT S40 Robot Vacuum and Mop
- ບ່ອນສາກ
- Power Adapter
- ການຄວບຄຸມໄລຍະໄກ
- ແປງຂ້າງ (2 ຄູ່)
- Main Brush (pre-installed + 1 spare)
- ຖັງຂີ້ຝຸ່ນ
- ຖັງນ້ຳພ້ອມ Mop Pad
- ເຄື່ອງມືທໍາຄວາມສະອາດ
- ຄູ່ມືຜູ້ໃຊ້
4. ຜະລິດຕະພັນເກີນview
Familiarize yourself with the components of your CREATE NETBOT S40.

ຮູບພາບ 4.1: ທາງເທິງ view of the CREATE NETBOT S40 robot vacuum, showing the main unit, a roller brush, a smartphone displaying the control app, and the remote control.

ຮູບພາບ 4.2: ດ້ານລຸ່ມ view of the robot, illustrating the main brush, side brushes, wheels, and various sensors.
ອົງປະກອບຂອງຫຸ່ນຍົນ
- ໜ້າ ປົກ: Houses the dust bin/water tank.
- ປຸ່ມເປີດ/ເປີດ: ເລີ່ມຕົ້ນຫຼືຢຸດການທໍາຄວາມສະອາດຊົ່ວຄາວ.
- ຕິດຕໍ່ພົວພັນການສາກໄຟ: For automatic charging at the dock.
- ແປງດ້ານຂ້າງ: Sweep debris into the main brush path.
- ແປງຫຼັກ: ເກັບຂີ້ຝຸ່ນແລະສິ່ງເສດເຫຼືອຈາກພື້ນເຮືອນ.
- ຖັງຂີ້ຝຸ່ນ: Collects dry debris.
- ຖັງນໍ້າ: Holds water for mopping.
- Mop Pad: Attaches to the water tank for wet cleaning.
- ເຊັນເຊີ Cliff: Detect edges and prevent falls.
- Bumper: ກວດພົບອຸປະສັກ.
- ລໍ້ຂັບລົດ: ຂັບເຄື່ອນຫຸ່ນຍົນ.
- Universal Wheel: Provides steering.

Image 4.3: Close-up of the robot's top cover, showing the 'CREATE NETBOT S40' branding.
5. ຕັ້ງຄ່າ
5.1 ການຈັດວາງ Dock ການສາກໄຟ
Place the charging dock against a wall in an open, uncluttered area. Ensure there is at least 1 meter (3 feet) of clear space on both sides and 2 meters (6 feet) in front of the dock. Plug the power adapter into the dock and then into a wall outlet.

Image 5.1: The robot positioned next to its charging dock, illustrating proper placement.
5.2 ການສາກໄຟເບື້ອງຕົ້ນ
Place the robot onto the charging dock, ensuring the charging contacts align. The robot will emit a sound and the indicator light will illuminate, indicating it is charging. Fully charge the robot for 4-6 hours before its first use.
5.3 App Connection (Wi-Fi & Alexa)
For full functionality, download the CREATE Home app from your smartphone's app store. Follow the in-app instructions to connect your NETBOT S40 to your home Wi-Fi network. Once connected, you can link the app to Alexa for voice control.
- Download the 'CREATE Home' app.
- ລົງທະບຽນຫລືເຂົ້າບັນຊີຂອງທ່ານ.
- Add your device by selecting 'Robot Vacuum' and following the pairing instructions.
- ໃຫ້ແນ່ໃຈວ່າເຄືອຂ່າຍ Wi-Fi ຂອງທ່ານແມ່ນ 2.4GHz.

Image 5.2: The robot shown alongside a smartphone displaying the CREATE Home app interface, indicating successful connection and mapping capabilities.
6. ຄໍາແນະນໍາການດໍາເນີນງານ
6.1 ການເລີ່ມຕົ້ນ/ຢຸດການທໍາຄວາມສະອາດ
- ຈາກຫຸ່ນຍົນ: Press the power button on the robot's top cover.
- From Remote Control: Press the 'Start/Pause' button.
- ຈາກ App: Tap the 'Start' button in the CREATE Home app.
6.2 ຮູບແບບການທໍາຄວາມສະອາດ
The NETBOT S40 offers various cleaning modes:
- ທໍາຄວາມສະອາດອັດຕະໂນມັດ: ຫຸ່ນຍົນອັດສະລິຍະນໍາທາງແລະເຮັດຄວາມສະອາດພື້ນທີ່ທັງຫມົດ.
- ການອະນາໄມຈຸດ: ສຸມໃສ່ການທຳຄວາມສະອາດໃນພື້ນທີ່ຂະໜາດນ້ອຍສະເພາະ.
- ການອະນາໄມຂອບ: ເຮັດຄວາມສະອາດຕາມຝາແລະແຄມເຟີນີເຈີ.
- ກໍານົດເວລາທໍາຄວາມສະອາດ: Set specific times for the robot to clean automatically via the app.
6.3 ຟັງຊັ່ນການຖູ
ການນໍາໃຊ້ການທໍາງານ mopping:
- Fill the water tank with clean water. Do not use detergents or harsh chemicals.
- ຕິດແຜ່ນຖູພື້ນເຂົ້າກັບຖັງນໍ້າໃຫ້ແໜ້ນ.
- Insert the filled water tank into the robot.
- ເລີ່ມຮອບທຳຄວາມສະອາດ. ຫຸ່ນຍົນຈະສູນຍາກາດ ແລະ mop ພ້ອມກັນ.

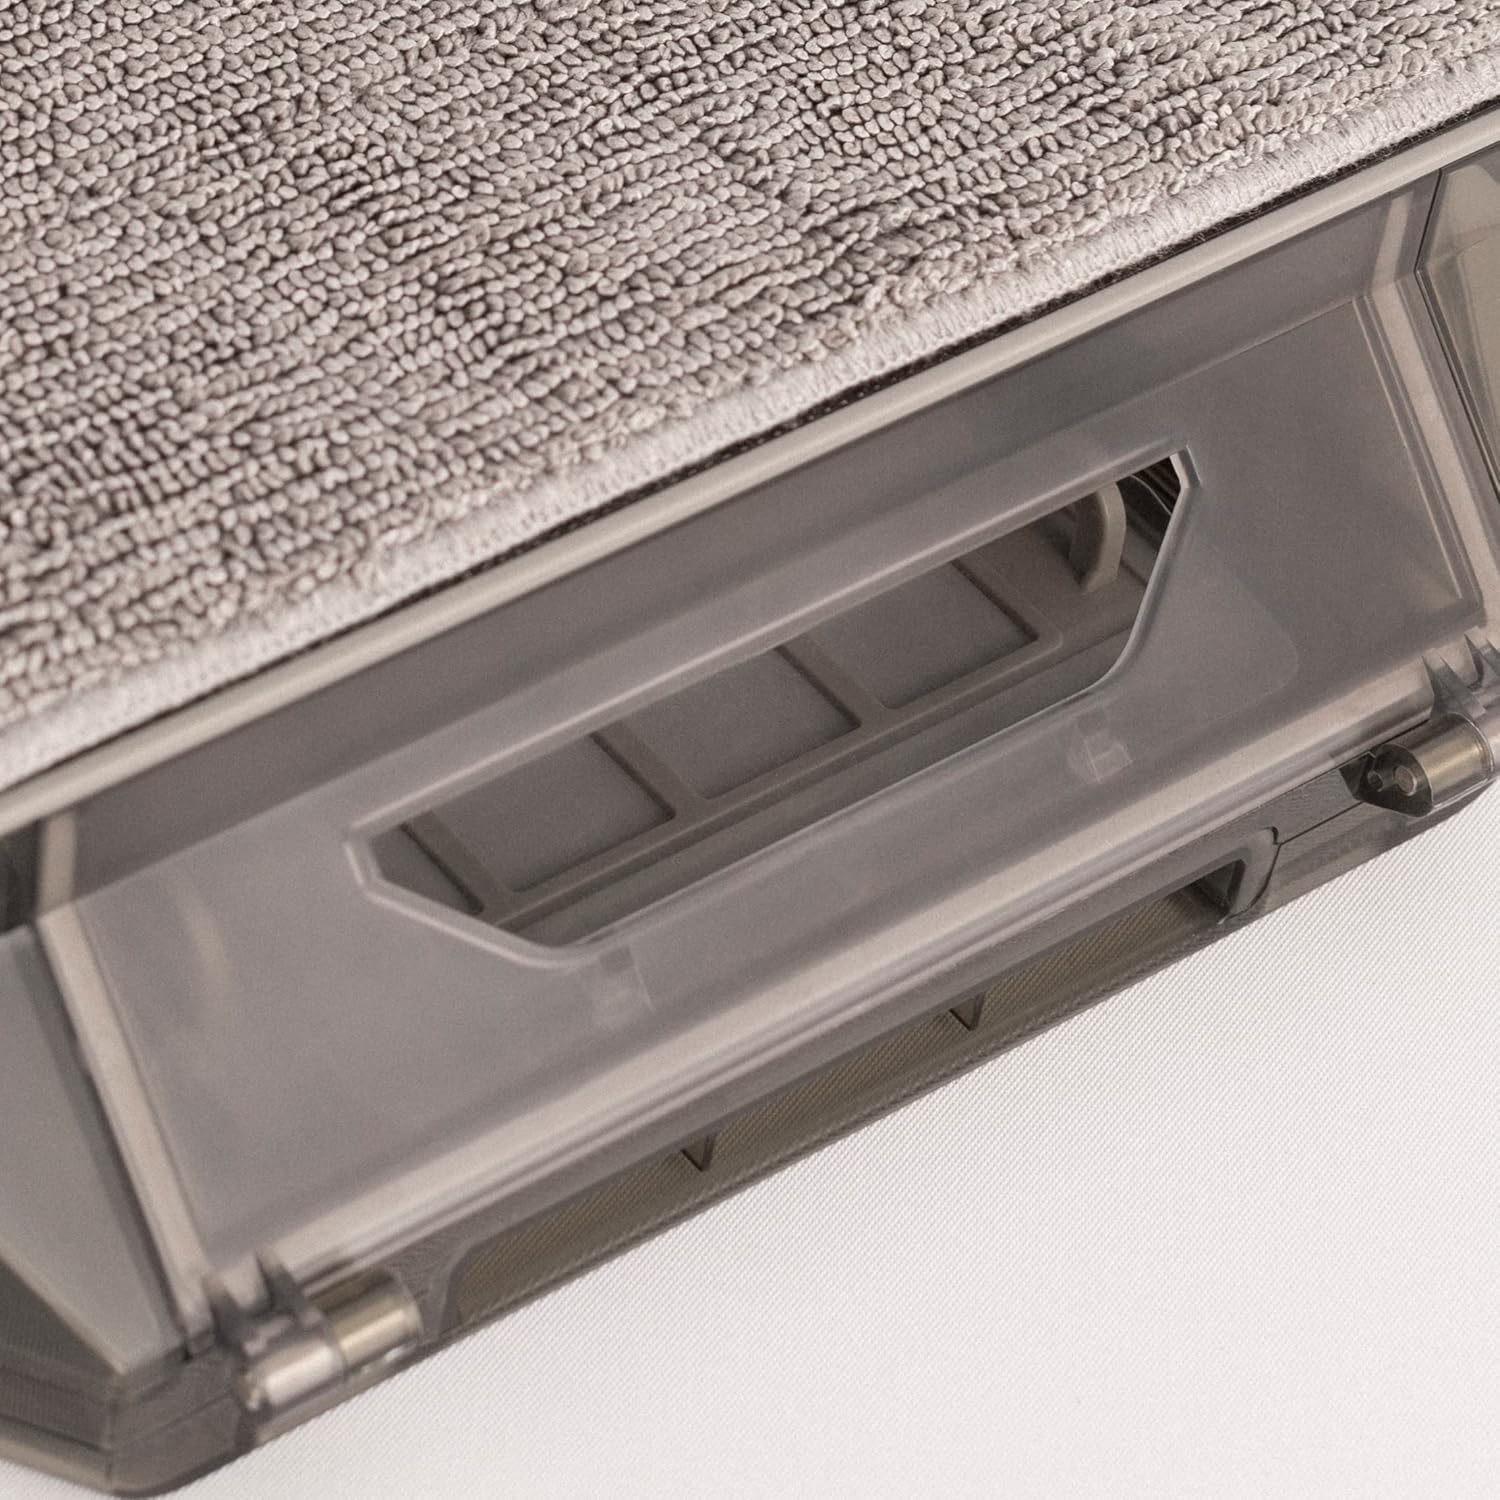
ຮູບພາບທີ 6.1: ໄລຍະໃກ້ view of the mop pad attached to the water tank, ready for installation into the robot.
7. ບໍາລຸງຮັກສາ
ການບໍາລຸງຮັກສາເປັນປົກກະຕິຮັບປະກັນການປະຕິບັດທີ່ດີທີ່ສຸດແລະຍືດອາຍຸຂອງຫຸ່ນຍົນຂອງທ່ານ.
7.1 Dust Bin and Filter Cleaning
Empty the dust bin after each use and clean the filter regularly.
- Press the release button to remove the dust bin.
- Open the dust bin cover and empty its contents.
- Remove the filter and tap it gently to remove dust. Do not wash the HEPA filter with water.
- Rinse the dust bin with water if necessary, ensuring it is completely dry before reinstallation.
ຮູບພາບ 7.1: ລາຍລະອຽດ view of the dust bin and its filter compartment, showing how it integrates into the robot.
7.2 ການເຮັດຄວາມສະອາດແປງຫຼັກ
Clean the main brush weekly to remove tangled hair and debris.
- ຫັນຫຸ່ນຍົນລົງ ແລະ ຊອກຫາຝາປິດແປງຫຼັກ.
- Remove the cover and lift out the main brush.
- Use the provided cleaning tool to cut and remove tangled hair.
- ຕິດຕັ້ງແປງຫຼັກ ແລະຝາປິດຄືນໃໝ່.
7.3 ການເຮັດຄວາມສະອາດແປງຂ້າງ
Inspect side brushes regularly for wear and tear, and clean them as needed.
- ຄ່ອຍໆດຶງແປງດ້ານຂ້າງຂຶ້ນໄປເພື່ອຖອດມັນອອກ.
- ເອົາຂົນຫຼືສິ່ງເສດເຫຼືອໃດໆ.
- ຖ້າແປງເສຍຫາຍ, ໃຫ້ປ່ຽນແປງໃໝ່.
- Press the new brushes firmly onto their posts until they click into place.
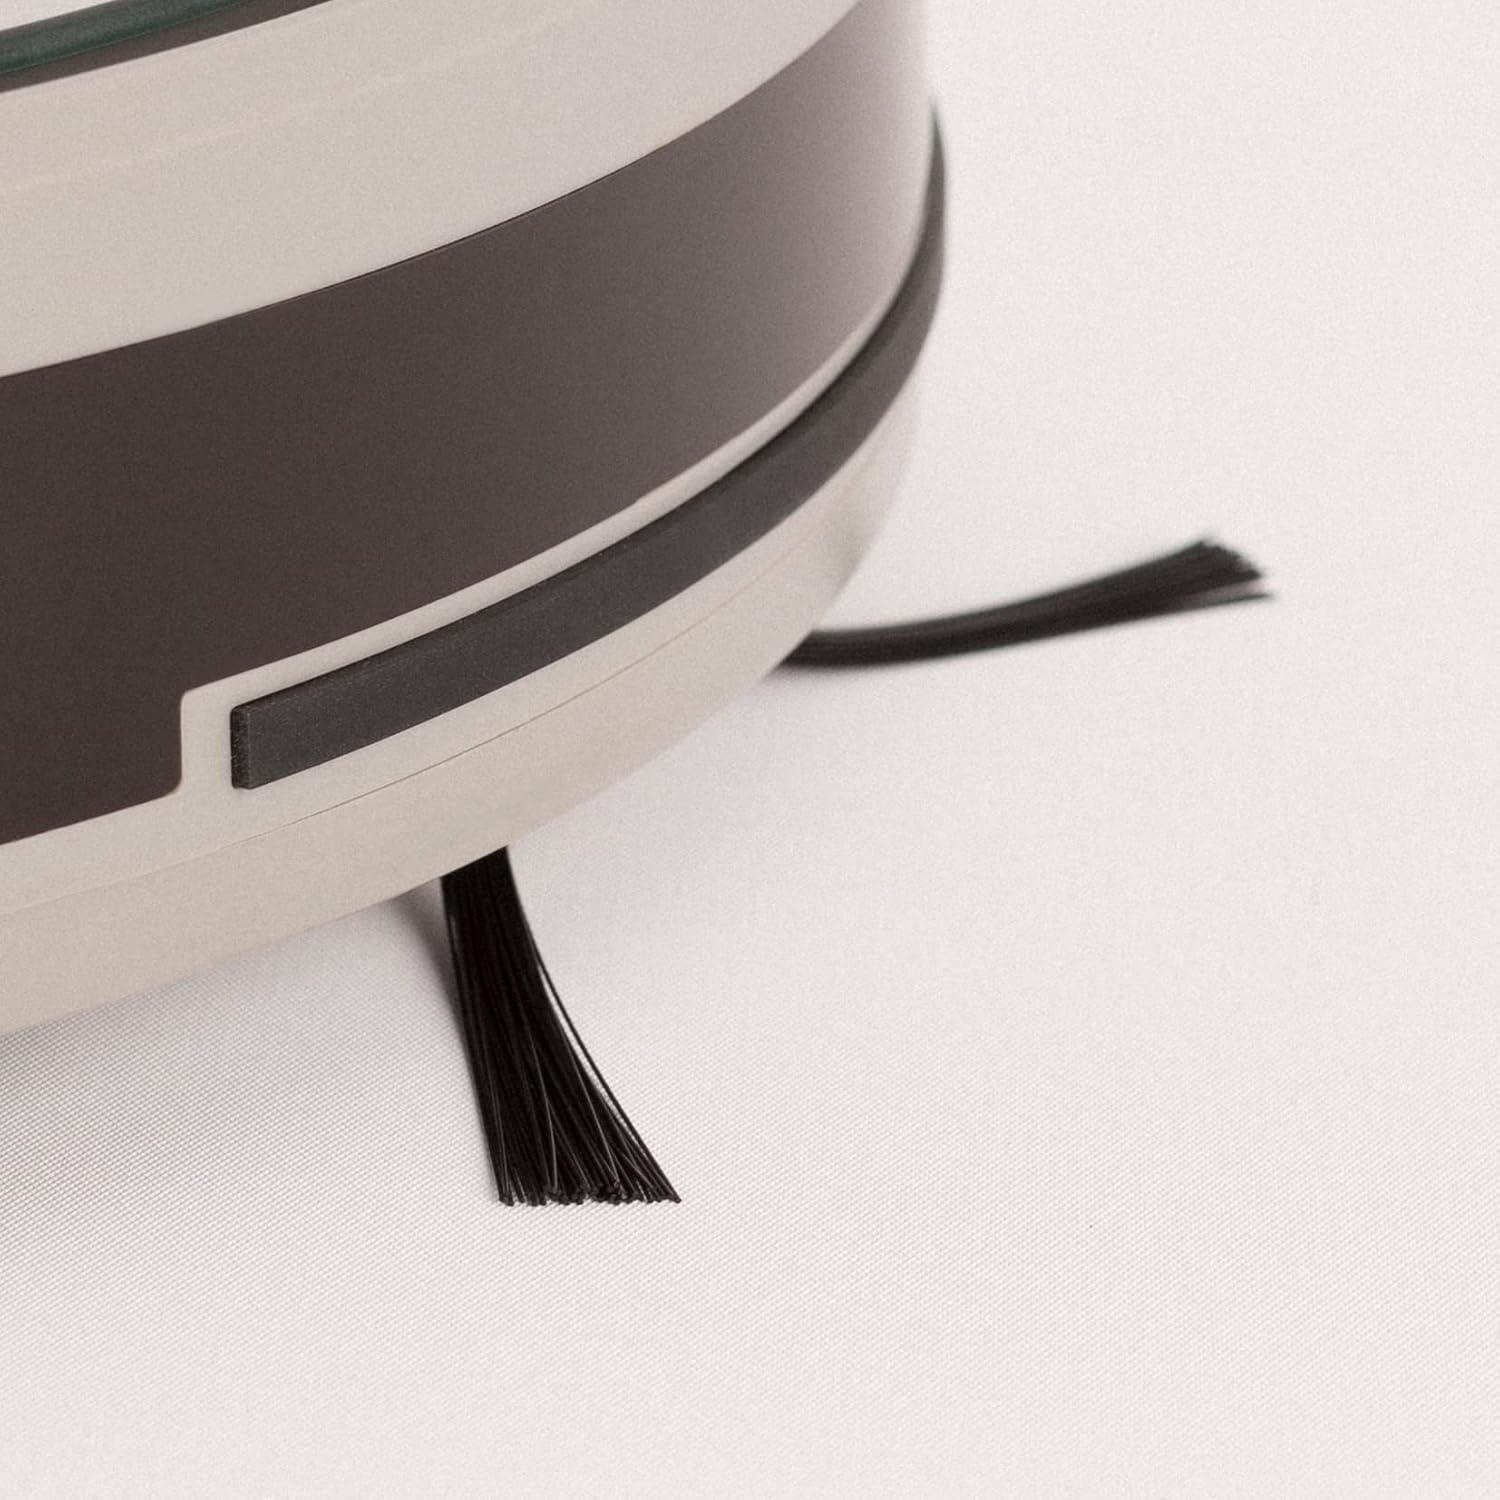
Image 7.2: Close-up of a side brush, showing its bristles and attachment point.
7.4 ການເຮັດຄວາມສະອາດຖັງນໍ້າ ແລະ ຜ້າຖູພື້ນ
ຫຼັງຈາກແຕ່ລະກອງປະຊຸມ mopping:
- ລ້າງນ້ໍາທີ່ຍັງເຫຼືອອອກຈາກຖັງ.
- Remove the mop pad and rinse it thoroughly with water. Allow it to air dry.
- ເຮັດຄວາມສະອາດຖັງນ້ໍາດ້ວຍການໂຄສະນາamp ຜ້າ.
7.5 ການເຮັດຄວາມສະອາດເຊັນເຊີ
Wipe all sensors (cliff sensors, bumper sensor) with a clean, dry cloth monthly to ensure proper navigation.
8. ການແກ້ໄຂບັນຫາ
If you encounter issues with your robot, refer to the following table:
| ບັນຫາ | ສາເຫດທີ່ເປັນໄປໄດ້ | ການແກ້ໄຂ |
|---|---|---|
| ຫຸ່ນຍົນບໍ່ເປີດ | ຫມໍ້ໄຟຕ່ໍາ; ປິດໄຟ | Charge the robot; Ensure power switch is on |
| ຫຸ່ນຍົນບໍ່ສາມາດສາກໄຟໄດ້ | ການສາກໄຟຕິດຕໍ່ເປື້ອນ; Dock ບໍ່ໄດ້ສາກໄຟ | Clean charging contacts; Check power adapter connection |
| ປະສິດທິພາບທໍາຄວາມສະອາດບໍ່ດີ | Dust bin full; Brushes tangled; Filter clogged | Empty dust bin; Clean main/side brushes; Clean/replace filter |
| ຫຸ່ນຍົນຕິດຢູ່ເລື້ອຍໆ | ອຸປະສັກໃນຊັ້ນ; Cliff sensors ເປື້ອນ | ພື້ນທີ່ຈະແຈ້ງ; ເຊັນເຊີ Cliff ສະອາດ |
| ການເຊື່ອມຕໍ່ແອັບຯລົ້ມເຫລວ | Incorrect Wi-Fi password; Router too far; 5GHz Wi-Fi | Verify password; Move robot closer to router; Ensure 2.4GHz Wi-Fi |
ຖ້າບັນຫາຍັງຄົງຢູ່, ກະລຸນາຕິດຕໍ່ຝ່າຍຊ່ວຍເຫຼືອລູກຄ້າ.
9. ຂໍ້ມູນຈໍາເພາະ
- ຍີ່ຫໍ້: ສ້າງ
- ຊື່ຕົວແບບ: NETBOT S40
- ໝາຍເລກຕົວແບບ: 130436_269434
- ແຮງດູດ: 4000 Pa (as per product description)
- ຊີວິດຫມໍ້ໄຟ: Up to 220 minutes (as per product description)
- ການເຊື່ອມຕໍ່: Wi-Fi, App Control, Alexa compatible
- ຂະໜາດ: 64 x 40 x 12 ຊມ (ຂະໜາດກ່ອງ)
- ນ້ໍາຫນັກລາຍການ: 116 Grams (as per specifications, likely product weight is higher, but using provided data)
- ແບັດເຕີຣີລວມ: ແມ່ນແລ້ວ
10. ການຮັບປະກັນແລະການສະຫນັບສະຫນູນ
Your CREATE NETBOT S40 comes with a standard manufacturer's warranty. Please refer to the warranty card included in your package for specific terms and conditions, including warranty period and coverage.
For technical support, troubleshooting assistance, or to inquire about replacement parts, please contact CREATE customer service through their official webເວັບໄຊ ຫຼືຂໍ້ມູນຕິດຕໍ່ທີ່ສະໜອງໃຫ້ຢູ່ໃນເອກະສານຜະລິດຕະພັນຂອງທ່ານ.


