ແນະນຳ
The aigo P6 CPU Air Cooler is engineered to provide superior thermal performance for a wide range of Intel and AMD processors. Featuring 6 heat pipes and a 120mm PWM fan with Addressable RGB lighting, this cooler ensures efficient heat dissipation and quiet operation, enhancing your system's stability and aesthetics. This manual provides comprehensive instructions for proper installation, operation, and maintenance to ensure optimal performance and longevity of your aigo P6 CPU Air Cooler.
ຂໍ້ມູນຄວາມປອດໄພ
- Ensure your system is powered off and unplugged from the wall outlet before beginning installation or maintenance.
- Handle components with care to avoid damage to the cooler or motherboard.
- Thermal paste is conductive; avoid excessive application or contact with electrical components.
- ເກັບຮັກສາຊິ້ນສ່ວນນ້ອຍໆ ແລະວັດສະດຸຫຸ້ມຫໍ່ໃຫ້ຫ່າງຈາກເດັກນ້ອຍ.
- Refer to your motherboard manual for specific CPU socket and fan header locations.
ເນື້ອໃນຊຸດ
ກວດສອບວ່າອົງປະກອບທັງຫມົດແມ່ນມີກ່ອນທີ່ຈະສືບຕໍ່ການຕິດຕັ້ງ:
- aigo P6 CPU Air Cooler Heatsink
- 120mm PWM Fan with ARGB
- Universal Backplate (for Intel/AMD)
- Intel Mounting Brackets and Screws
- AMD Mounting Brackets and Screws
- ທໍ່ລະບາຍຄວາມຮ້ອນ
- ແຟນຄລັບ
- ARGB Controller (if not using motherboard ARGB)
- ຄູ່ມືຜູ້ໃຊ້ (ເອກະສານນີ້)
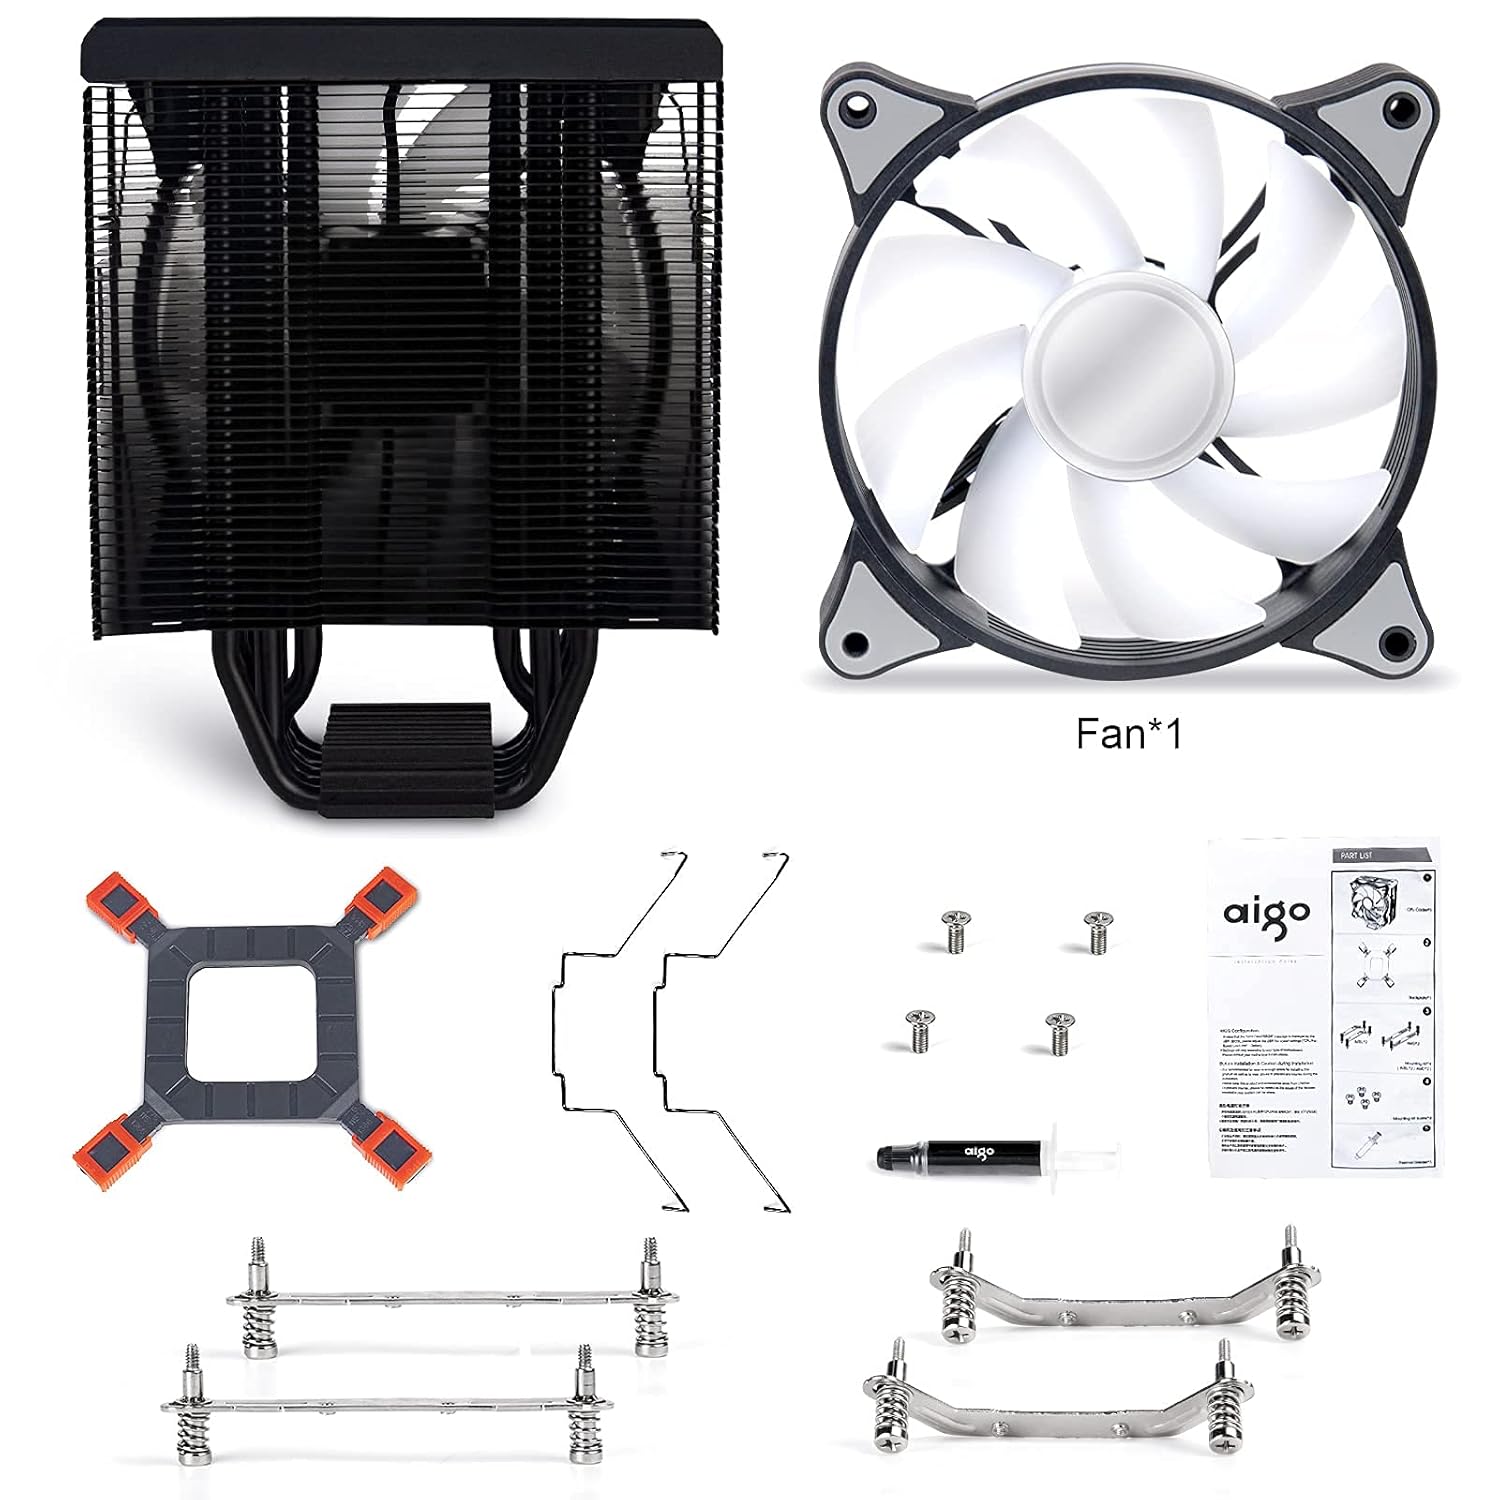
ຮູບທີ 1: All components included with the aigo P6 CPU Air Cooler. This image displays the heatsink, fan, universal backplate, various mounting brackets for Intel and AMD, screws, thermal paste, and fan clips.
ການຕິດຕັ້ງແລະການຕິດຕັ້ງ
Follow these steps carefully for proper installation of your aigo P6 CPU Air Cooler. Ensure your system is powered off and unplugged before starting.
1. ກະກຽມ Motherboard
Depending on your CPU socket type (Intel or AMD), you will use different mounting hardware. The installation video below demonstrates both processes.
ວິດີໂອ 1: Official installation guide for the aigo P6 CPU Air Cooler, covering both Intel and AMD platforms. This video provides a visual walkthrough of each step, from preparing the motherboard to mounting the heatsink and connecting the fan.
For Intel Sockets (LGA 775/115X/1200/1366)
- Attach the Intel mounting brackets to the heatsink base using the provided screws. Ensure they are securely fastened.
- Adjust the universal backplate to match your Intel socket's mounting holes. Insert the four standoffs through the backplate and the motherboard's CPU cooler mounting holes.
- Apply a small amount of thermal paste to the center of your CPU's integrated heat spreader (IHS). A pea-sized or X-pattern application is generally sufficient.
- Carefully place the heatsink onto the CPU, aligning the screws on the heatsink brackets with the standoffs on the motherboard. Tighten the screws in a diagonal pattern until snug, ensuring even pressure.
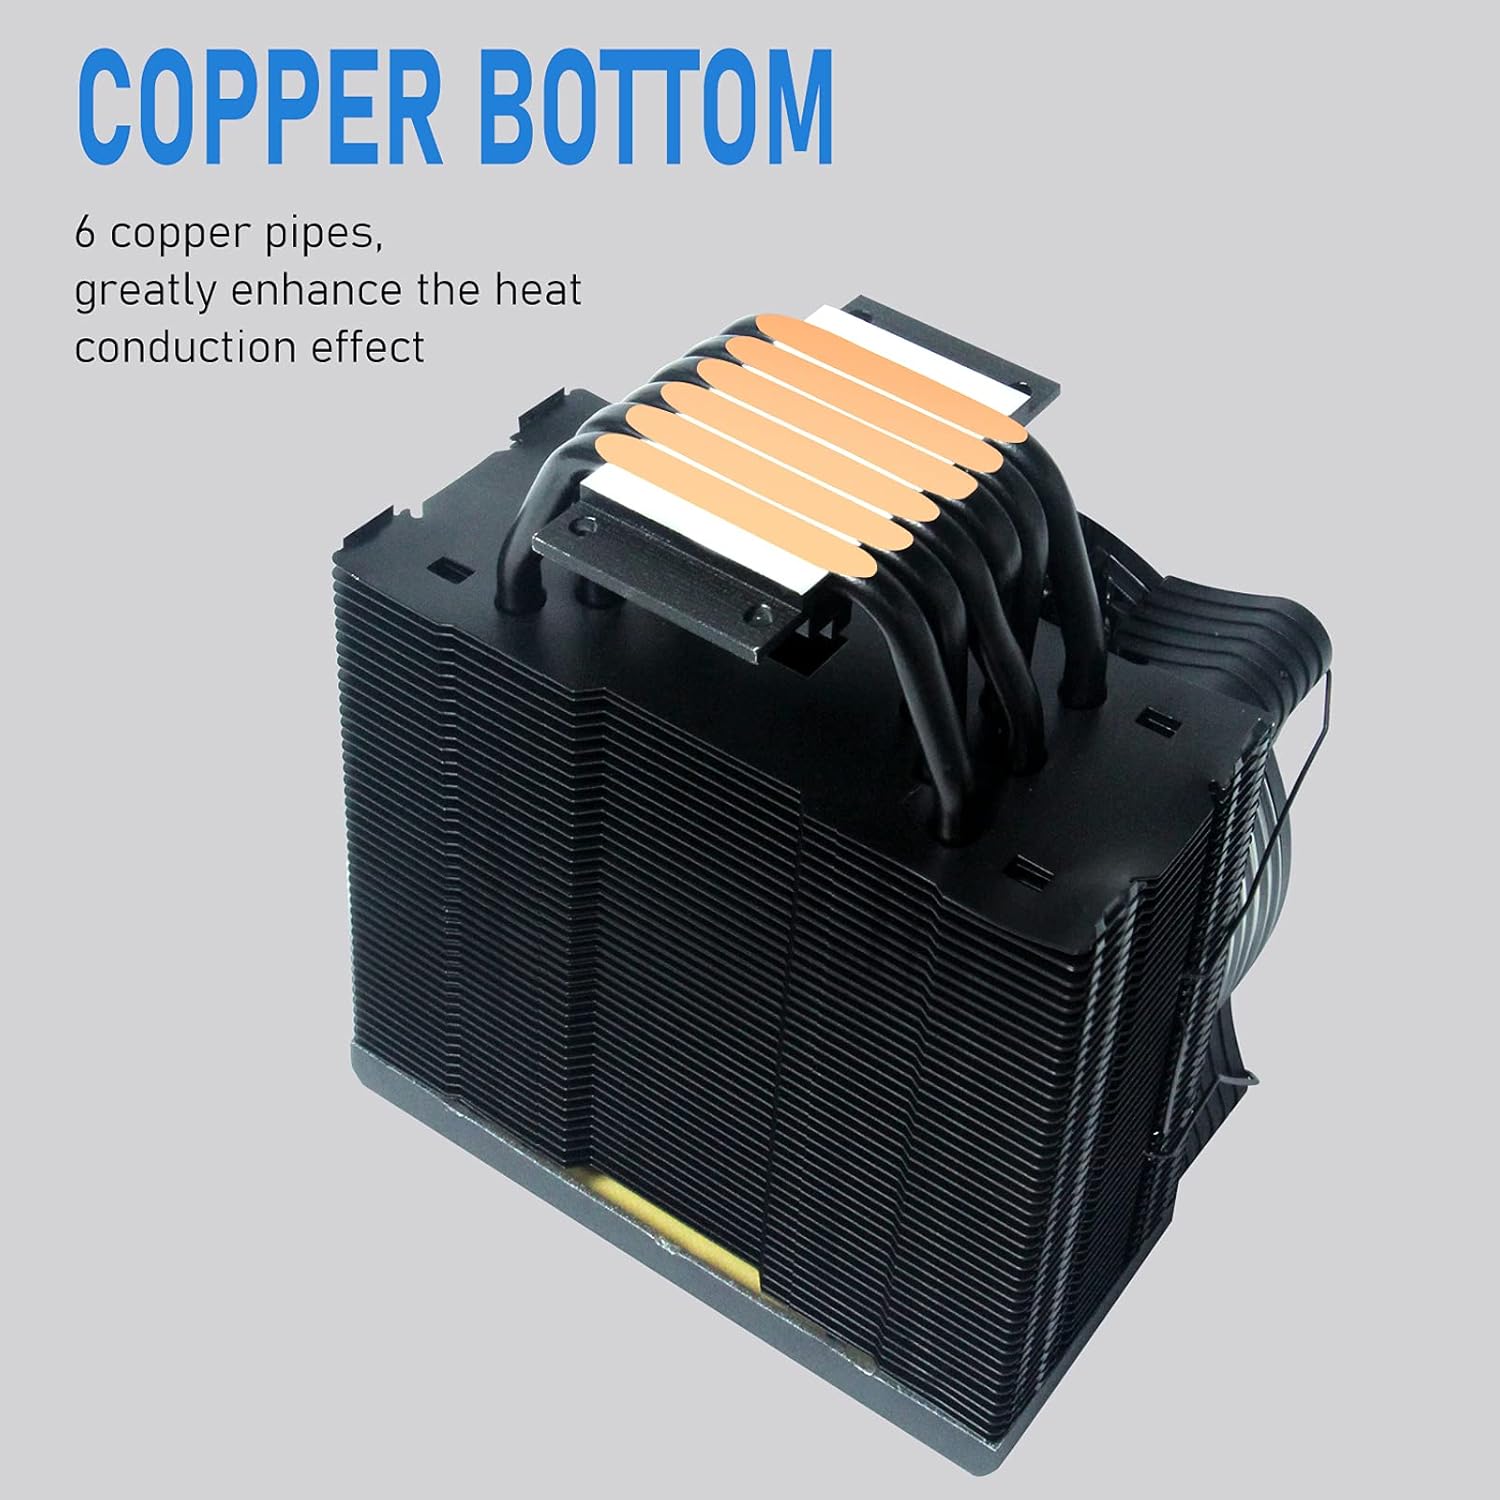
ຮູບທີ 2: The copper base of the aigo P6 CPU Air Cooler, showing the direct contact heat pipes. This surface makes direct contact with the CPU for efficient heat transfer.
For AMD Sockets (AM4/AM3+/AM3/AM2+/AM2)
- Remove the existing plastic retention clips from the motherboard's CPU socket. Keep the original backplate if your motherboard has one.
- Attach the AMD mounting brackets to the heatsink base using the provided screws. Ensure they are securely fastened.
- Apply a small amount of thermal paste to the center of your CPU's integrated heat spreader (IHS). A pea-sized or X-pattern application is generally sufficient.
- Carefully place the heatsink onto the CPU, aligning the screws on the heatsink brackets with the motherboard's original backplate screw holes. Tighten the screws in a diagonal pattern until snug, ensuring even pressure.
2. ຕິດຕັ້ງພັດລົມ
Once the heatsink is securely mounted, attach the 120mm PWM fan to the heatsink using the provided fan clips. Ensure the fan is oriented to blow air through the heatsink fins towards the rear of your PC case for optimal airflow.

ຮູບທີ 3: The aigo P6 CPU Air Cooler with its 120mm PWM fan attached, showcasing the vibrant RGB lighting capabilities.
3. ເຊື່ອມຕໍ່ສາຍ
- ເຊື່ອມຕໍ່ສາຍພັດລົມ PWM 4-pin ເຂົ້າກັບຫົວ "CPU_FAN" ເທິງເມນບອດຂອງທ່ານ.
- Connect the 3-pin Addressable RGB (ARGB) cable to a 5V 3-pin ARGB header on your motherboard. If your motherboard does not have a 5V 3-pin ARGB header, use the included ARGB controller and connect it to a SATA power connector from your power supply.

ຮູບທີ 4: ໃກ້ຊິດ view of the 3-pin ARGB connector and 4-pin PWM connector for the aigo P6 CPU Air Cooler. These are essential for fan speed control and lighting synchronization.
ຄໍາແນະນໍາການດໍາເນີນງານ
ການຄວບຄຸມພັດລົມ (PWM)
The 120mm fan supports Pulse Width Modulation (PWM), allowing your motherboard to automatically control the fan speed based on CPU temperature. This ensures optimal cooling performance while minimizing noise. You can typically adjust fan curves and settings within your motherboard's BIOS/UEFI or through manufacturer-provided software.
- ຄວາມໄວພັດລົມ: 800-1600 RPM ± 20%
- ການໄຫຼທາງອາກາດ: 74 CFM (ສູງສຸດ)
- ລະດັບສຽງລົບກວນ: 14-25.8 dB(A)
ໄຟ RGB ທີ່ສາມາດແກ້ໄຂໄດ້
The integrated Addressable RGB lighting provides vibrant and customizable lighting effects. Control of the ARGB lighting depends on your connection method:
- Motherboard Sync: If connected to a 5V 3-pin ARGB header, you can control the lighting effects using your motherboard's RGB software (e.g., ASUS Aura Sync, MSI Mystic Light Sync, Gigabyte RGB Fusion, ASRock Polychrome Sync).
- ຕົວຄວບຄຸມ ARGB: If using the included ARGB controller, you can cycle through various lighting modes and colors using the physical buttons on the controller. Refer to the controller's specific instructions for detailed operation.
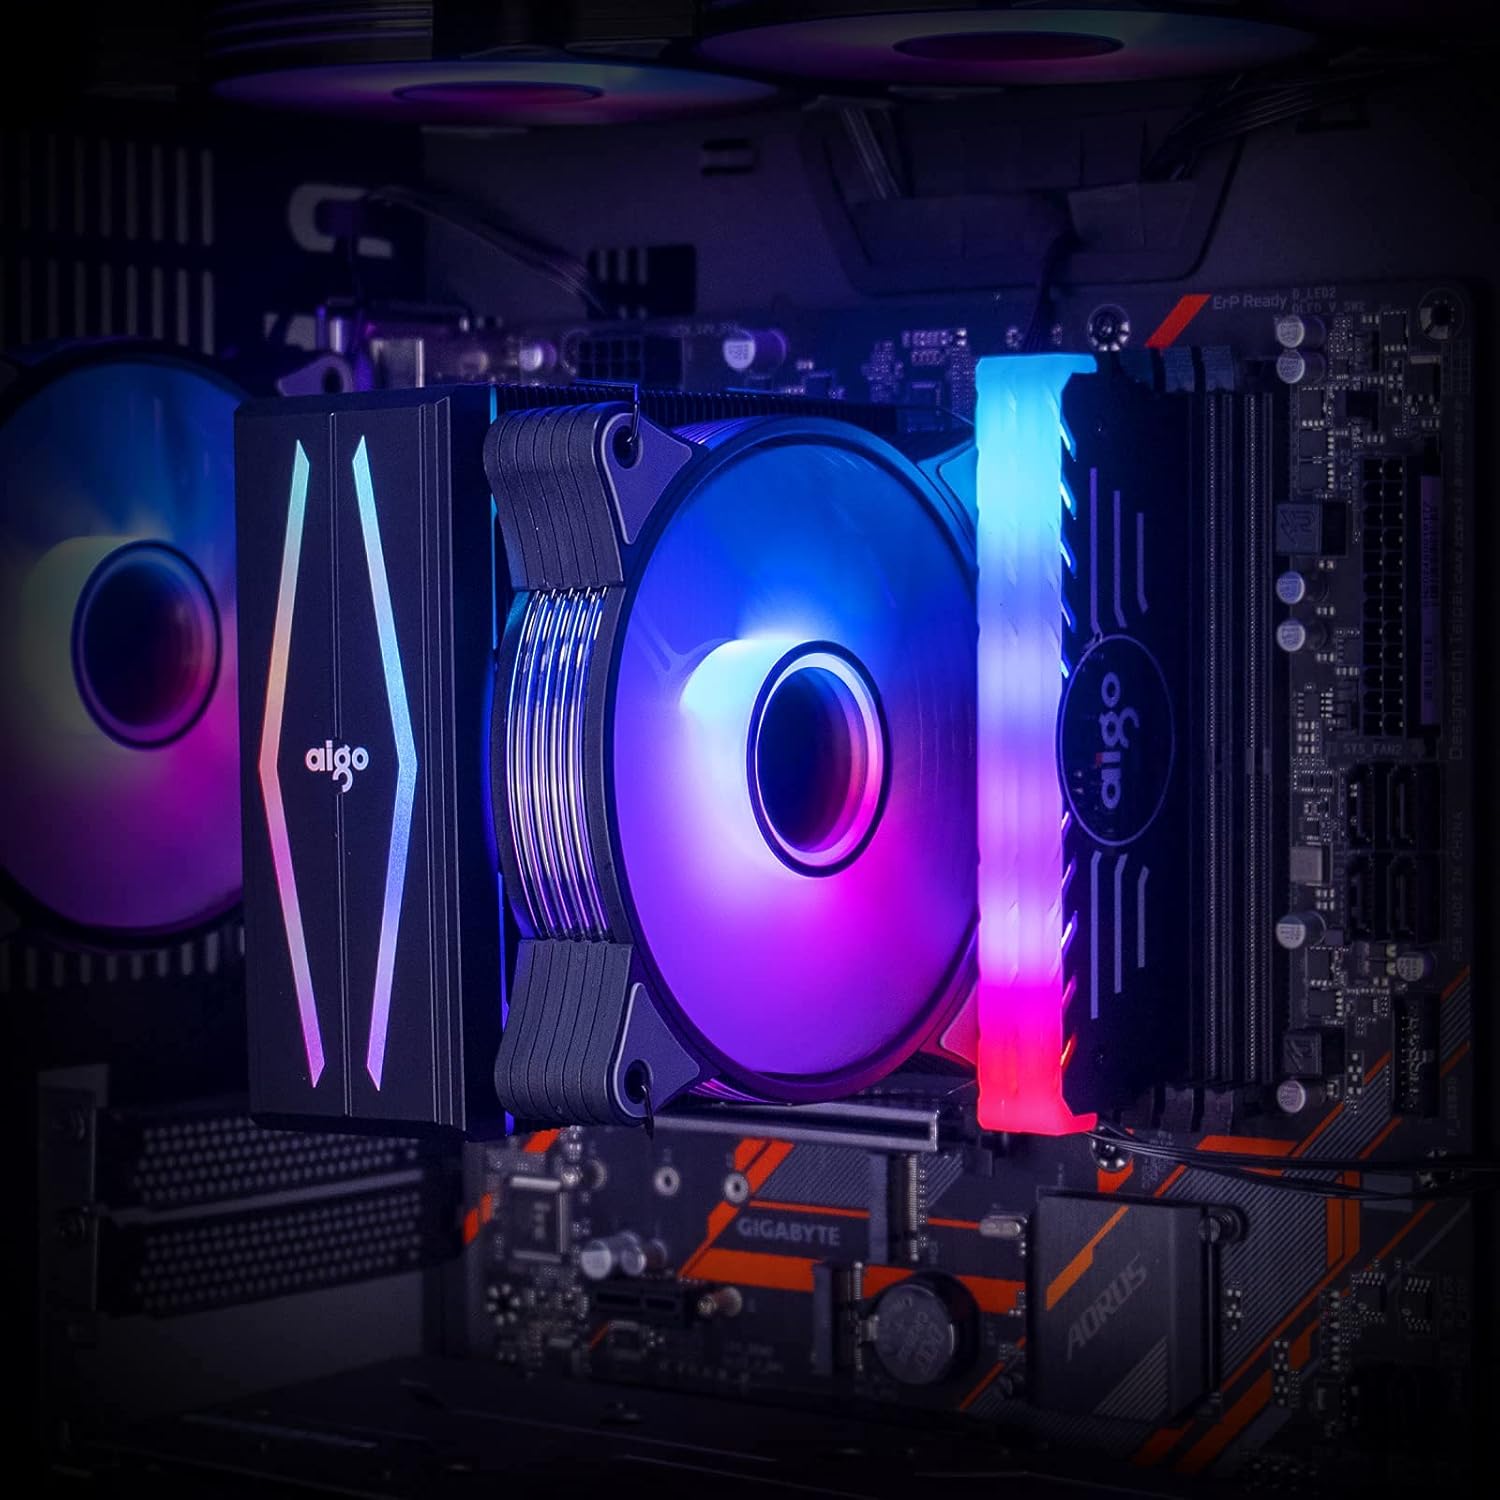
ຮູບທີ 5: The aigo P6 CPU Air Cooler installed within a computer system, demonstrating its illuminated fan and top cover, contributing to the overall aesthetic of the build.
ບໍາລຸງຮັກສາ
ການບຳລຸງຮັກສາແບບປົກກະຕິຈະຊ່ວຍຮັບປະກັນອາຍຸຍືນ ແລະປະສິດທິພາບທີ່ດີທີ່ສຸດຂອງເຄື່ອງເຮັດຄວາມເຢັນ CPU ຂອງທ່ານ.
- ທໍາຄວາມສະອາດຂີ້ຝຸ່ນ: ເຊັດຂີ້ຝຸ່ນອອກຈາກຄີບລະບາຍຄວາມຮ້ອນ ແລະ ໃບພັດລົມເປັນໄລຍະໂດຍໃຊ້ລົມອັດ ຫຼື ແປງອ່ອນໆ. ຮັບປະກັນວ່າພັດລົມບໍ່ໝຸນໃນລະຫວ່າງການທຳຄວາມສະອາດເພື່ອປ້ອງກັນຄວາມເສຍຫາຍຕໍ່ແບຣິ່ງ.
- ການວາງຄວາມຮ້ອນ: Reapply thermal paste if you remove the cooler from the CPU. Old thermal paste can dry out and reduce cooling efficiency.
- ການກວດກາພັດລົມ: Check the fan for any unusual noises or wobbling. If the fan is damaged or excessively noisy, consider replacing it.
ການແກ້ໄຂບັນຫາ
| ບັນຫາ | ສາເຫດທີ່ເປັນໄປໄດ້ | ການແກ້ໄຂ |
|---|---|---|
| Fan not spinning or spinning slowly. | Incorrect fan header connection, insufficient power, or BIOS settings. | Ensure 4-pin PWM cable is connected to "CPU_FAN" header. Check BIOS/UEFI settings for fan speed control. Verify power supply connections. |
| ໄຟ RGB ບໍ່ເຮັດວຽກ. | Incorrect ARGB header connection, incompatible header (12V RGB vs. 5V ARGB), or software issue. | Ensure 3-pin ARGB cable is connected to a 5V 3-pin ARGB header. Do NOT connect to a 12V 4-pin RGB header. If using controller, ensure it's powered via SATA. Check motherboard RGB software. |
| High CPU temperatures. | Improper thermal paste application, loose heatsink mounting, insufficient airflow in case, or fan not spinning optimally. | Reapply thermal paste. Ensure heatsink is securely mounted with even pressure. Check case airflow and fan orientation. Verify fan speed settings. |
| ສຽງພັດລົມດັງ. | High fan speed, dust accumulation, or faulty fan bearing. | Adjust fan curve in BIOS/UEFI to lower speeds at idle. Clean fan blades. If noise persists, the fan may need replacement. |
ຂໍ້ມູນຈໍາເພາະ
| ຄຸນສົມບັດ | ລາຍລະອຽດ |
|---|---|
| ໝາຍເລກຕົວແບບ | aigo P6 CPU Air Cooler |
| ຂະໜາດ (L x W x H) | 4.72"L x 0.98"W x 4.72"H (Fan) / 6.5 x 4.1 x 6.7 inches (Product) |
| ທໍ່ຄວາມຮ້ອນ | 6 x 6mm Direct Contact Copper Heat Pipes |
| TDP | 180W |
| ຂະໜາດພັດລົມ | 120mm PWM |
| ຄວາມໄວພັດລົມ | 800-1600 RPM ± 20% |
| ກະແສລົມ | 74 CFM (ສູງສຸດ) |
| ລະດັບສຽງ | 14-25.8 dB(A) |
| ຕົວເຊື່ອມຕໍ່ພະລັງງານ | 4-Pin PWM |
| ຕົວເຊື່ອມຕໍ່ RGB | 3-Pin Addressable RGB (5V) |
| ເຕົ້າສຽບທີ່ເຂົ້າກັນໄດ້ | Intel: LGA 1366/1200/1156/1155/1151/1150/775 AMD: AM4/AM3+/AM3/AM2+/AM2/FM2+/FM2 |
| ວັດສະດຸ | Aluminum (fins), Copper (heat pipes/base) |

ຮູບທີ 6: Detailed dimensions of the aigo P6 CPU Air Cooler, including height, width, and depth measurements for compatibility assessment within PC cases.
ການຮັບປະກັນແລະການສະຫນັບສະຫນູນ
The aigo P6 CPU Air Cooler is covered by the standard manufacturer's warranty. For specific warranty terms, technical support, or service inquiries, please refer to the official aigo website ຫຼືຕິດຕໍ່ສະຫນັບສະຫນູນລູກຄ້າຂອງເຂົາເຈົ້າໂດຍກົງ. ຮັກສາຫຼັກຖານການຊື້ຂອງທ່ານສໍາລັບການຮ້ອງຂໍການຮັບປະກັນ.
ທ່ານສາມາດຊອກຫາຂໍ້ມູນເພີ່ມເຕີມແລະລາຍລະອຽດການຕິດຕໍ່ກ່ຽວກັບການ aigo Store.


