1. ບົດແນະນຳ
ຂອບໃຈສໍາລັບການຊື້asing the VILINICE 6500 Lumens 720P Native Portable Projector. This manual provides essential information for the safe and efficient operation of your device. Please read it thoroughly before use and retain it for future reference.
2. ຂໍ້ມູນຄວາມປອດໄພ
To ensure safe operation and prolong the lifespan of your projector, please observe the following safety precautions:
- ຢ່າອຸດຕັນຊ່ອງລະບາຍອາກາດ. ຮັບປະກັນໃຫ້ມີກະແສລົມໄຫຼວຽນພຽງພໍອ້ອມຮອບໂປເຈັກເຕີເພື່ອປ້ອງກັນຄວາມຮ້ອນເກີນໄປ.
- Avoid direct exposure to the projector lens light. The bright light can cause eye strain or damage.
- Do not place the projector in unstable locations. Ensure it is on a flat, stable surface to prevent falls.
- ເກັບຮັກສາໂປເຈັກເຕີໃຫ້ຫ່າງຈາກນໍ້າ, ຄວາມຊຸ່ມ ແລະ ວັດສະດຸໄວໄຟ.
- ໃຊ້ພຽງແຕ່ອະແດັບເຕີໄຟທີ່ສະໜອງໃຫ້ກັບໂປເຈັກເຕີເທົ່ານັ້ນ.
- ຢ່າພະຍາຍາມສ້ອມແປງໂປເຈັກເຕີດ້ວຍຕົວທ່ານເອງ. ໃຫ້ແນະນຳບໍລິການທັງໝົດໃຫ້ກັບພະນັກງານທີ່ມີຄຸນວຸດທິ.
- ຖອດສາຍໂປເຈັກເຕີໃນລະຫວ່າງການມີຟ້າຜ່າ ຫຼືເມື່ອບໍ່ໄດ້ໃຊ້ເປັນເວລາດົນນານ.
3. ເນື້ອໃນຊຸດ
ກະລຸນາກວດເບິ່ງເນື້ອໃນຂອງແພັກເກດເມື່ອເປີດ. ຖ້າລາຍການໃດຂາດຫາຍໄປ ຫຼືເສຍຫາຍ, ໃຫ້ຕິດຕໍ່ຝ່າຍຊ່ວຍເຫຼືອລູກຄ້າ.
- VILINICE 6500 Lumens 720P Native Portable Projector
- ການຄວບຄຸມໄລຍະໄກ
- ສາຍໄຟ
- ສາຍ HDMI
- ສາຍ AV
- ຄູ່ມືຜູ້ໃຊ້
- 100-inch Projector Screen (as indicated in product images)
4. ຜະລິດຕະພັນເກີນview
ຮູ້ຈັກກັບອົງປະກອບ ແລະ ອິນເຕີເຟດຂອງໂປເຈັກເຕີ.

Image: The VILINICE projector shown with its remote controls, highlighting its compact design.
4.1 ດ້ານໜ້າ ແລະ ດ້ານຂ້າງ View
- ເລນການສາຍ: ປ່ອຍຮູບພາບລົງເທິງໜ້າຈໍ.
- ແຫວນຈຸດສຸມ: ປັບຄວາມຊັດເຈນຂອງຮູບພາບ.
- ວົງແຫວນແກ້ໄຂ Keystone: ແກ້ໄຂການບິດເບືອນຮູບພາບ trapezoidal.
- ການເປີດລະບາຍອາກາດ: ສຳລັບການລະບາຍຄວາມຮ້ອນ. ຫ້າມອຸດຕັນ.

Image: The projector's rear and side panels displaying multiple connectivity options including AV, AUX, HDMI, USB, VGA, and SD card slot.
4.2 Rear and Side Interfaces
- ພອດ AV: ສໍາລັບການເຊື່ອມຕໍ່ອຸປະກອນເກົ່າໂດຍໃຊ້ສາຍ AV.
- AUX (Audio Out) Port: ສໍາລັບການເຊື່ອມຕໍ່ລໍາໂພງພາຍນອກຫຼືຫູຟັງ.
- ຜອດ HDMI (x2): For connecting devices like laptops, gaming consoles, or TV sticks.
- ພອດ USB (x2): For connecting USB drives to play media or power devices.
- ຜອດ VGA: ສຳລັບເຊື່ອມຕໍ່ຄອມພິວເຕີທີ່ມີຜົນຜະລິດ VGA.
- ຊ່ອງໃສ່ບັດ SD: ສຳລັບການຫຼິ້ນສື່ໂດຍກົງຈາກ SD card.
- ການປ້ອນຂໍ້ມູນພະລັງງານ: ເຊື່ອມຕໍ່ກັບອະແດບເຕີພະລັງງານ.
5. ຕັ້ງຄ່າ
5.1 ການວາງຕຳແໜ່ງ ແລະ ການສາຍພາບ
Position the projector on a stable surface. The optimal projection distance and screen size can vary. Ensure the projector is perpendicular to the screen for the best image quality.

Image: The projector set up for an outdoor movie night, demonstrating its portability and the included 100-inch screen.
The projector also features a mounting hole for ceiling or tripod installation.
ຮູບພາບ: A ລາຍລະອຽດ view of the projector's mounting hole, suitable for various installation methods.
5.2 ການເຊື່ອມຕໍ່ພະລັງງານ
Connect the power cable to the projector's power input and then plug it into a power outlet.
5.3 ຈຸດສຸມແລະການແກ້ໄຂ Keystone
After powering on, adjust the focus ring on the projector lens until the image is clear. If the image appears trapezoidal, use the keystone correction ring to adjust it to a rectangular shape.

Image: Visual guide demonstrating how to adjust the focus and keystone correction for a clear and properly shaped image.
5.4 ອຸປະກອນເຊື່ອມຕໍ່
ໂປເຈັກເຕີຮອງຮັບແຫຼ່ງປ້ອນຂໍ້ມູນຕ່າງໆ:
- HDMI: Connect laptops, TV sticks, gaming consoles (PS4, Xbox), or DVD players using an HDMI cable.
- USB: Insert a USB disk to play photos, videos, or music directly.
- VGA: ເຊື່ອມຕໍ່ຄອມພິວເຕີ ຫຼືໂນດບຸກລຸ້ນເກົ່າໂດຍໃຊ້ສາຍ VGA.
- ຂອງ: Connect legacy devices like VCRs or older DVD players.
- SD ກາດ: Insert an SD card into the slot to access media files.
- ໂທລະສັບສະຫຼາດ: For smartphone connectivity, an external MHL HDMI adapter (not included) may be required.
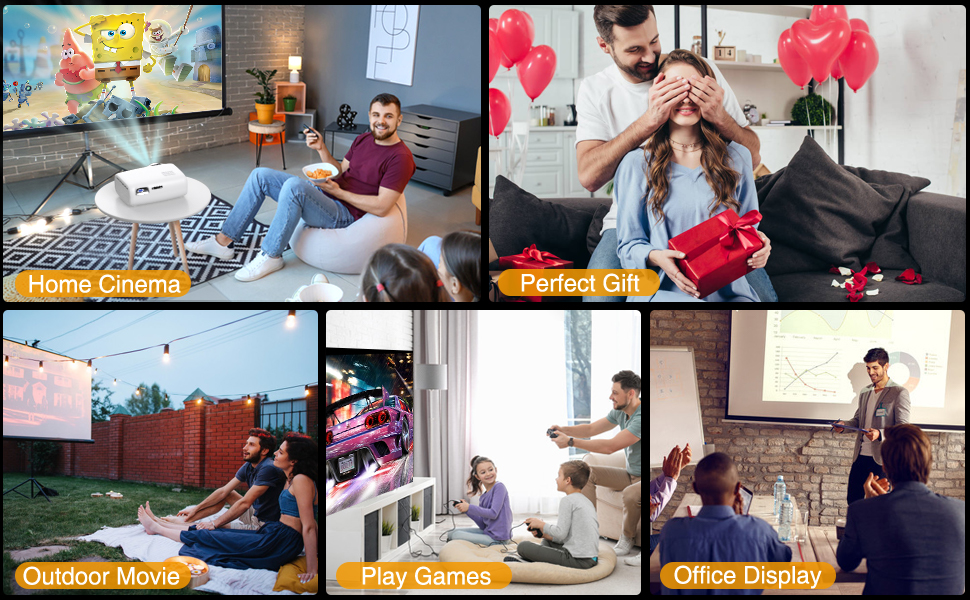
Image: Illustration of connecting a smartphone or laptop to the projector, emphasizing ease of use.
6. ການດໍາເນີນງານ
6.1 ການເປີດ/ປິດ
ກົດປຸ່ມເປີດປິດຢູ່ໂປເຈັກເຕີ ຫຼືຣີໂໝດຄວບຄຸມເພື່ອເປີດ ຫຼືປິດອຸປະກອນ.
6.2 ການເລືອກແຫຼ່ງປ້ອນຂໍ້ມູນ
Use the "Source" button on the remote control or the projector's control panel to select the desired input source (HDMI1, HDMI2, USB, VGA, AV, SD Card).
6.3 ການປັບການຕັ້ງຄ່າ
Navigate the on-screen menu using the remote control to adjust various settings:
- ການຕັ້ງຄ່າຮູບ: ປັບຄວາມສະຫວ່າງ, ຄວາມຄົມຊັດ, ສີ ແລະ ອັດຕາສ່ວນ.
- ການຕັ້ງຄ່າສຽງ: Control volume and audio modes. The projector features a built-in HiFi stereo speaker for an immersive audio experience.
- ຟັງຊັນຊູມ: The projector supports a 100%-75% zoom function, allowing you to adjust the screen size without moving the projector.
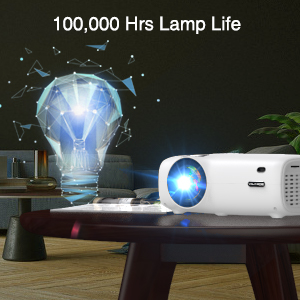
Image: Visual representation of the projector's zoom function, showing how the image size can be reduced from 100% to 75%.

Image: A family enjoying a movie projected by the VILINICE projector, highlighting the built-in HiFi stereo speaker for a great auditory experience.
7. ບໍາລຸງຮັກສາ
Proper maintenance ensures optimal performance and longevity of your projector.
- ການອະນາໄມເລນ: Use a soft, lint-free cloth and lens cleaning solution specifically designed for optical lenses. Do not use abrasive cleaners.
- ການກຳຈັດຂີ້ຝຸ່ນ: Regularly clean the projector's exterior with a soft, dry cloth. Use a can of compressed air to gently clear dust from ventilation openings.
- ການເກັບຮັກສາ: ເມື່ອບໍ່ໄດ້ໃຊ້ງານ, ໃຫ້ເກັບຮັກສາໂປເຈັກເຕີໄວ້ໃນບ່ອນທີ່ເຢັນ, ແຫ້ງ, ຫ່າງຈາກແສງແດດໂດຍກົງ ແລະ ອຸນຫະພູມທີ່ຮຸນແຮງ.
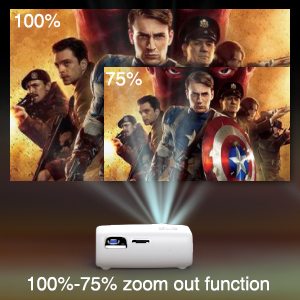
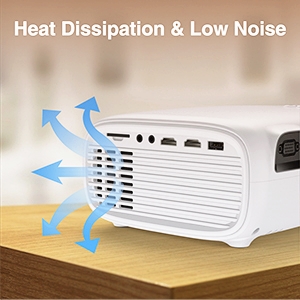
Image: Illustration of the projector's heat dissipation system, designed for efficient cooling and low noise operation.
The projector is designed with a long-lasting lamp ຊີວິດເຖິງ 100,000 ຊົ່ວໂມງ.

Image: A visual representation emphasizing the projector's extended lamp lifespan of 100,000 hours.
8. ການແກ້ໄຂບັນຫາ
ຖ້າຫາກທ່ານພົບບັນຫາ, ເບິ່ງບັນຫາທົ່ວໄປດັ່ງຕໍ່ໄປນີ້ແລະການແກ້ໄຂ:
- ບໍ່ມີພະລັງງານ:
- ໃຫ້ແນ່ໃຈວ່າສາຍໄຟໄດ້ເຊື່ອມຕໍ່ກັບທັງໂປເຈັກເຕີ ແລະ ປລັກໄຟຢ່າງແໜ້ນໜາແລ້ວ.
- ກວດເບິ່ງວ່າປລັກສຽບໄຟເຮັດວຽກຫຼືບໍ່.
- ບໍ່ມີຮູບພາບ:
- Verify the input source is correctly selected (e.g., HDMI1, USB).
- Check the connection cable (HDMI, VGA, AV) between the projector and the source device.
- ກວດໃຫ້ແນ່ໃຈວ່າອຸປະກອນແຫຼ່ງແມ່ນເປີດ ແລະສົ່ງສັນຍານອອກ.
- ຮູບມົວ:
- ປັບວົງການໂຟກັສໃສ່ເລນໂປເຈັກເຕີ.
- ໃຫ້ແນ່ໃຈວ່າໄລຍະການຄາດຄະເນຢູ່ໃນຂອບເຂດທີ່ແນະນໍາ.
- ທຳຄວາມສະອາດເລນໂປເຈັກເຕີຖ້າມັນເປື້ອນ.
- Trapezoidal Image:
- ປັບວົງແຫວນແກ້ໄຂ keystone ຈົນກວ່າຮູບພາບຈະເປັນຮູບສີ່ແຈສາກ.
- Ensure the projector is placed on a flat surface and is perpendicular to the screen.
- ບໍ່ມີສຽງ:
- ເພີ່ມລະດັບສຽງໃນທັງໂປເຈັກເຕີ ແລະອຸປະກອນແຫຼ່ງ.
- Check if external speakers are connected and properly functioning.
- Ensure the audio output settings on the source device are correct.
9. ຂໍ້ມູນຈໍາເພາະ
Below are the technical specifications for the VILINICE 6500 Lumens 720P Native Portable Projector:
| ຄຸນສົມບັດ | ຂໍ້ມູນຈໍາເພາະ |
|---|---|
| ຍີ່ຫໍ້ | ວິນລາ |
| ຄວາມລະອຽດການສະແດງ | ຕົ້ນສະບັບ 1280 x 720 (720P) |
| ຄວາມລະອຽດທີ່ຮອງຮັບ | 1080P ຄວາມລະອຽດ Full HD |
| ຄວາມສະຫວ່າງ | 6500 Lumens |
| ປະເພດການສະແດງ | ຈໍ LCD |
| ເຕັກໂນໂລຊີການເຊື່ອມຕໍ່ | HDMI, MHL, USB, VGA |
| ຄຸນນະສົມບັດພິເສດ | Portable, 100%-75% Zoom Function |
| ປະເພດລຳໂພງ | Built-In, Surround (HiFi Stereo) |
| Lamp ຊີວິດ | ສູງສຸດ 100,000 ຊົ່ວໂມງ |
| ນ້ໍາຫນັກລາຍການ | 4.92 ປອນ |
| ຂະໜາດສິນຄ້າ | 12.6 x 5.51 x 8.27 ນິ້ວ |
10. ການຮັບປະກັນແລະການສະຫນັບສະຫນູນ
VILINICE products come with a standard manufacturer's warranty. For detailed warranty information, product support, or technical assistance, please refer to the warranty card included in your package or visit the official VILINICE website. Do not attempt to open or modify the projector, as this may void your warranty.


