1. ບົດແນະນຳ
This manual provides comprehensive instructions for the operation and maintenance of your Fetcus Universal Remote Control, designed for various Hitachi Air Conditioner models. Please read this manual thoroughly before using the remote control to ensure proper function and longevity.
This remote control is a direct replacement or compatible alternative for original Hitachi air conditioner remote models including RAS-D10EX, RAR-5E1, RAS-10XH1, RAR-5E2, RAR-5E3, RAR-5E4, RAR-5E5, RAR-5E6, and RAS-D14EX2.
2. ຄຸນລັກສະນະຂອງຜະລິດຕະພັນ
- ຄວາມເຂົ້າກັນໄດ້ທົ່ວໂລກ: Designed to work with a wide range of Hitachi air conditioner models.
- ການເຊື່ອມຕໍ່ອິນຟາເລດ: Utilizes standard infrared signals for reliable communication with your AC unit.
- Dedicated AC Functions: Includes specific buttons for common air conditioner operations such as power, mode selection, temperature adjustment, fan speed, and more.
- ການອອກແບບກະທັດຮັດ: Ergonomic and easy to handle.
- No App Support: Operates independently without the need for a smartphone application.
- ຄວາມຖີ່: Operates at 433 MHz for signal transmission.
3. ຕັ້ງຄ່າ
3.1 ການຕິດຕັ້ງຫມໍ້ໄຟ
The remote control requires appropriate batteries for operation. Follow these steps to install or replace batteries:
- ຊອກຫາຊ່ອງໃສ່ຫມໍ້ໄຟຢູ່ດ້ານຫຼັງຂອງການຄວບຄຸມໄລຍະໄກ.
- Slide the battery compartment cover downwards or press the latch to open it.
- Insert new batteries, ensuring the positive (+) and negative (-) terminals align correctly with the markings inside the compartment. Typically, two AAA batteries are required, though specific battery type should be confirmed by checking the compartment markings.
- ປິດຝາປິດຊ່ອງໃສ່ແບັດໄວ້ຢ່າງປອດໄພຈົນກວ່າມັນຈະກົດໃສ່ບ່ອນ.

ຮູບທີ 3.1: ຫລັງ view of the Fetcus remote control with the battery compartment open, revealing the two battery slots and a label with battery safety warnings. This image illustrates the correct orientation for battery insertion.
ສຳຄັນ: ຖອດແບດເຕີລີ່ອອກຖ້າຫາກວ່າການຄວບຄຸມຫ່າງໄກສອກຫຼີກຈະບໍ່ຖືກນໍາໃຊ້ເປັນໄລຍະເວລາເພີ່ມເຕີມເພື່ອປ້ອງກັນການຮົ່ວໄຫຼແລະຄວາມເສຍຫາຍ.
4. ຄໍາແນະນໍາການດໍາເນີນງານ
Familiarize yourself with the buttons on your remote control. The remote features a main display and various control buttons for your air conditioner.
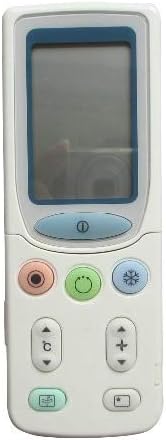
ຮູບທີ 4.1: ດ້ານໜ້າ view of the Fetcus remote control, highlighting the LCD screen and the primary control buttons for power, mode, and temperature adjustment.
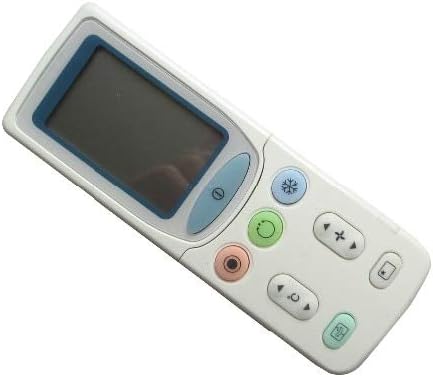
ຮູບທີ 4.2: ມຸມ view of the Fetcus remote control, showing the main display and primary function buttons including power, mode, and fan speed controls.
4.1 ຫນ້າທີ່ພື້ນຖານ
- ປຸ່ມເປີດປິດ (①): ກົດເພື່ອເປີດ ຫຼື ປິດເຄື່ອງປັບອາກາດ.
- ປຸ່ມໂໝດ (↻): Press repeatedly to cycle through operating modes: Auto, Cool, Dry, Fan, Heat (if applicable to your AC unit).
- ປຸ່ມປັບອຸນຫະພູມ (+ / -): ກົດເພື່ອເພີ່ມ ຫຼື ຫຼຸດການຕັ້ງຄ່າອຸນຫະພູມທີ່ຕ້ອງການ.
- ປຸ່ມຄວາມໄວພັດລົມ (❄): Press to adjust the fan speed (e.g., Auto, Low, Medium, High).
4.2 ໜ້າທີ່ຂັ້ນສູງ (ພາຍໃຕ້ຝາປິດເລື່ອນ)
Some advanced functions are accessible by sliding down the cover on the remote control. This reveals additional buttons for more specific controls.

ຮູບທີ 4.3: ມຸມ view of the Fetcus remote control with the sliding cover open, exposing additional advanced function buttons beneath the main display.
- ການຄວບຄຸມ Swing / Louver: Adjusts the direction of the airflow (vertical or horizontal swing).
- Timer/Sleep Mode: Sets a timer for the AC unit to turn on or off, or activates a sleep-friendly operating mode.
- C/F Switch (℃): ສະຫຼັບການສະແດງອຸນຫະພູມລະຫວ່າງເຊວຊີ ແລະຟາເຣນຮາຍ.
- ປຸ່ມຣີເຊັດ: Used to reset the remote control settings or clear certain functions. Consult your AC unit's manual for specific reset procedures if needed.
- Other Specific Buttons: Depending on your specific Hitachi AC model, other buttons may control functions like Quiet mode, Turbo mode, or Health functions. Refer to your AC unit's original manual for detailed explanations of these specific icons.
5. ບໍາລຸງຮັກສາ
- ທໍາຄວາມສະອາດ: ເຊັດການຄວບຄຸມໄລຍະໄກດ້ວຍຜ້າອ່ອນ, ແຫ້ງ. ຢ່າໃຊ້ເຄື່ອງເຮັດຄວາມສະອາດຂອງແຫຼວຫຼືວັດສະດຸຂັດ, ເພາະວ່າພວກມັນອາດຈະທໍາລາຍພື້ນຜິວຫຼືອົງປະກອບພາຍໃນ.
- ການປ່ຽນແບັດເຕີຣີ: Replace batteries when the remote's range decreases or the display becomes dim. Always replace all batteries at the same time with new ones of the same type.
- ການເກັບຮັກສາ: ເກັບຮັກສາເຄື່ອງຄວບຄຸມໄລຍະໄກໄວ້ໃນບ່ອນທີ່ເຢັນ, ແຫ້ງ, ຫ່າງຈາກແສງແດດໂດຍກົງແລະອຸນຫະພູມທີ່ຮຸນແຮງ.
6. ການແກ້ໄຂບັນຫາ
| ບັນຫາ | ສາເຫດທີ່ເປັນໄປໄດ້ | ການແກ້ໄຂ |
|---|---|---|
| ໄລຍະໄກບໍ່ຕອບສະໜອງ. | ແບັດເຕີຣີຕາຍ ຫຼື ຕິດຕັ້ງບໍ່ຖືກຕ້ອງ. | ປ່ຽນແບັດເຕີຣີ, ຮັບປະກັນວ່າຂົ້ວທີ່ຖືກຕ້ອງ (+/-). |
| ໄລຍະໄກແມ່ນບໍ່ດີ. | ແບັດເຕີຣີອ່ອນ; ມີສິ່ງກີດຂວາງລະຫວ່າງຣີໂໝດ ແລະ ເຄື່ອງປັບອາກາດ. | Replace batteries. Ensure a clear line of sight to the AC unit's infrared receiver. |
| ເຄື່ອງປັບອາກາດບໍ່ຕອບສະໜອງຕໍ່ໜ້າທີ່ສະເພາະ. | Remote not fully compatible with all AC unit features; AC unit does not support the function. | Verify the function exists on your specific AC model. This remote is a universal replacement and may not support all obscure functions of every original remote. |
| ຈໍສະແດງຜົນແມ່ນມືດ ຫຼືຫວ່າງເປົ່າ. | ພະລັງງານຫມໍ້ໄຟຕ່ໍາ. | ປ່ຽນແບັດ. |
7. ຂໍ້ມູນຈໍາເພາະ
| ຄຸນສົມບັດ | ລາຍລະອຽດ |
|---|---|
| ຍີ່ຫໍ້ | ຈຸດຫົວລ້ານ |
| ໝາຍເລກຮຸ່ນ (ພາຍໃນ) | CLS-D41D8CD98F00B204E9800998ECF8427E |
| ອຸປະກອນທີ່ເຂົ້າກັນໄດ້ | Air Conditioner (Hitachi RAS-D10EX, RAR-5E1, RAS-10XH1, RAR-5E2, RAR-5E3, RAR-5E4, RAR-5E5, RAR-5E6, RAS-D14EX2) |
| ເຕັກໂນໂລຊີການເຊື່ອມຕໍ່ | ອິນຟາເຣດ |
| ຄວາມຖີ່ | 433 MHz |
| ຈຳນວນສູງສຸດຂອງອຸປະກອນທີ່ຮອງຮັບ | 1 |
| ວັດສະດຸ | Other (Durable Plastic) |
| ລາຍລະອຽດຫມໍ້ໄຟ | Lithium (Typically uses AAA batteries, please check compartment) |
| ຄຸນນະສົມບັດພິເສດ | Universal, Wireless |
| ຈໍານວນຊຸດລາຍການ | 1 |
| ວັນທີທໍາອິດທີ່ມີ | ວັນທີ 8 ພຶດສະພາ 2019 |
8. ການຮັບປະກັນແລະການສະຫນັບສະຫນູນ
This Fetcus Remote Control comes with a ຮັບປະກັນ 90 ວັນ ຈາກວັນທີ່ຊື້. ການຮັບປະກັນນີ້ກວມເອົາຄວາມບົກຜ່ອງດ້ານການຜະລິດແລະຮັບປະກັນການທໍາງານຂອງຜະລິດຕະພັນຕາມຈຸດປະສົງພາຍໃຕ້ການນໍາໃຊ້ປົກກະຕິ.
For warranty claims or technical support, please contact your retailer or the manufacturer with your purchase details. Please retain your proof of purchase for warranty validation.


