1. ບົດແນະນຳ
This manual provides detailed instructions for the assembly, operation, and maintenance of your Sharkoon VS4-W Series ATX/MicroATX Mid-Tower PC Case, model SHA-VS4-WBK. Please read this manual thoroughly before beginning installation to ensure proper setup and to maximize the lifespan of your product.
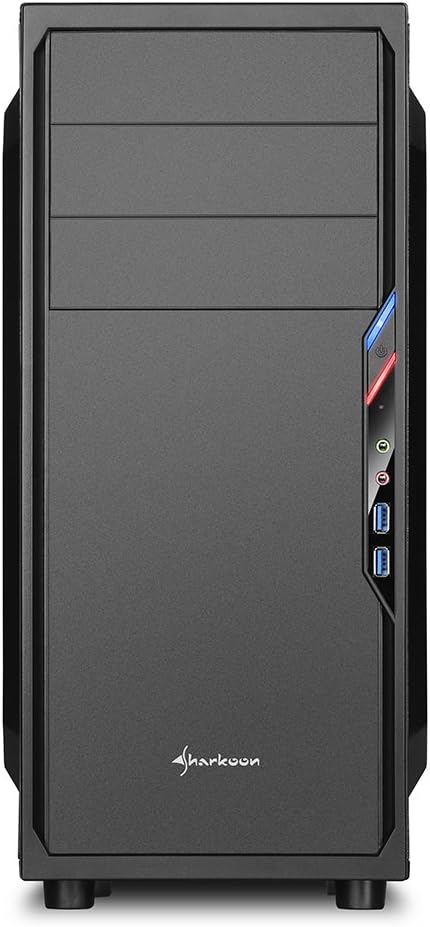
The Sharkoon VS4-W Series is designed for users seeking a cost-effective and functional PC case. It features a full-black aesthetic with an acrylic side window panel, offering a clear view of your internal components. The case supports ATX and Micro-ATX motherboards and provides ample space for various components, including multiple storage drives and long graphics cards.
2. ຜະລິດຕະພັນເກີນview
2.1. ຄຸນນະສົມບັດທີ່ສໍາຄັນ
- Acrylic side window panel for component visibility.
- Full-black interior and exterior design.
- Support for ATX and Micro-ATX motherboards.
- Three 5.25-inch drive bays, two with tool-less mechanisms.
- Seven drive bays for storage: three 3.5-inch and four 2.5-inch.
- Generous expansion card space, up to 385mm with 2.5-inch cage removed.
- Cable management space behind the motherboard tray due to a bulged side panel design.
- ຮອງຮັບເຄື່ອງເຮັດຄວາມເຢັນ CPU ສູງເຖິງ 160 ມມ ໃນລະດັບຄວາມສູງ.
- Front I/O panel with 2x USB 3.0 and 2x USB 2.0 ports, plus HD Audio.
- Pre-installed 120mm front fan and 120mm blue LED rear fan.
2.2. ການກໍານົດອົງປະກອບ


3. ການຕິດຕັ້ງແລະການຕິດຕັ້ງ
3.1. ການກະກຽມກໍລະນີ
- ແກະກ່ອງ PC ອອກ ແລະ ເອົາວັດສະດຸຫຸ້ມຫໍ່ທັງໝົດອອກ.
- ວາງກໍລະນີຢູ່ເທິງພື້ນຜິວຮາບພຽງທີ່ຫມັ້ນຄົງ.
- ເອົາແຜງດ້ານຂ້າງອອກໂດຍການໝຸນສະກູທີ່ຢູ່ດ້ານຫຼັງຂອງເຄສ.
3.2. ການຕິດຕັ້ງເມນບອດ
- ຕິດຕັ້ງແຜ່ນປ້ອງກັນ I/O ທີ່ມາພ້ອມກັບເມນບອດຂອງທ່ານເຂົ້າໄປໃນຊ່ອງຕັດທີ່ຢູ່ດ້ານຫຼັງຂອງເຄສ.
- Ensure standoffs are correctly aligned for your ATX or Micro-ATX motherboard. Install additional standoffs if necessary.
- ຄ່ອຍໆວາງແຜງວົງຈອນຫຼັກເຂົ້າໄປໃນເຄສ, ໂດຍຈັດໃຫ້ມັນກົງກັບຈຸດຢືນ ແລະ ແຜ່ນປ້ອງກັນ I/O.
- ຮັບປະກັນ motherboard ດ້ວຍ screws.
3.3. ການຕິດຕັ້ງການສະຫນອງພະລັງງານ
- Mount the power supply unit (PSU) in the designated area at the bottom rear of the case.
- ຮັບປະກັນ PSU ດ້ວຍ screws ຈາກດ້ານຫລັງຂອງກໍລະນີ.
- Route necessary power cables through the cable management cutouts.
3.4. ການຕິດຕັ້ງ Drive
- 5.25-inch Drives: For tool-less bays, slide the drive in until it clicks into place. For other bays, secure with screws.
- 3.5-inch Drives: Slide the 3.5-inch drives into the designated bays and secure them.
- 2.5-inch Drives: Mount 2.5-inch SSDs/HDDs onto the dedicated mounting points.
3.5. ການຕິດຕັ້ງບັດຂະຫຍາຍ
- ເອົາຝາປິດຊ່ອງ PCI ທີ່ຈຳເປັນອອກຈາກດ້ານຫຼັງຂອງເຄສ.
- ໃສ່ກາດກຣາບຟິກ ຫຼື ບັດຂະຫຍາຍອື່ນໆຂອງທ່ານເຂົ້າໃນຊ່ອງ PCI-E ທີ່ເໝາະສົມຢູ່ເທິງເມນບອດ.
- Secure the cards with screws. For longer graphics cards, the 2.5-inch drive cage can be removed to provide up to 385mm of space.
3.6. ການຄຸ້ມຄອງສາຍໄຟ
Utilize the space behind the motherboard tray and the various cable routing holes to organize cables. This improves airflow and aesthetics.
4. ຄໍາແນະນໍາການດໍາເນີນງານ
Once all components are installed and connected, replace the side panels and secure them with the thumbscrews. Connect your peripherals (monitor, keyboard, mouse, etc.) to the motherboard's I/O ports. Connect the power cable to the PSU and a wall outlet. Press the power button on the front panel to start your system.
5. ບໍາລຸງຮັກສາ
5.1. ທໍາຄວາມສະອາດ
- Regularly clean dust filters (if present) to maintain optimal airflow.
- ໃຊ້ອາກາດທີ່ຖືກບີບອັດເພື່ອກຳຈັດຝຸ່ນອອກຈາກອົງປະກອບພາຍໃນ ແລະ ພັດລົມ.
- ເຊັດດ້ານນອກຂອງກໍລະນີດ້ວຍຄວາມອ່ອນ, ງamp ຜ້າ. ຫຼີກລ້ຽງການເຮັດຄວາມສະອາດຂັດ.
5.2. ບຳລຸງຮັກສາພັດລົມ
Ensure fans are free from obstructions and spinning correctly. If a fan becomes noisy or stops working, consider replacing it to maintain proper cooling.
6. ການແກ້ໄຂບັນຫາ
6.1. ລະບົບບໍ່ເປີດເຄື່ອງ
- Check all power connections, including the PSU to the wall, and internal connections to the motherboard and components.
- Ensure the power button cable from the case is correctly connected to the motherboard's front panel header.
- ກວດສອບວ່າສະວິດ PSU ຢູ່ໃນຕຳແໜ່ງ 'ເປີດ'.
6.2. Poor Airflow/Overheating
- Clean any dust filters and internal components.
- Ensure fans are operating correctly and oriented for optimal airflow (intake/exhaust).
- Improve cable management to reduce obstructions to airflow.
6.3. Front Panel USB/Audio Not Working
- Verify that the front panel USB and HD Audio cables are securely connected to the corresponding headers on your motherboard.
7. ຂໍ້ມູນຈໍາເພາະ
| ຊື່ຕົວແບບ | VS4-W Series |
| ຈຳ ນວນຕົວແບບຜະລິດຕະພັນ | SHA-VS4-WBK |
| ປະເພດກໍລະນີ | ຫໍກາງ |
| ວັດສະດຸ | ເຫຼັກກ້າ, ພາດສະຕິກ, ອະຄິລິກ |
| ສີ | ດຳ |
| ຄວາມເຂົ້າກັນໄດ້ຂອງເມນບອດ | ATX, ໄມໂຄຣ-ATX |
| ຊ່ອງຂັບ 5.25" | 3 (2 with tool-less mechanism) |
| ຊ່ອງຂັບພາຍໃນ 3.5" | 3 |
| ຊ່ອງຂັບ 2.5" | 4 |
| ສະລັອດຕິງຂະຫຍາຍ PCI | 7 |
| ສູງສຸດ. ຄວາມຍາວບັດກາຟິກ | 310mm (385mm with 2.5" cage removed) |
| ສູງສຸດ. ຄວາມສູງຂອງ CPU Cooler | 160ມມ |
| ສູງສຸດ. ຄວາມຍາວ PSU | 260ມມ |
| ທ່າເຮືອທາງ ໜ້າ I / O | 2x USB 3.0, 2x USB 2.0, HD Audio (Mic/Headphone) |
| ພັດລົມທີ່ຕິດຕັ້ງໄວ້ລ່ວງໜ້າ | Front: 1x 120mm, Rear: 1x 120mm Blue LED |
| ວິທີການເຮັດຄວາມເຢັນ | ການລະບາຍອາກາດ |
| ຂະໜາດສິນຄ້າ (L x W x H) | 44.5 x 20 x 43 cm |
| ນ້ໍາຫນັກລາຍການ | 3.5 ກິໂລ |
8. ການຮັບປະກັນແລະການສະຫນັບສະຫນູນ
ສຳລັບຂໍ້ມູນການຮັບປະກັນ ແລະ ການຊ່ວຍເຫຼືອດ້ານເຕັກນິກ, ກະລຸນາອ້າງອີງເຖິງ Sharkoon ຢ່າງເປັນທາງການ webເວັບໄຊ ຫຼືຕິດຕໍ່ຮ້ານຂາຍຍ່ອຍໃນທ້ອງຖິ່ນຂອງທ່ານ. ຮັກສາຫຼັກຖານການຊື້ຂອງທ່ານສໍາລັບການຮ້ອງຂໍການຮັບປະກັນ.
Official Sharkoon Webເວັບໄຊ: www.sharkoon.com