
ແນະນຳ
Thank you for choosing the RAINPOINT 4-Zone Programmable Watering Timer. This device is designed to automate your garden and lawn irrigation, providing flexible and efficient watering schedules for up to four independent zones. Please read this manual carefully to ensure proper installation, operation, and maintenance of your watering timer.
ຄຸນສົມບັດຜະລິດຕະພັນ
- 4 ເຂດທີ່ຕັ້ງໂປຣແກຣມໄດ້ສະເພາະບຸກຄົນ: Customize watering schedules (start time, duration, frequency) for each zone independently.
- Multiple Watering Cycle Modes: Set watering duration from 1 minute to 3 hours 59 minutes, and frequency for every 8 hours, every 12 hours, or every 1 to 7 days.
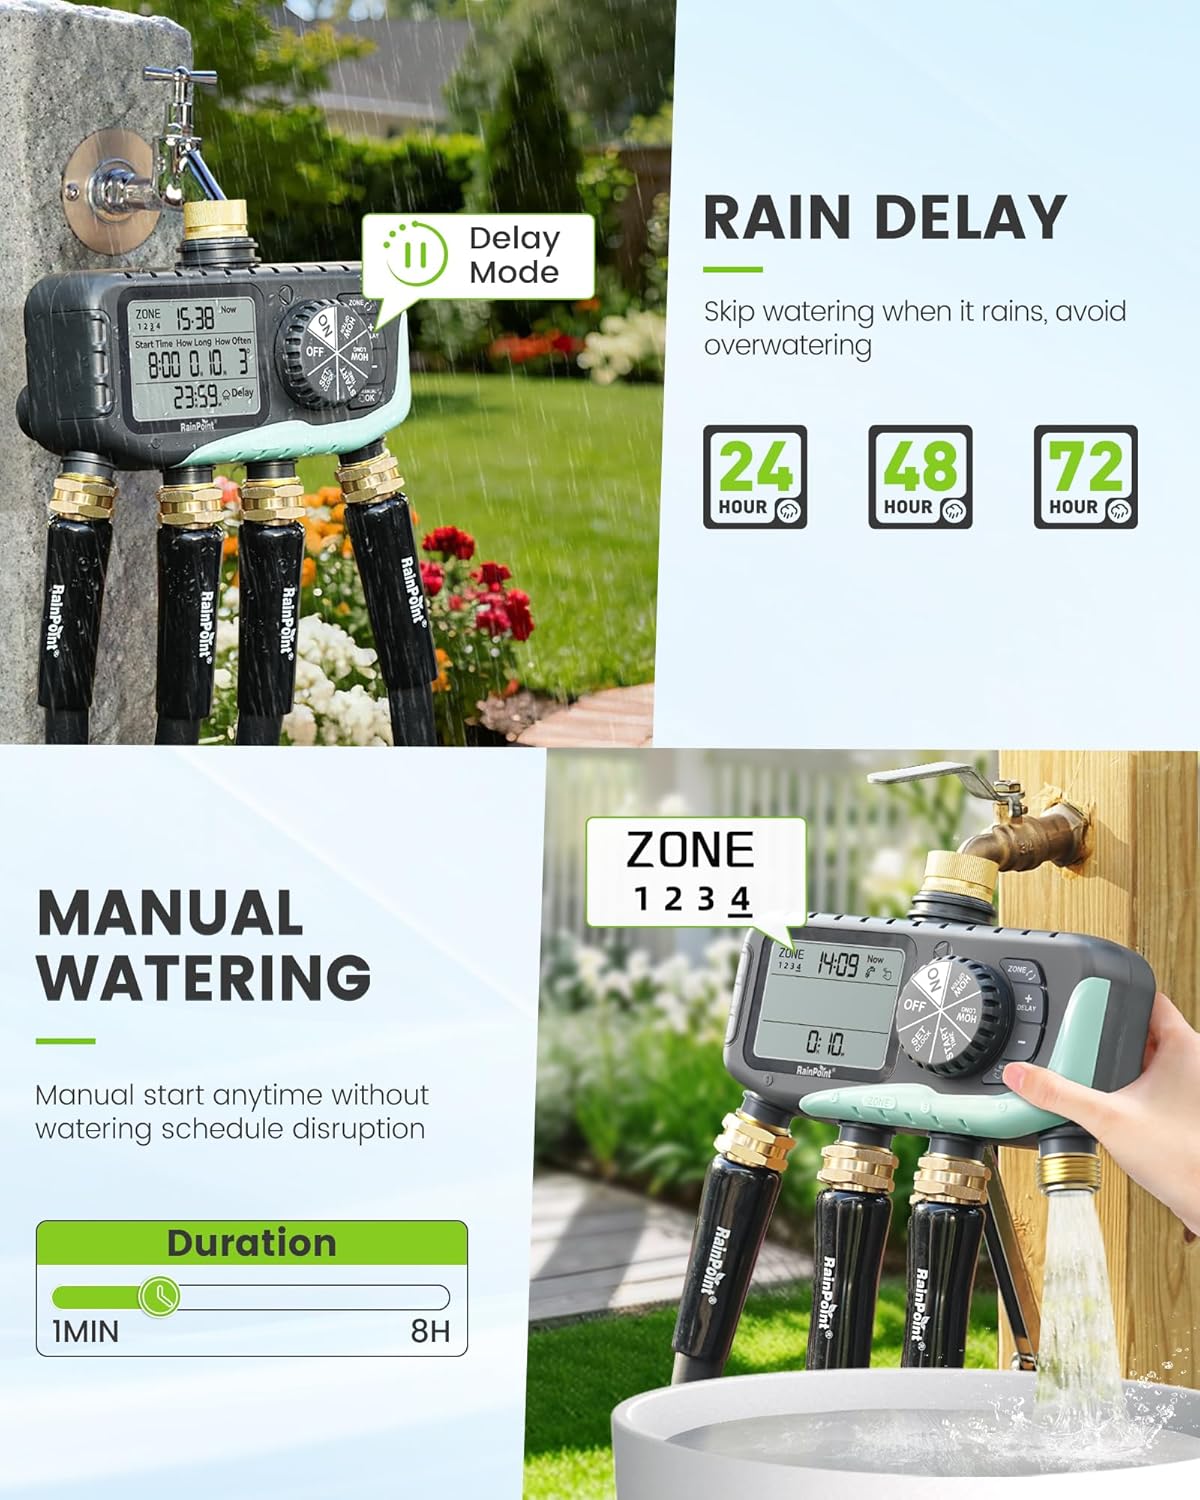
- ຟັງຊັນການລ່າຊ້າຝົນ: ຂ້າມການຫົດນ້ຳເປັນເວລາ 24, 48, ຫຼື 72 ຊົ່ວໂມງ ເພື່ອຮັກສານ້ຳໃນໄລຍະຝົນ.
- ໂໝດການຫົດນໍ້າດ້ວຍມື: Initiate watering instantly for 1 minute to 8 hours without affecting programmed schedules.
- ໂປຣແກມງ່າຍ: Features a large 3.4-inch LCD screen, a large dial, and clear buttons for intuitive setup.
- ການກໍ່ສ້າງທົນທານ: Equipped with solid brass inlet and outlet, leak-proof sealing rings, and an IP65 waterproof rating for outdoor use.
- Upgraded Coil Valve: Provides stronger water pressure and wider coverage compared to standard valves.
- ການປົກປ້ອງພະລັງງານຕໍ່າ: Valves automatically close when battery power is low to prevent water waste.


ເນື້ອໃນຊຸດ
- RAINPOINT 4-Zone Programmable Watering Timer
- ຄູ່ມືຜູ້ໃຊ້
- Standard 3/4-inch faucet adapter (if applicable)
ການຕິດຕັ້ງແລະການຕິດຕັ້ງ
- ການຕິດຕັ້ງຫມໍ້ໄຟ: Open the battery compartment on the back of the timer. Insert two (2) AA alkaline batteries (not included), ensuring correct polarity. Close the compartment securely.
- ເຊື່ອມຕໍ່ກັບ Faucet: Screw the timer onto a standard 3/4-inch outdoor faucet. Ensure the connection is tight to prevent leaks. It is recommended to use a short hose between the faucet and the timer to reduce stress on the faucet connection and allow for easier positioning.
- ເຊື່ອມຕໍ່ທໍ່: Attach your garden hoses to the four independent outlets (Zone 1, Zone 2, Zone 3, Zone 4) at the bottom of the timer. Ensure each connection is secure.
- ການເປີດເຄື່ອງເບື້ອງຕົ້ນ: The LCD screen will light up, and the timer will be ready for programming.


ຄໍາແນະນໍາການດໍາເນີນງານ
1. ຕັ້ງຄ່າເວລາປະຈຸບັນ
Rotate the dial to the 'SET CLOCK' position. Use the '+' and '-' buttons to adjust the current time. Press 'OK' to confirm and move to the next setting (e.g., AM/PM or 24-hour format). Rotate the dial away from 'SET CLOCK' to save.
2. Programming Watering Schedules (for each zone)
ເຄື່ອງຈັບເວລາອະນຸຍາດໃຫ້ຂຽນໂປລແກລມສ່ວນບຸກຄົນສໍາລັບແຕ່ລະສີ່ເຂດຂອງມັນ.
- ເລືອກເຂດ: Rotate the dial to 'PROGRAM'. Use the 'ZONE' button to select the desired zone (1, 2, 3, or 4) you wish to program.
- ຕັ້ງເວລາເລີ່ມຕົ້ນ: Use the '+' and '-' buttons to set the desired watering start time for the selected zone. Press 'OK' to confirm.
- ກຳນົດໄລຍະເວລາການຫົດນ້ຳ: Use the '+' and '-' buttons to set how long the watering will last (from 1 minute to 3 hours 59 minutes). Press 'OK' to confirm.
- ຕັ້ງຄວາມຖີ່: Use the '+' and '-' buttons to set how often the watering will occur (e.g., every 8 hours, every 12 hours, or every 1 to 7 days). Press 'OK' to confirm.
- Repeat steps a-d for each zone you wish to program. Rotate the dial to 'ON' to activate the programmed schedules.

3. ຟັງຊັນການລ່າຊ້າຝົນ
To temporarily pause watering due to rain:
- Rotate the dial to 'ON'.
- ກົດປຸ່ມ 'DELAY'.
- Use the '+' or '-' buttons to select the desired delay duration (24, 48, or 72 hours).
- Press 'OK' to confirm. The timer will resume its programmed schedule after the delay period.
4. ການຫົດນໍ້າດ້ວຍມື
ການຫົດນໍ້າທັນທີໂດຍບໍ່ສົ່ງຜົນກະທົບຕໍ່ຕາຕະລາງເວລາທີ່ເຈົ້າໄດ້ຕັ້ງໄວ້:
- Rotate the dial to 'ON'.
- Press the 'MANUAL/OK' button.
- Use the '+' or '-' buttons to set the desired manual watering duration (from 1 minute to 8 hours).
- Press 'OK' to start manual watering. The timer will automatically return to its programmed schedule after the manual watering duration ends.
5. Low Power Protection
When the battery level is critically low, the timer's valves will automatically close to prevent continuous water flow and waste. Replace batteries promptly when the low battery indicator appears on the screen.

ບໍາລຸງຮັກສາ
- ທໍາຄວາມສະອາດ: Periodically wipe the timer's exterior with a soft, damp ຜ້າ. ຢ່າໃຊ້ເຄື່ອງເຮັດຄວາມສະອາດຂັດຫຼືສານລະລາຍ.
- ການປ່ຽນແບັດເຕີຣີ: Replace batteries annually or when the low battery indicator appears. Always use fresh AA alkaline batteries.
- ລະດູໜາວ: Before the first frost, disconnect the timer from the faucet and hoses. Drain any remaining water and store the unit indoors in a dry, protected area to prevent freezing damage.
- ກວດເບິ່ງເຄື່ອງຊັກຜ້າ: Regularly inspect the rubber washers in the inlet and outlet connections for wear or damage. Replace if necessary to prevent leaks.
ການແກ້ໄຂບັນຫາ
- No Water Flow or Partial Flow:
- ກວດເບິ່ງລະດັບຫມໍ້ໄຟແລະປ່ຽນແທນຖ້າຕ່ໍາ.
- ໃຫ້ແນ່ໃຈວ່າ faucet ເປີດຢ່າງເຕັມສ່ວນ.
- Verify that the watering schedule is correctly programmed and activated ('ON' mode).
- Inspect hose connections for kinks or blockages.
- Check the timer's inlet filter for debris.
- ການຮົ່ວໄຫຼຈາກການເຊື່ອມຕໍ່:
- Ensure all connections (faucet, hoses) are tightened securely.
- Check rubber washers for proper seating and damage; replace if worn.
- Display Fading or Not Working:
- ປ່ຽນແບັດເຕີລີ່ໃໝ່.
- Avoid prolonged exposure to direct sunlight, which can degrade LCD screens over time. Consider shielding the display if installed in a very sunny area.
- Water Hammer (Pipes Clanging):
- This can occur when valves close rapidly. Consider installing a water hammer arrester between the faucet and the timer.
- ໂມງຈັບເວລາບໍ່ຕອບສະໜອງ:
- Remove batteries for a few minutes, then reinsert them to reset the device. Reprogram as needed.
ຂໍ້ມູນຈໍາເພາະ
| ໝາຍເລກຕົວແບບ | iob447 |
| ຍີ່ຫໍ້ | ຈຸດຝົນ |
| ASIN | B0G32Z1HMB |
| ວັດສະດຸ | ພາດສະຕິກ, ທອງເຫຼືອງ |
| ສີ | ສີຟ້າ |
| ຂະໜາດສິນຄ້າ (L x W x H) | 2.54 x 2.54 x 2.54 cm (approx. 1 x 1 x 1 inch); 317.51 grams |
| ຂະໜາດໜ້າຈໍ | 3.4 ນິ້ວ |
| ຈໍານວນການຕັ້ງຄ່າ | 7 (ອ້າງອີງເຖິງຕົວເລືອກການຂຽນໂປຣແກຣມ) |
| ການປະເມີນກັນນ້ໍາ | IP65 |
| ແຫຼ່ງພະລັງງານ | 2 x AA Alkaline Battery (ບໍ່ລວມ) |
ການຮັບປະກັນແລະການສະຫນັບສະຫນູນ
RAINPOINT products are designed for reliability and performance. For warranty information, technical support, or any questions regarding your 4-Zone Programmable Watering Timer, please contact RAINPOINT customer service through the official website or your retailer's support channels. Please have your model number (iob447) and purchase information ready when contacting support.