
1. ຜະລິດຕະພັນເກີນview
The Tilta PYXIS 6K/12K Camera Cage Base Kit (Model ES-T21-A) is a custom-designed camera cage system for the Blackmagic Design PYXIS 6K and 12K camera bodies. This kit provides enhanced protection, stability, and multiple mounting points for various camera accessories, improving the versatility and functionality of your camera setup. It includes a full camera cage, a NATO top handle, and a NATO side handle.
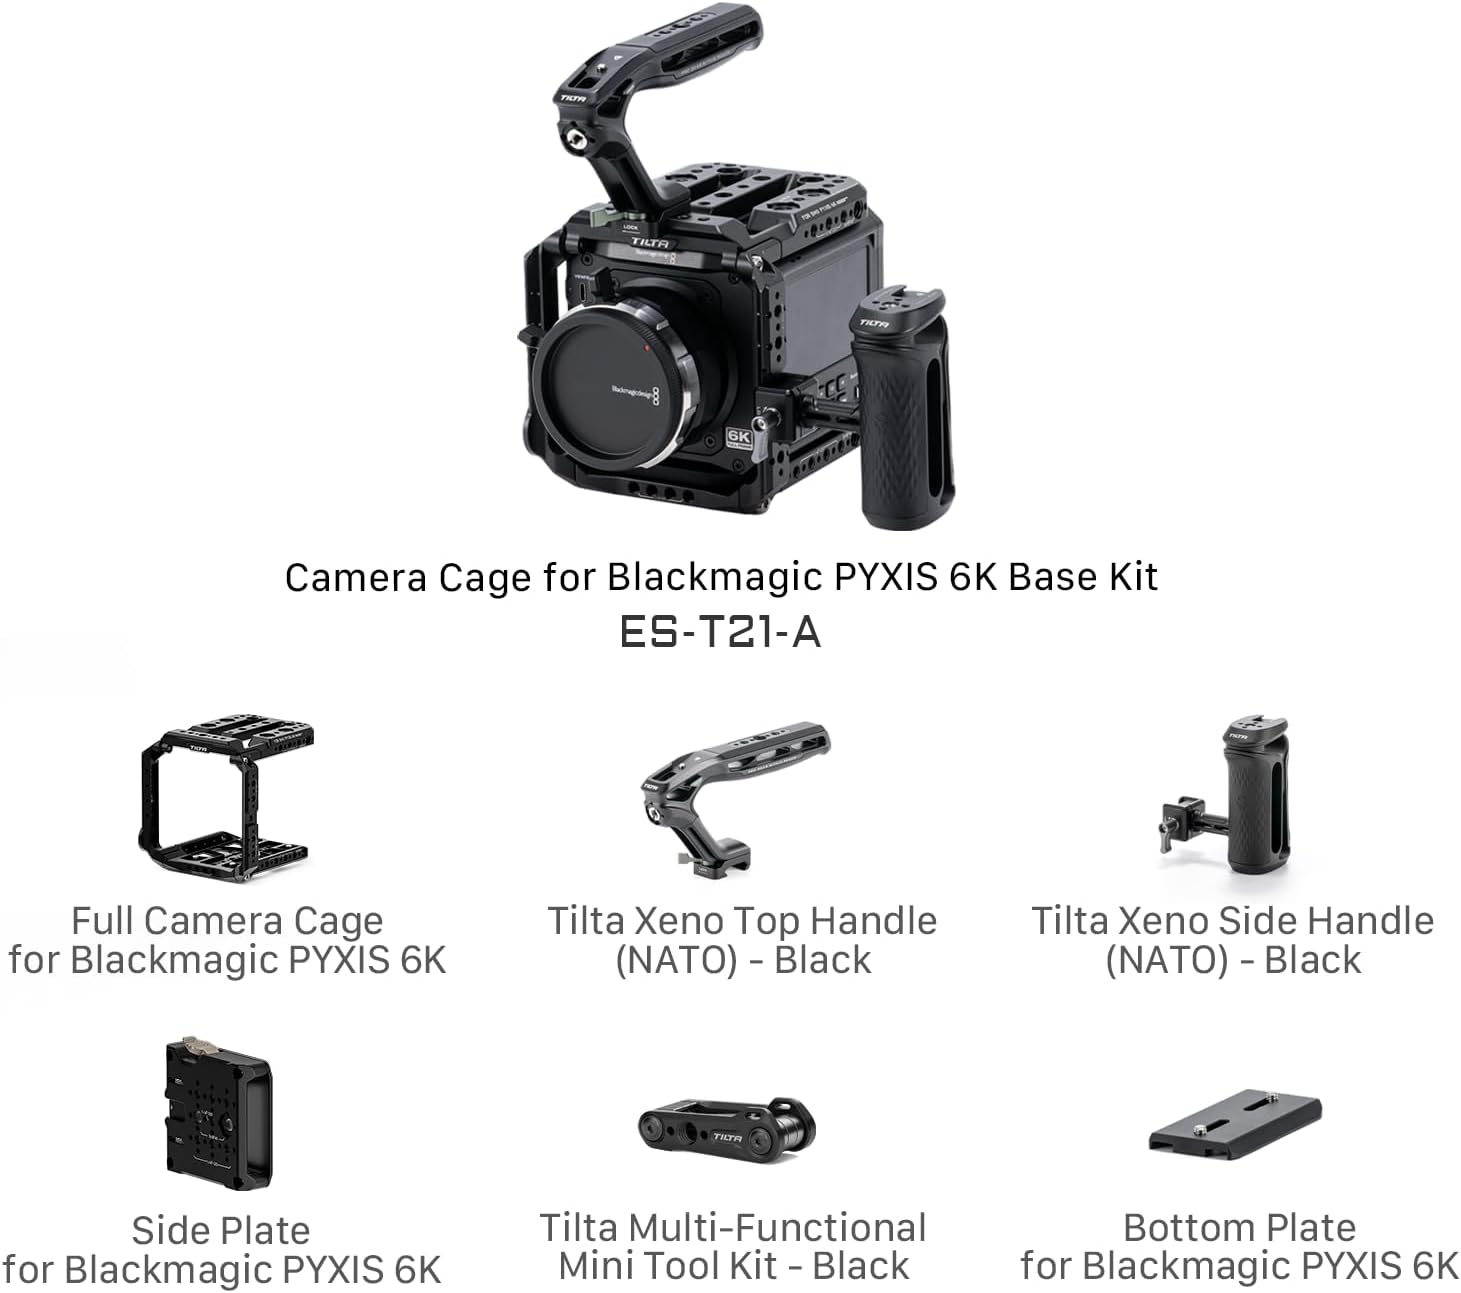
Image 1.1: The Tilta PYXIS 6K Camera Cage Base Kit assembled with a camera, showcasing the full cage, top handle, and side handle.
2. ເນື້ອໃນຊຸດ
ກະລຸນາກວດສອບວ່າລາຍການທັງຫມົດທີ່ລະບຸໄວ້ຂ້າງລຸ່ມນີ້ແມ່ນລວມຢູ່ໃນຊຸດຂອງທ່ານ:
- 1 x Full Camera Cage for PYXIS 6K
- 1 x Tilta Xeno Top Handle (NATO) - Black
- 1 x Tilta Xeno Side Handle (NATO) - Black
- 1 x Multi-Functional Mini Tool Kit (Black)
- 1 x Side Plate for Blackmagic PYXIS 6K
- 1 x Bottom Plate for Blackmagic PYXIS 6K

ຮູບພາບ 2.1: ລະເບີດ view showing all components of the Tilta PYXIS 6K Camera Cage Base Kit.
3. ການຕິດຕັ້ງແລະການຕິດຕັ້ງ
3.1 Assembling the Camera Cage
- Attach the Bottom Plate: Secure the bottom plate to the base of your Blackmagic PYXIS 6K/12K camera using the provided screws. Ensure it is firmly tightened.
- Mount the Full Camera Cage: Carefully place the full camera cage around your camera, aligning it with the bottom plate and any other attachment points on the camera body. Secure the cage using the designated screws.
- Install the Side Plate: Attach the multi-functional side plate to the side of the camera cage. This plate supports vertical configurations and features an SSD mounting slot.
3.2 Attaching Handles and Accessories
The cage features various mounting points for accessories:
- NATO Top Handle: Slide the Tilta Xeno Top Handle onto the NATO rail located on the top plate of the cage. Tighten the locking mechanism to secure it. This handle offers increased flexibility for low-angle shots and carrying the setup.
- NATO Side Handle: The Tilta Xeno Side Handle can be mounted on either the left or right side NATO rail of the cage. Slide it onto the rail and tighten the locking screw for a secure grip.
- Additional Mounting Points: The cage includes ARRI Anti-Twist 3/8"-16 threads, standard 1/4"-20 and 3/8"-16 threads, Cold Shoe mounts, and Rosette mounts for attaching monitors, microphones, lights, and other accessories.

ຮູບພາບ 3.1: ຂ້າງ view of the cage highlighting various mounting points including Top Plate, ARRI Anti-Twist, SSD Unlock Lever, 3/8"-16 threads, Cold Shoe, Safety Pin, Multi-functional Side Plate, NATO Rail, and Rosette.

ຮູບພາບ 3.2: ທາງເທິງ view of the cage showing clearance for exhaust, 1/4"-20 & 3/8"-16 threads, NATO Rail, and Cold Shoe mounts.
3.3 SSD Mounting
The side plate features a dedicated slot for mounting an SSD. This slot is compatible with hard drives between 52mm and 60mm in width and less than 12mm in thickness. Use the unlock lever to secure or release the SSD.
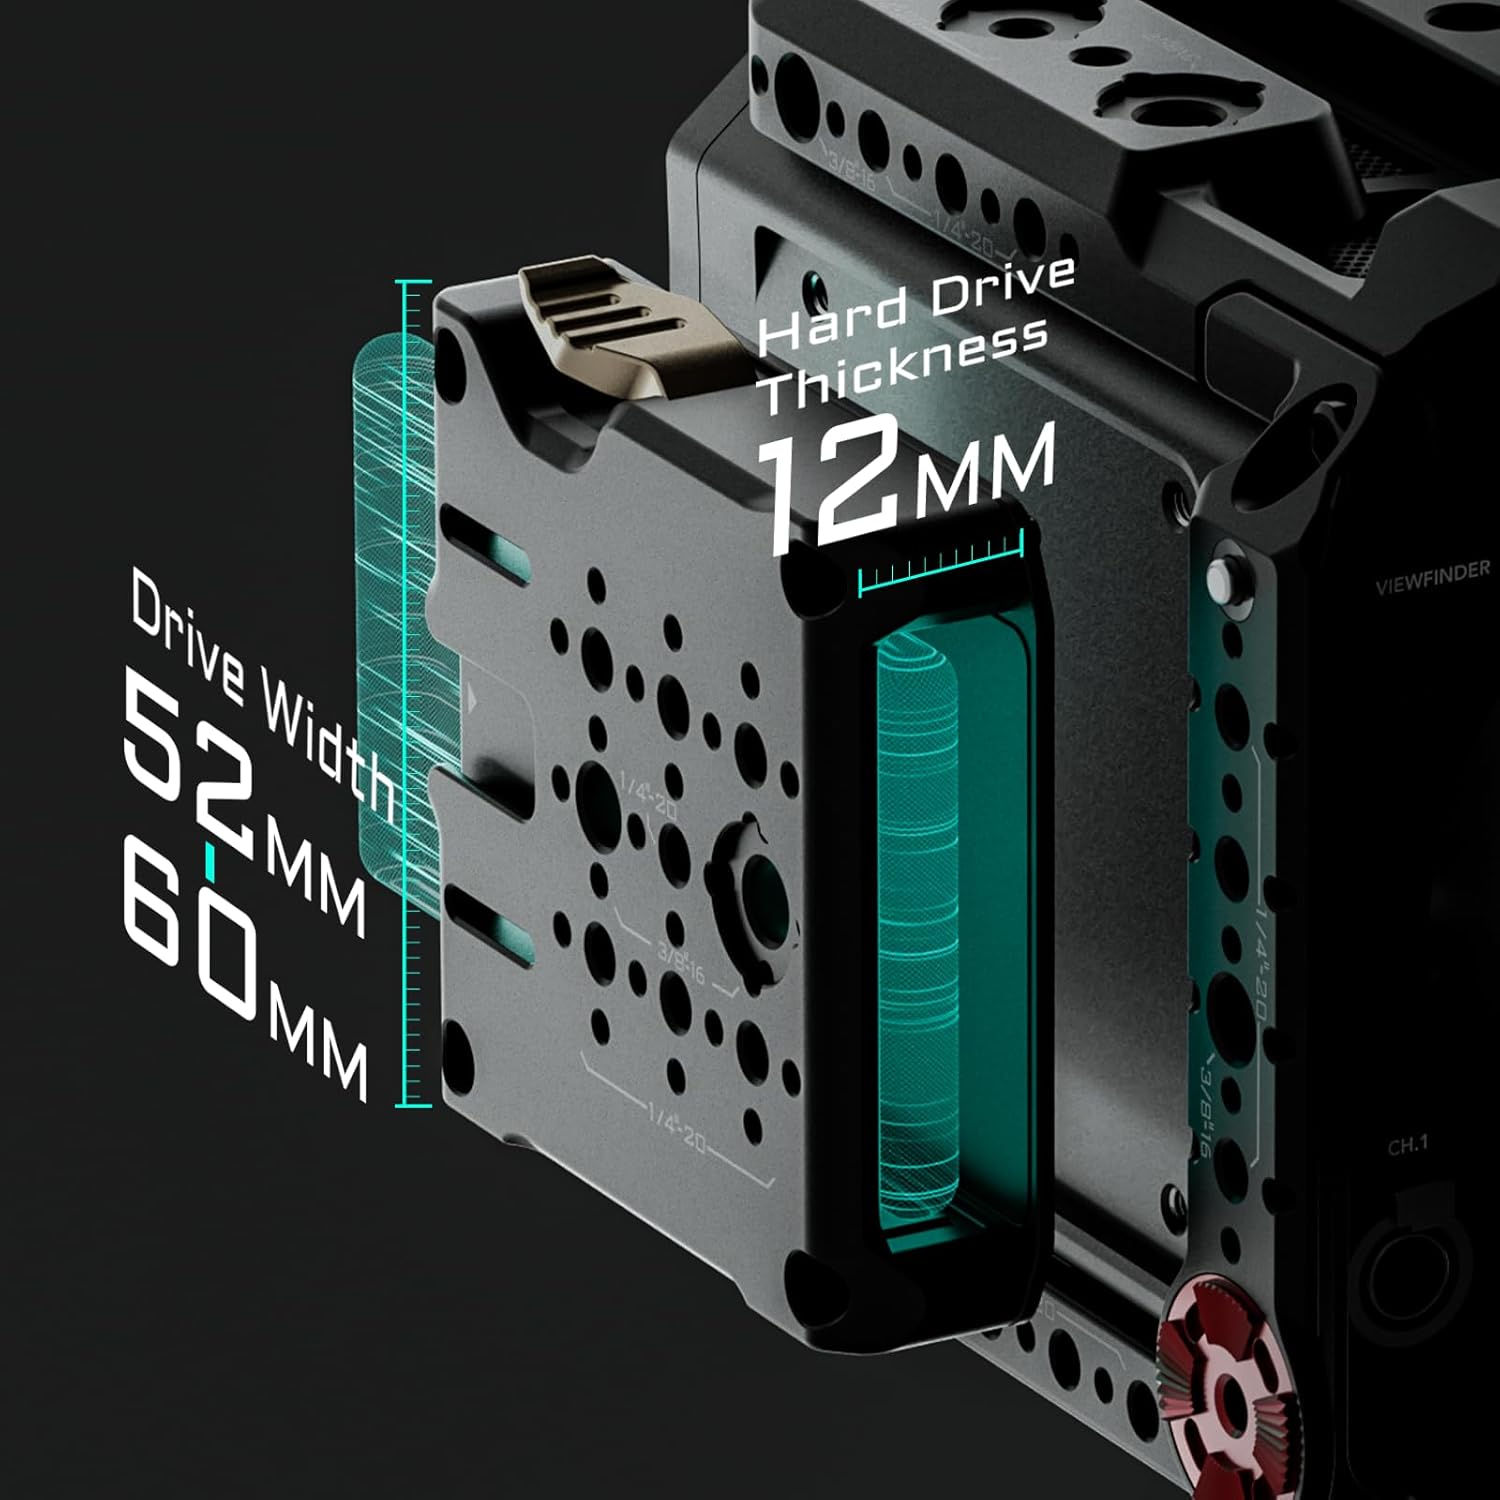
Image 3.3: Illustration of the SSD mounting slot on the side plate, showing compatible drive width (52mm-60mm) and thickness (max 12mm).
3.4 ການກະຈາຍຄວາມຮ້ອນ
The cage's design incorporates clearance for the camera body's heat dissipation vents. Both the bottom and top plates are engineered to avoid obstructing these vents, ensuring the camera's cooling performance remains unaffected during operation.

ຮູບພາບທີ 3.4: ໄລຍະໃກ້ view of the cage's design, illustrating the clearance provided for the camera's heat dissipation vents.
4. ຄໍາແນະນໍາການດໍາເນີນງານ
4.1 Vertical Shooting Mode
The multi-functional side plate can be utilized as a bottom plate to enable vertical shooting configurations. This provides ample space between rods and the lens for most accessories, making it suitable for social media content creation or specific cinematic styles.
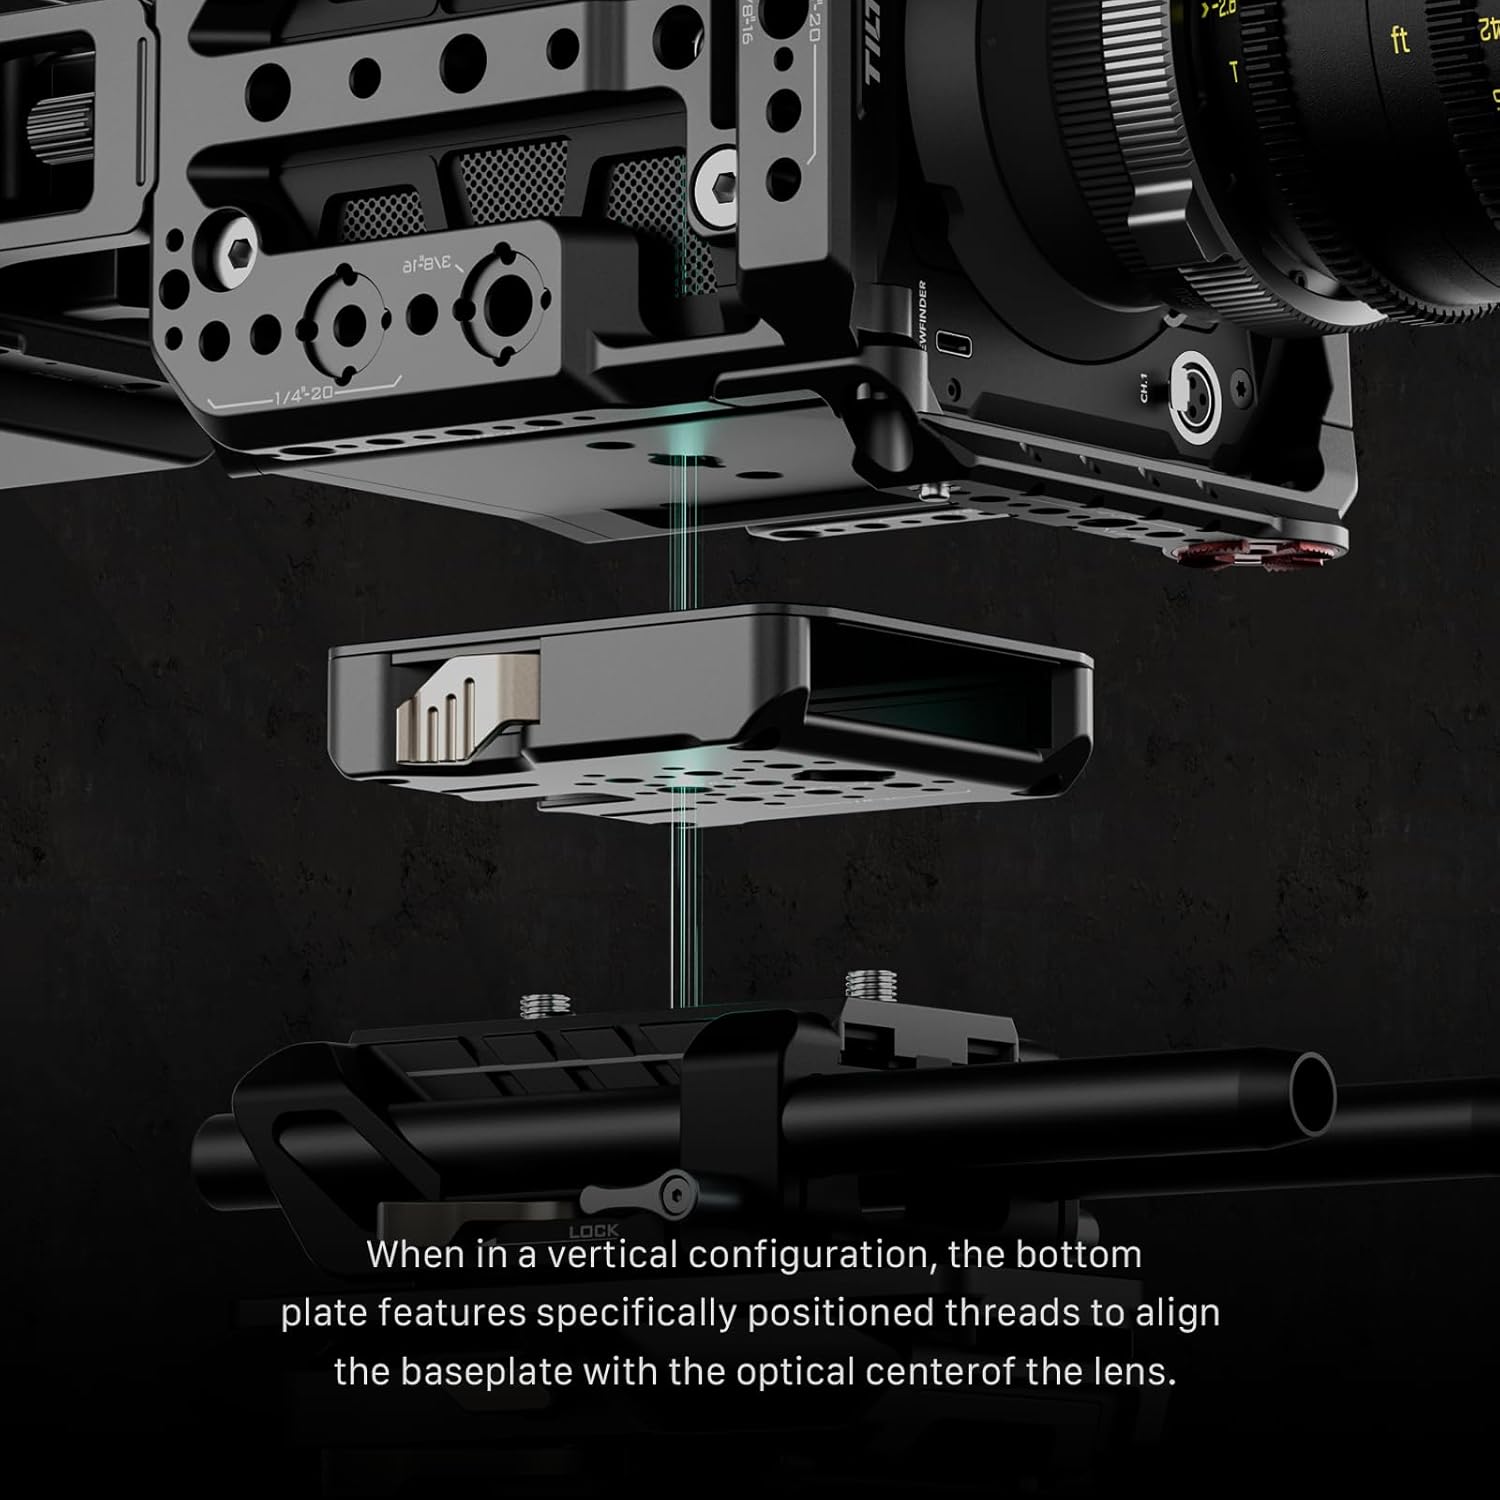
Image 4.1: The camera cage configured for vertical shooting, demonstrating how the side plate functions as a base.
4.2 Accessory Mounting
Utilize the various mounting points (NATO rails, ARRI Rosettes, Cold Shoe mounts, 1/4"-20 and 3/8"-16 threads) to attach external monitors, follow focus systems, matte boxes, wireless video transmitters, and other production tools. Ensure all accessories are securely fastened to prevent accidental detachment during use.
5. ບໍາລຸງຮັກສາ
To ensure the longevity and optimal performance of your Tilta PYXIS 6K/12K Camera Cage Base Kit, follow these maintenance guidelines:
- ທໍາຄວາມສະອາດ: Wipe the cage and its components with a soft, dry cloth after each use to remove dust and fingerprints. For stubborn dirt, a slightly damp ຜ້າສາມາດນໍາໃຊ້ໄດ້, ປະຕິບັດຕາມໂດຍການແຫ້ງທັນທີ. ຫຼີກລ້ຽງການເຮັດຄວາມສະອາດຂັດຫຼືສານລະລາຍ.
- ການກວດກາ: Periodically inspect all screws, bolts, and locking mechanisms for tightness. Re-tighten any loose components to maintain structural integrity.
- ການເກັບຮັກສາ: Store the camera cage in a clean, dry environment, away from extreme temperatures and humidity, when not in use.
6. ການແກ້ໄຂບັນຫາ
This section addresses common issues you might encounter with your camera cage.
- ບັນຫາ: ກ້ອງຖ່າຍຮູບຮູ້ສຶກວ່າວ່າງຢູ່ໃນກະຕ່າ.
ການແກ້ໄຂ: Ensure all mounting screws connecting the camera to the bottom plate and the cage to the camera body are securely tightened. Check that the camera is correctly seated in the cage. - ບັນຫາ: Accessories are not securely attaching to mounting points.
ການແກ້ໄຂ: Verify that the accessory's mounting mechanism (e.g., NATO clamp, screw thread) is compatible with the cage's mounting point. Ensure all locking levers or screws are fully engaged and tightened. - ບັນຫາ: Difficulty inserting or removing an SSD.
ການແກ້ໄຂ: Ensure the SSD dimensions (width 52-60mm, thickness <12mm) are compatible. Use the unlock lever to fully release the SSD. Do not force the SSD into the slot.
7. ຂໍ້ມູນຈໍາເພາະ
| ໝາຍເລກຕົວແບບ | ES-T21-A |
| ຍີ່ຫໍ້ | ທິວຕາ |
| ສີ | ດຳ |
| ອຸປະກອນທີ່ເຂົ້າກັນໄດ້ | Blackmagic Design PYXIS 6K, Blackmagic Design Cinema Camera 6K |
| ນ້ໍາຫນັກລາຍການ | 1.97 ກິໂລກຣາມ |
| ຈຸດເຊື່ອມຕໍ່ | NATO Rails, ARRI Rosette, Cold Shoe, 1/4"-20 threads, 3/8"-16 threads with positioning pins |
| ຄວາມເຂົ້າກັນໄດ້ຂອງ SSD | Width 52-60mm, Thickness <12mm |
| ວັດສະດຸ | Aluminum Alloy, SUS304 |
8. ການຮັບປະກັນແລະການສະຫນັບສະຫນູນ
8.1 ຂໍ້ມູນການຮັບປະກັນ
This Tilta product is covered by a ການຮັບປະກັນຂອງຜູ້ຜະລິດ 1 ປີ from the date of purchase. The warranty covers defects in materials and workmanship under normal use. It does not cover damage caused by misuse, accidents, unauthorized modifications, or normal wear and tear.
8.2 ສະຫນັບສະຫນູນລູກຄ້າ
For technical assistance, warranty claims, or product inquiries, please contact Tilta customer support through their official website or the retailer from whom you purchased the product. Please have your product model number (ES-T21-A) and proof of purchase ready when contacting support.