ແນະນຳ
This manual provides detailed instructions for the installation, operation, and maintenance of your Zyyini B150M V3 Computer Motherboard. Please read this manual thoroughly before proceeding with installation to ensure proper setup and to prevent damage to the components. This motherboard is designed for desktop computers, supporting LGA 1151 CPUs and DDR4 memory, offering a stable and efficient platform for various computing needs.
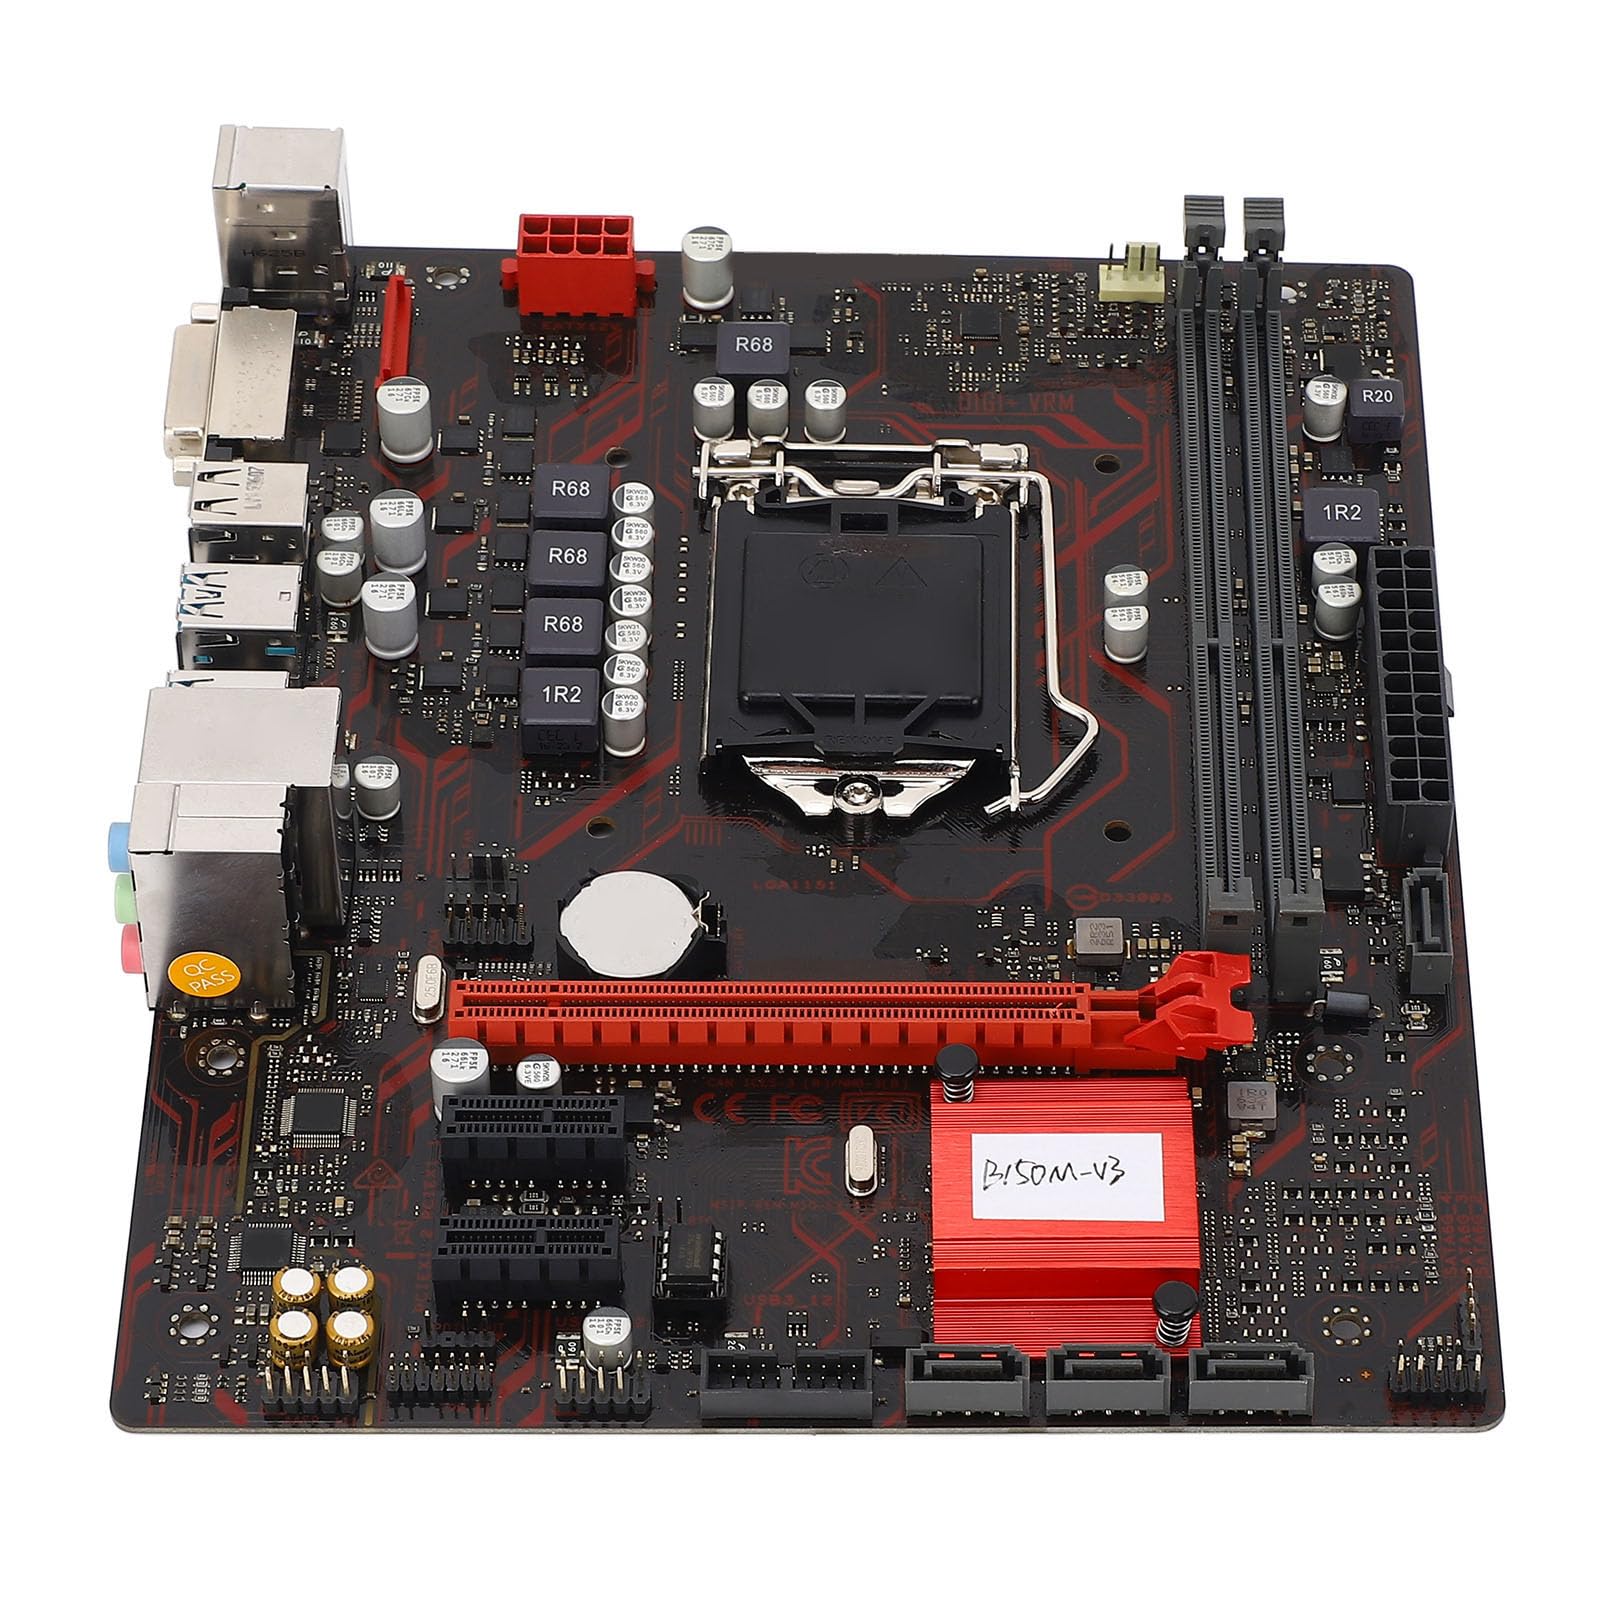
ຮູບ 1: ເກີນview of the Zyyini B150M V3 Motherboard.
ການຕິດຕັ້ງແລະການຕິດຕັ້ງ
Before beginning installation, ensure your workspace is clean and static-free. It is recommended to wear an anti-static wrist strap to prevent electrostatic discharge (ESD) damage to components.
1. ຂໍ້ຄວນລະວັງຄວາມປອດໄພ
- ສະເຫມີຕັດການເຊື່ອມຕໍ່ການສະຫນອງພະລັງງານຈາກເຕົ້າສຽບໃສ່ຝາກ່ອນທີ່ຈະຕິດຕັ້ງຫຼືເອົາອົງປະກອບໃດໆ.
- ຈັບອົງປະກອບຕ່າງໆດ້ວຍຂອບຂອງມັນເພື່ອຫຼີກເວັ້ນການສຳຜັດກັບວົງຈອນທີ່ລະອຽດອ່ອນ.
- Ensure proper grounding to prevent ESD.
- Refer to the CPU, memory, and other component manuals for specific installation instructions.
2. ແຜນຜັງຂອງເມນບອດ

ຮູບ 2: ເທິງລົງລຸ່ມ view highlighting key components and connectors on the motherboard.
Familiarize yourself with the locations of the CPU socket, memory slots, PCI-E slots, SATA ports, and power connectors before installation.
3. ການຕິດຕັ້ງ CPU (LGA 1151)
- ຊອກຫາຊັອກເກັດ CPU LGA 1151 ຢູ່ໃນເມນບອດ.
- ຍູ້ຕົວໂຫຼດຄ່ອຍໆລົງ ແລະດຶງມັນໄປທາງຂ້າງເພື່ອເປີດຝາປິດຊັອກເກັດ CPU.
- Carefully align the notches on your Intel Core i7/i5/i3/Pentium/Celeron (14nm) processor with the corresponding keys on the socket. Ensure the gold triangle on the CPU matches the triangle on the socket.
- Place the CPU gently into the socket without forcing it.
- ປິດແຜ່ນບັນຈຸແລະຍູ້ lever ໂຫຼດກັບຄືນໄປບ່ອນສະຖານທີ່ຈົນກ່ວາມັນກົດ.

ຮູບທີ 3: ໄລຍະໃກ້ view of the LGA 1151 CPU socket, ready for processor installation.
4. Memory Installation (DDR4 DIMM)
The motherboard features two DDR4 DIMM slots, supporting dual-channel DDR4 2133MHz memory up to a maximum of 32GB.
- ເປີດຄລິບຢູ່ທັງສອງສົ້ນຂອງຊ່ອງສຽບ DIMM.
- ວາງຈຸດໃສ່ໃນໂມດູນຄວາມຈຳ DDR4 ດ້ວຍກະແຈໃນຊ່ອງສຽບ DIMM.
- ສຽບໂມດູນໜ່ວຍຄວາມຈຳເຂົ້າໄປໃນຊ່ອງສຽບຢ່າງແໜ້ນ ຈົນກວ່າຄລິບຈະເຂົ້າໃສ່. ໃຫ້ແນ່ໃຈວ່າທັງສອງຄລິບຖືກປິດ.

Figure 4: The two DDR4 DIMM slots for memory installation.
5. Storage Device Installation (SATA III & M.2)
The motherboard provides 4 x Serial ATA III interfaces and 1 x M.2 slot for storage devices.
- ອຸປະກອນ SATA: Connect one end of a SATA data cable to a SATA III port on the motherboard and the other end to your SATA hard drive or SSD. Connect the SATA power cable from your power supply to the drive.
- M.2 Devices: Insert your M.2 SSD into the M.2 slot, securing it with the provided screw.
6. Expansion Card Installation (PCI-E)
The motherboard includes 1 x PCI-E x16 graphics card slot and 2 x PCI-E x1 slots for expansion cards.
- Align your PCI-E expansion card (e.g., graphics card, sound card, network card) with the desired PCI-E slot.
- Press the card firmly into the slot until it is fully seated. Secure the card with a screw to the chassis.
7. Connecting Peripherals and Front Panel
Connect your USB devices, DVI display, audio devices, and Ethernet cable to the rear I/O panel. Connect the front panel connectors (power button, reset button, USB ports, audio jacks) from your PC case to the corresponding headers on the motherboard.

ຮູບທີ 5: ລາຍລະອຽດ view of the rear I/O panel, showing USB, DVI, Ethernet, and audio ports.
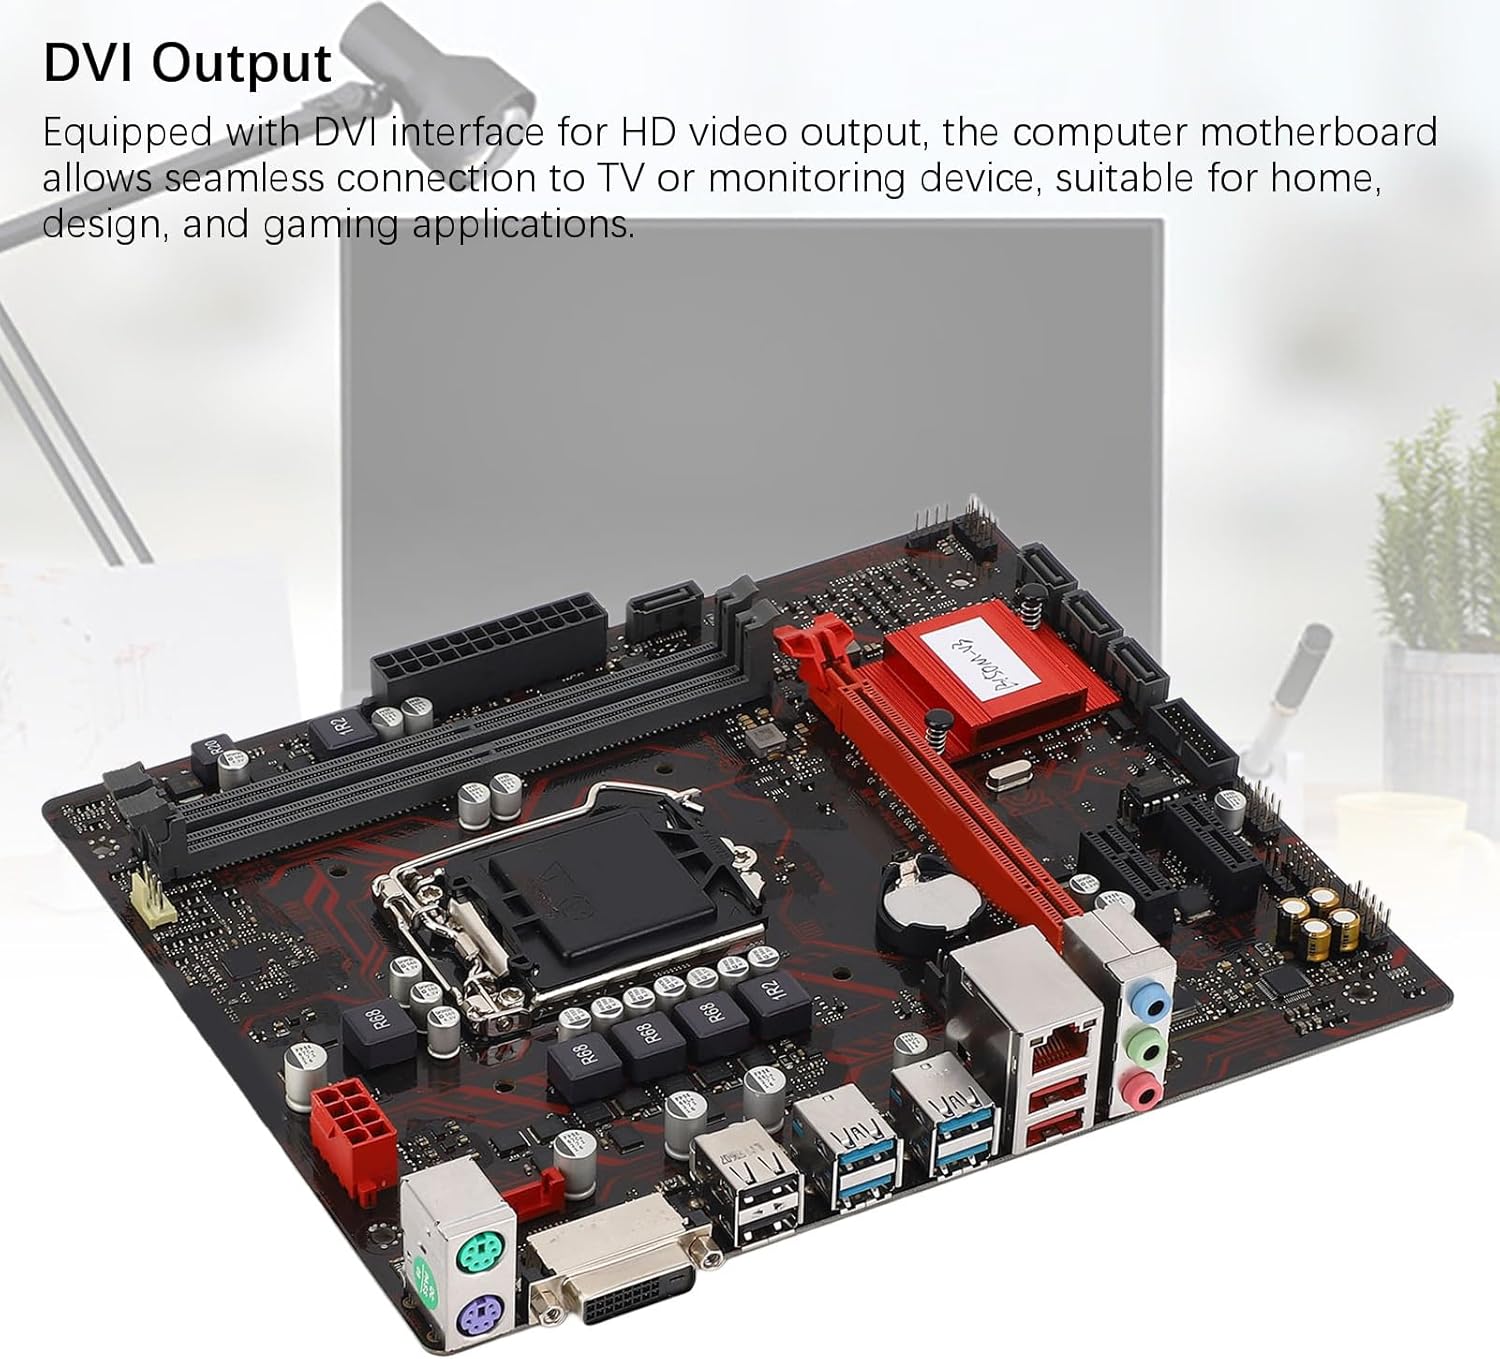
Figure 6: The DVI interface for connecting a display.
8. ການເຊື່ອມຕໍ່ພະລັງງານ
Connect the 24-pin ATX power connector and the 8-pin CPU power connector from your power supply to the respective ports on the motherboard. Ensure they are firmly seated.

ຮູບທີ 7: ມຸມ view showing the location of power connectors and other ports.
ຄໍາແນະນໍາການດໍາເນີນງານ
1. ການ Boot-up ເບື້ອງຕົ້ນ
After all components are installed and connected, power on your system. The system should initiate the boot process. If no display appears, refer to the troubleshooting section.
2. ການຕັ້ງຄ່າ BIOS/UEFI
During boot-up, press the designated key (usually DEL or F2) to enter the BIOS/UEFI setup. Here you can configure boot order, system time, and other advanced settings. Save changes before exiting.
3. ການຕິດຕັ້ງໄດເວີ
After installing your operating system, install the necessary drivers for the motherboard chipset, network, and audio. These are typically provided on a driver CD or available for download from the manufacturer's webເວັບໄຊ.
ບໍາລຸງຮັກສາ
1. ການເຮັດຄວາມສະອາດຝຸ່ນ
Regularly clean the inside of your computer case to prevent dust buildup, which can lead to overheating and component failure. Use compressed air to gently remove dust from fans, heatsinks, and motherboard surfaces.
2. ການອັບເດດ BIOS
ກວດສອບຜູ້ຜະລິດເປັນໄລຍະ webເວັບໄຊທ໌ສໍາລັບການອັບເດດ BIOS. ການປັບປຸງ BIOS ສາມາດປັບປຸງຄວາມຫມັ້ນຄົງຂອງລະບົບ, ເພີ່ມການສະຫນັບສະຫນູນສໍາລັບຮາດແວໃຫມ່, ຫຼືແກ້ໄຂຂໍ້ຜິດພາດ. ປະຕິບັດຕາມຄໍາແນະນໍາການອັບເດດຢ່າງລະມັດລະວັງເພື່ອຫຼີກເວັ້ນການທໍາລາຍ motherboard.
ການແກ້ໄຂບັນຫາ
1. ບໍ່ມີພະລັງງານ
- Ensure the power supply is connected to the wall outlet and switched on.
- Verify that the 24-pin and 8-pin power connectors are securely attached to the motherboard.
- ກວດສອບການເຊື່ອມຕໍ່ສະວິດໄຟຂອງແຜງດ້ານໜ້າກັບເມນບອດ.
2. ບໍ່ມີຈໍສະແດງຜົນ
- Confirm that the monitor is connected to the correct video output (DVI) on the motherboard or graphics card and is powered on.
- Reseat the memory modules. Try booting with only one memory module installed.
- ຣີເຊັດບັດກາຟິກ (ຖ້າມີ).
- Ensure the CPU is properly installed and the CPU cooler is securely attached.
3. ຄວາມບໍ່ສະຖຽນລະພາບຂອງລະບົບ / ການຂັດຂ້ອງ
- Check for overheating. Ensure all fans are working and heatsinks are clean.
- Verify that all components (CPU, RAM, storage) are properly seated.
- ເປີດໃຊ້ເຄື່ອງມືວິນິດໄສຄວາມຈຳເພື່ອກວດສອບ RAM ທີ່ຜິດພາດ.
- ຮັບປະກັນວ່າໄດເວີທັງໝົດແມ່ນອັບເດດແລ້ວ.
ຂໍ້ມູນຈໍາເພາະ

Figure 8: The motherboard's robust construction ensures stable performance and longevity.
| ຄຸນສົມບັດ | ລາຍລະອຽດ |
|---|---|
| ຮູບແບບເມນບອດ | B150M-V3 |
| ຊິບເຊັດ | ຊິບເຊັດ B150 |
| ເຕົ້າສຽບ CPU | LGA 1151 |
| Compatible CPU Type | Intel Core i7, i5, i3, Pentium, Celeron (14nm processors) |
| ປະເພດຄວາມຈໍາ | 2 x DDR4 DIMM (Dual Channel) |
| ຄວາມໄວຄວາມຈໍາ | 2133MHz |
| ຄວາມອາດສາມາດຫນ່ວຍຄວາມຈໍາສູງສຸດ | 32GB |
| ມາດຕະຖານ PCI-E | PCI-E 3.0 |
| PCI-E x16 Slots | 1 |
| PCI-E x1 Slots | 2 |
| ການໂຕ້ຕອບການເກັບຮັກສາ | 4 x Serial ATA III, 1 x M.2 |
| USB Interfaces (Rear) | 4 x USB3.0, 4 x USB2.0 |
| USB Interfaces (Internal) | 1 x USB3.0 header, 1 x USB2.0 header |
| ອິນເຕີເຟດວິດີໂອ | 1 x DVI |
| Network Chip | Realtek RTL8111GR Gigabit Ethernet |
| ຊິບສຽງ | Realtek ALC887 8-Channel |
| ການໂຕ້ຕອບພະລັງງານ | One 8-Pin, One 24-Pin |
| ປັດໄຈແບບຟອມ | M-ATX |
| ຮູບແບບການສະ ໜອງ ພະລັງງານ | 5 ໄລຍະ |
| ອິນເຕີເຟດອື່ນໆ | RJ45, Chassis Fan, Internal Speaker, System Panel, Sound, PS/2 Mouse, PS/2 Keyboard, COM |
ຂໍ້ມູນການຮັບປະກັນ
For specific warranty terms and conditions, please refer to the documentation provided with your purchase or visit the official Zyyini webເວັບໄຊ. ໂດຍທົ່ວໄປແລ້ວການຮັບປະກັນປະກອບມີຂໍ້ບົກພ່ອງຂອງວັດສະດຸ ແລະຝີມືພາຍໃຕ້ການໃຊ້ງານປົກກະຕິ.
ການຊ່ວຍເຫຼືອລູກຄ້າ
If you encounter any issues that cannot be resolved using this manual, please contact your retailer or visit the Zyyini official support channels for assistance. Have your product model number (B150M-V3) and purchase details ready when seeking support.