1. ບົດແນະນຳ
This manual provides essential information for the proper installation, operation, and maintenance of your GAMEON Pro Series 27-inch Fast IPS Gaming Monitor (Model: GOAE27QHD165IPS). Please read this manual thoroughly before using the product to ensure optimal performance and safety. Keep this manual for future reference.

ຮູບພາບ 1.1: ດ້ານຫນ້າ view of the GAMEON Pro Series 27-inch Fast IPS Gaming Monitor, showcasing bezels ກະທັດຮັດແລະຢືນ.
The GAMEON Pro Series 27-inch Fast IPS Gaming Monitor features a QHD 2K (2560x1440p) resolution, a 165Hz refresh rate, and a 0.5ms MPRT response time. It supports Adaptive-Sync and Variable Refresh Rate (VRR) technologies for smooth, tear-free gameplay. Connectivity options include dual HDMI 2.1 ports and dual DisplayPort 1.4 ports, along with an audio-out jack and integrated speakers. This monitor is compatible with various gaming consoles and PCs, including PS5.
2. ເນື້ອໃນຊຸດ
ກະລຸນາກວດເບິ່ງເນື້ອໃນຂອງແພັກເກັດເມື່ອ unboxing. ຖ້າລາຍການໃດຂາດຫາຍໄປ ຫຼືເສຍຫາຍ, ໃຫ້ຕິດຕໍ່ຮ້ານຂາຍຍ່ອຍຂອງເຈົ້າ.
- GAMEON Pro Series 27-inch Fast IPS Gaming Monitor
- Monitor Stand (ຖານ ແລະ ຄໍ)
- Power Adapter ແລະສາຍໄຟ
- ສາຍ HDMI
- ສາຍ DisplayPort
- ຄູ່ມືຜູ້ໃຊ້
3. ຕັ້ງຄ່າ
3.1 Monitor Assembly
- ເອົາຈໍພາບອອກຈາກເຄື່ອງຫຸ້ມຫໍ່ຂອງມັນຢ່າງລະມັດລະວັງ, ຮັກສາຫນ້າຈໍປ້ອງກັນ.
- ແນບຄໍຂາຕັ້ງໃສ່ກັບແຜງຈໍພາບ. ໃຫ້ແນ່ໃຈວ່າມັນກົດຢ່າງປອດໄພເຂົ້າໄປໃນສະຖານທີ່ຫຼືໄດ້ຖືກ fastened ດ້ວຍ screws ຖ້າຫາກວ່າໄດ້ສະຫນອງໃຫ້.
- Attach the stand base to the stand neck and tighten the screw at the bottom of the base.
- ວາງຈໍສະແດງຜົນທີ່ປະກອບໃສ່ໃນພື້ນທີ່ຮາບພຽງທີ່ຫມັ້ນຄົງ.
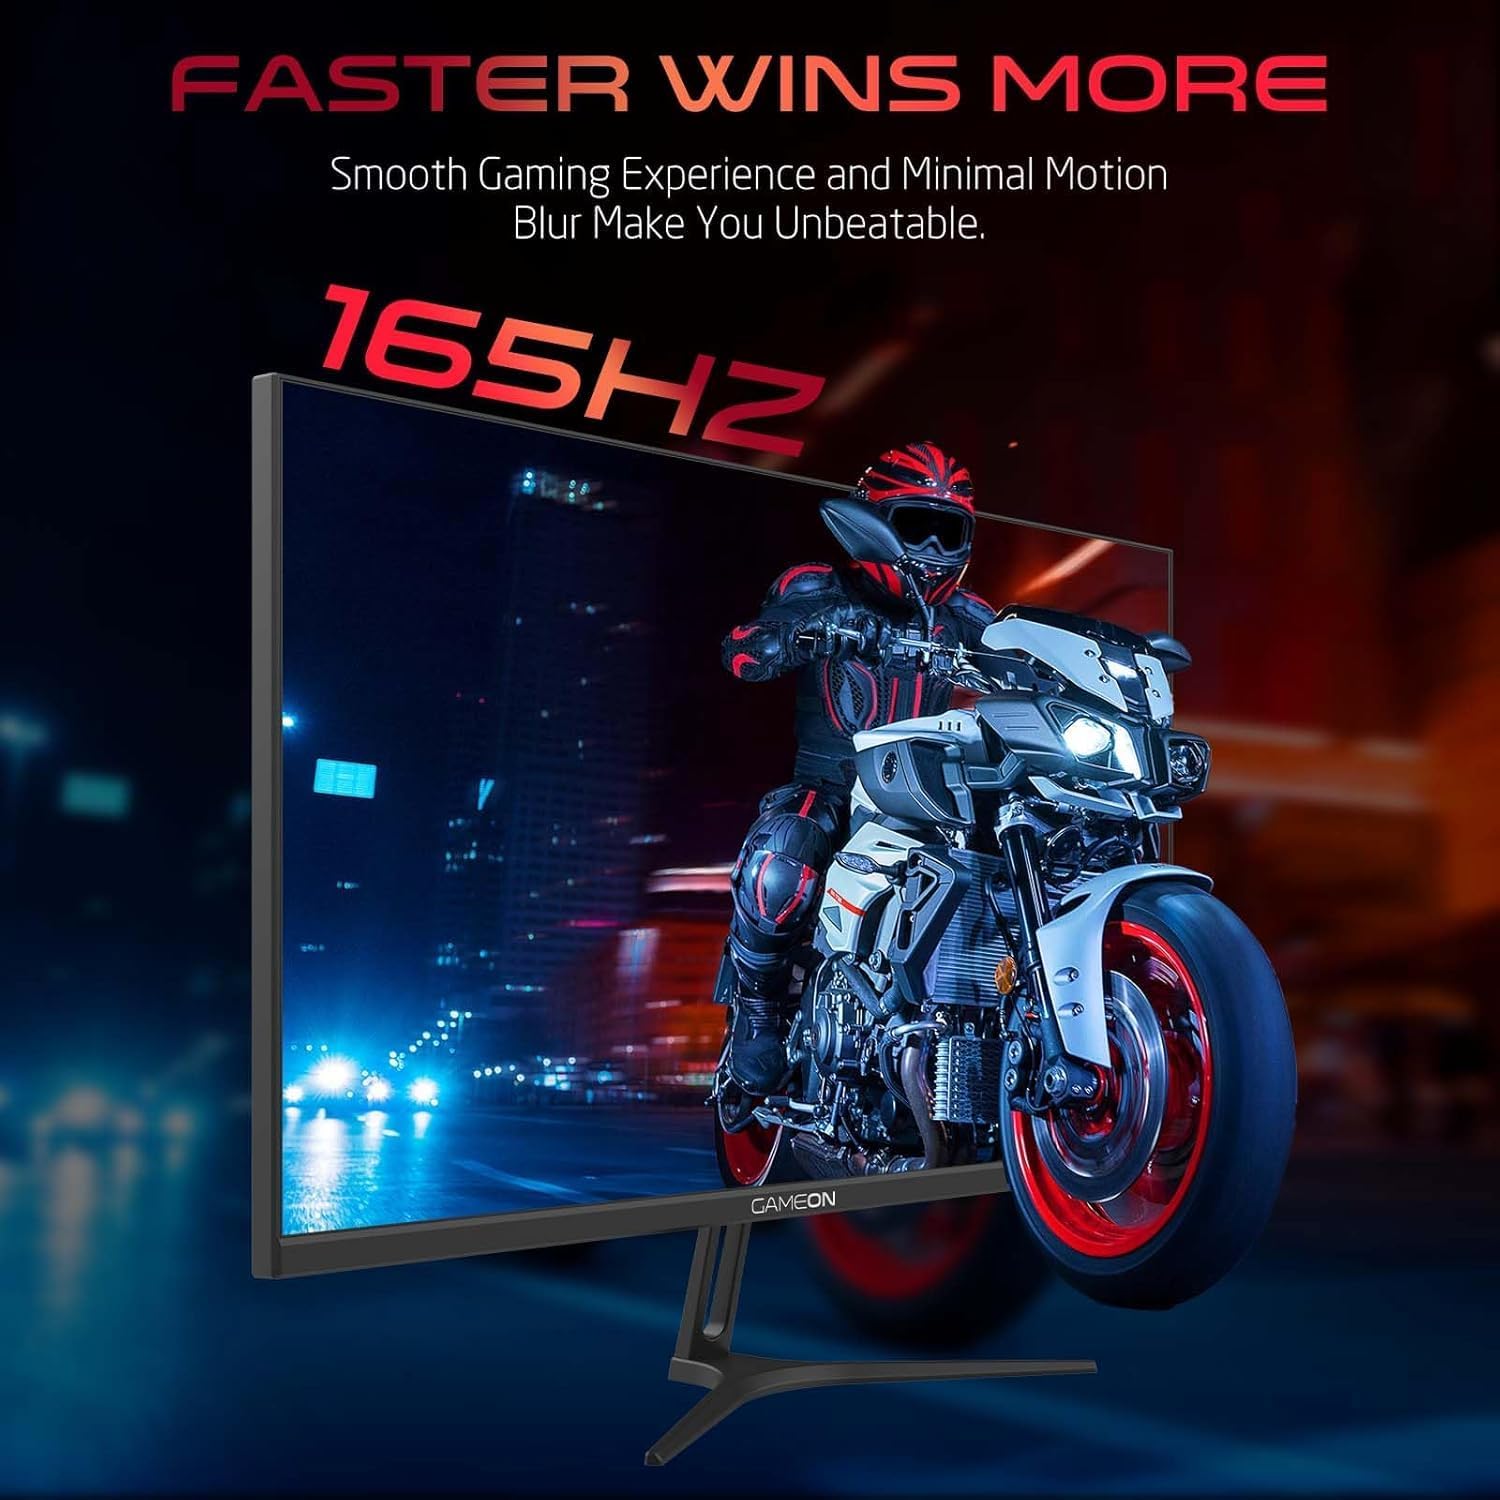
Image 3.1: Illustration of the monitor with its stand, ready for assembly.
3.2 ການເຊື່ອມຕໍ່ກັບອຸປະກອນ
The monitor offers multiple input options. Choose the appropriate cable for your device (PC, gaming console, etc.).

ຮູບພາບ 3.2: ດ້ານຫລັງ view of the monitor, highlighting the input ports and VESA mounting points.

Image 3.3: Detailed diagram illustrating the various input/output ports and their corresponding devices.
- ການເຊື່ອມຕໍ່ HDMI: Connect one end of the HDMI cable to the HDMI output port of your device (PC, PS5, Xbox, TV box) and the other end to one of the HDMI 2.1 ports on the monitor.
- ການເຊື່ອມຕໍ່ DisplayPort: Connect one end of the DisplayPort cable to the DisplayPort output of your PC and the other end to one of the DisplayPort 1.4 ports on the monitor.
- ສຽງອອກ: For external audio, connect headphones or external speakers to the 3.5mm audio-out jack on the monitor.
3.3 ການເຊື່ອມຕໍ່ພະລັງງານ
- Connect the power adapter to the DC IN port on the monitor.
- Plug the power cable into the power adapter, then plug the other end of the power cable into a power outlet.
4. ຄໍາແນະນໍາການດໍາເນີນງານ
4.1 ເປີດ/ປິດ
ກົດປຸ່ມເປີດປິດຢູ່ໃນຈໍສະແດງຜົນເພື່ອເປີດຫຼືປິດມັນ. ໄຟຕົວຊີ້ວັດພະລັງງານຈະສະຫວ່າງເມື່ອຈໍພາບເປີດຢູ່.
4.2 ເມນູການສະແດງເທິງໜ້າຈໍ (OSD).
The monitor features a menu button (often a joystick or a series of buttons) usually located on the back or bottom right of the monitor. Use this to navigate the OSD menu and adjust settings.
- Press the menu button to open the OSD menu.
- ໃຊ້ການຄວບຄຸມການນຳທາງເພື່ອເລື່ອນຜ່ານຕົວເລືອກເມນູ.
- Press the menu button again (or a designated 'Enter' button) to select an option.
- Use the navigation controls to adjust values or select sub-menus.
- Select 'Exit' or press the menu button repeatedly to close the OSD menu.
4.3 ການຕັ້ງຄ່າ OSD ທົ່ວໄປ
- ການຕັ້ງຄ່າຮູບ: ປັບຄວາມສະຫວ່າງ, ກົງກັນຂ້າມ, ຄວາມຄົມຊັດ, gamma, ແລະອຸນຫະພູມສີ.
- ການຕັ້ງຄ່າສີ: Fine-tune RGB values, hue, and saturation.
- ແຫຼ່ງປ້ອນຂໍ້ມູນ: Manually select between HDMI 1, HDMI 2, DisplayPort 1, or DisplayPort 2.
- ສຽງ: ປັບລະດັບສຽງສຳລັບລຳໂພງໃນຕົວ ຫຼື ຫູຟັງທີ່ເຊື່ອມຕໍ່.
- ຄຸນນະສົມບັດຂອງເກມ: Enable/disable Adaptive-Sync/FreeSync, adjust overdrive settings, and activate crosshair overlays if available.
4.4 PS5 120Hz Setup Guide
To enable 120Hz output on your PlayStation 5 with this monitor, follow these steps:

Image 4.1: Visual guide for configuring 120Hz refresh rate on a PlayStation 5 console.
- Enable 120Hz from PS5 Settings:
- ໄປທີ່ ການຕັ້ງຄ່າ > Screen and Video > ຜົນຜະລິດວິດີໂອ.
- ຕັ້ງ Enable 120Hz Output ກັບ ອັດຕະໂນມັດ.
- ຕັ້ງ ຄວາມລະອຽດ ກັບ 1080p or ອັດຕະໂນມັດ. (Note: While the monitor supports 1440p, some PS5 games may require 1080p for 120Hz output.)
- Enable Performance Mode for Gamers:
- ໄປທີ່ ການຕັ້ງຄ່າ > Save Data and Game App Settings > ເກມ Presets.
- ຕັ້ງ ໂໝດປະສິດທິພາບ ເປັນຄ່າເລີ່ມຕົ້ນ.
- Check In-Game Settings:
- Go to the specific game's ການຕັ້ງຄ່າເກມ > ການຕັ້ງຄ່າວິດີໂອ ແລະເລືອກ 120fps or ໂໝດປະສິດທິພາບ.
5. ບໍາລຸງຮັກສາ
5.1 ການທໍາຄວາມສະອາດຫນ້າຈໍ
- ປິດໜ້າຈໍ ແລະຖອດສາຍໄຟອອກ.
- ໃຊ້ຜ້າແພອ່ອນໆ ທີ່ບໍ່ມີເສັ້ນດ່າງ ງampສໍາເລັດດ້ວຍນ້ໍາຫຼືເຄື່ອງເຮັດຄວາມສະອາດຫນ້າຈໍພິເສດ.
- Wipe the screen gently. Do not press hard or use abrasive materials.
- Avoid using alcohol, ammonia, or benzene-based cleaners, as they may damage the screen surface.
5.2 ການທໍາຄວາມສະອາດ Casing
- ໃຊ້ຜ້າອ່ອນໆເຊັດຈໍສະແດງຜົນ casing.
- ສໍາລັບ stains stubborn, lightly dampen ຜ້າດ້ວຍນ້ໍາແລະຢາຊັກຟອກອ່ອນໆ, ຫຼັງຈາກນັ້ນເຊັດໃຫ້ແຫ້ງ.
6. ການແກ້ໄຂບັນຫາ
If you encounter issues with your monitor, refer to the following troubleshooting guide:
| ບັນຫາ | ສາເຫດທີ່ເປັນໄປໄດ້ | ການແກ້ໄຂ |
|---|---|---|
| ບໍ່ມີຮູບພາບໃນ ໜ້າ ຈໍ | ບໍ່ມີພະລັງງານ; ແຫຼ່ງປ້ອນຂໍ້ມູນບໍ່ຖືກຕ້ອງ; ສາຍວິດີໂອວ່າງ | Ensure power cable is securely connected and power outlet is active. Press power button. Check OSD menu to select correct input source (HDMI/DP). Reconnect video cable firmly. |
| ຮູບພາບມົວຫຼືບິດເບືອນ | Incorrect resolution; Video cable issue | Set display resolution to 2560x1440p in your device's display settings. Try a different video cable. |
| ບໍ່ມີສຽງ | Volume too low; Incorrect audio output selected; Loose audio cable | Adjust monitor volume via OSD. Ensure monitor is selected as the audio output device on your PC/console. Check external audio cable connection if using headphones/speakers. |
| ໜ້າຈໍກະພິບ | Refresh rate mismatch; Adaptive-Sync/VRR issue | Ensure your device's refresh rate is set to 165Hz. If flickering persists with Adaptive-Sync/VRR enabled, try disabling it in the OSD or your graphics card settings. |
| Monitor not detected by PC/console | Video cable issue; Driver issue | Try a different video cable or port. Update your graphics card drivers. Restart your PC/console. |
7. ຂໍ້ມູນຈໍາເພາະ
Below are the technical specifications for the GAMEON Pro Series 27-inch Fast IPS Gaming Monitor (GOAE27QHD165IPS):
| ຄຸນສົມບັດ | ຂໍ້ມູນຈໍາເພາະ |
|---|---|
| ຂະຫນາດຈໍສະແດງຜົນ | 27 ນິ້ວ |
| ປະເພດແຜງ | IPS ໄວ |
| ຄວາມລະອຽດ | QHD 2K (2560x1440p) |
| ອັດຕາການໂຫຼດຂໍ້ມູນຄືນໃໝ່ | 165Hz |
| ເວລາຕອບສະຫນອງ | 0.5ms MPRT |
| ອັດຕາສ່ວນກົງກັນຂ້າມ | 1000:1 |
| ຄວາມສະຫວ່າງ | 280 (±30) nits typical |
| Viewໃນ Angles | ກວ້າງ viewing angles (IPS technology) |
| ເທັກໂນໂລຍີການຊິງຄ໌ແບບປັບຕົວໄດ້ | Adaptive-Sync, FreeSync, VRR Compatible |
| ການເຊື່ອມຕໍ່ | 2x HDMI 2.1, 2x DisplayPort 1.4, 1x Audio Out (3.5mm) |
| ສຽງ | Built-in 4Ω2W speakers |
| ຄວາມເຂົ້າກັນໄດ້ຂອງ VESA Mount | 100x100ມມ |
| ການປ້ອນຂໍ້ມູນພະລັງງານ | ອະແດັບເຕີ DC 12V 4A ພາຍນອກ |
| ການບໍລິໂພກພະລັງງານສູງສຸດ | 48W |
| ຂະໜາດສິນຄ້າ (ມີຂາຕັ້ງ) | 16.2 x 61.4 x 45.3 cm |
| ນ້ຳໜັກສິນຄ້າ | 5.84 ກິໂລ |
| ໝາຍເລກຕົວແບບ | GOAE27QHD165IPS |
8. ການຮັບປະກັນແລະການສະຫນັບສະຫນູນ
The GAMEON Pro Series 27-inch Fast IPS Gaming Monitor comes with a ຮັບປະກັນ 2 ປີ ຈາກວັນທີ່ຊື້. ການຮັບປະກັນນີ້ກວມເອົາຄວາມບົກຜ່ອງດ້ານການຜະລິດພາຍໃຕ້ການນໍາໃຊ້ປົກກະຕິ. ກະລຸນາຮັກສາຫຼັກຖານການຊື້ຂອງທ່ານສໍາລັບການຮຽກຮ້ອງການຮັບປະກັນ.
For technical support, warranty inquiries, or service requests, please contact GAMEON customer service through their official website or the retailer where the product was purchased. Provide your monitor's model number (GOAE27QHD165IPS) and a detailed description of the issue to expedite assistance.