ແນະນຳ
This manual provides detailed instructions for the installation, operation, maintenance, and troubleshooting of your wisecoco 12.6 Inch Bar LCD Screen HDMI Display Monitor. This monitor is specifically designed to integrate seamlessly with the Hyte Y60 PC case, serving as an excellent secondary display for monitoring system performance, displaying custom visuals, or extending your desktop.

Figure 1: The 12.6-inch bar LCD screen displaying real-time system performance data.
ການຕິດຕັ້ງແລະການຕິດຕັ້ງ
The wisecoco 12.6 Inch Bar LCD Screen is designed for easy installation, particularly within the Hyte Y60 PC case. The package includes all necessary components for a straightforward setup.
ເນື້ອໃນຊຸດ
ກ່ອນທີ່ຈະເລີ່ມການຕິດຕັ້ງ, ກະລຸນາກວດສອບວ່າທຸກລາຍການມີຢູ່ໃນຊຸດ:
- 12.6-inch Bar LCD Screen
- 3.5mm DC Power Cable
- ສາຍ HDMI ຫາ Mini HDMI
- ຂ້າມ Screwdriver

Figure 2: Included accessories: DC power cable, HDMI to Mini HDMI cable, and a screwdriver.
Installation Steps (for Hyte Y60 PC Case)
- ການກະກຽມກໍລະນີຄອມພິວເຕີ: Ensure your Hyte Y60 PC case is powered off and unplugged. Carefully remove the side panel where the monitor will be installed.
- Mount the Screen: The screen features a bracket specifically designed to fit the Y60 case panel. Align the screen with the designated slot on the case. Use the provided screwdriver to secure the screen in place. No additional screws are typically required.
- ເຊື່ອມຕໍ່ສາຍວິດີໂອ: Connect one end of the HDMI to Mini HDMI cable to the Mini HDMI port on the monitor. Connect the other end to an available HDMI port on your graphics card (GPU) or motherboard.
- ເຊື່ອມຕໍ່ສາຍໄຟ:
- Connect the 3.5mm DC power cable to the DC 3.5mm port on the monitor. The other end of this cable typically connects to a power source within your PC.
- Alternatively, the screen can be powered via a Micro USB A cable (not included). If using Micro USB A, ensure the input is 5V500mA. If using the DC cable, the input should be 5V2A.
- ການຄຸ້ມຄອງສາຍໄຟ: Route the cables neatly within your PC case to avoid interference with fans or other components.
- ເປີດ: Once all connections are secure, replace the PC case panel, plug in your PC, and power it on. The monitor should be detected as a secondary display.

Figure 3: Visual guide for installing the secondary monitor into the Hyte Y60 PC case.

Figure 4: The monitor seamlessly integrated into a Hyte Y60 PC case, displaying custom visuals.

Figure 5: Dimensions and port layout of the 12.6-inch bar LCD screen.
ຄໍາແນະນໍາການດໍາເນີນງານ
The wisecoco 12.6 Inch Bar LCD Screen functions as a standard secondary display, compatible with PCs and laptops. It offers versatile display options and user-friendly controls.
ຄຸນສົມບັດການສະແດງ
- ຄວາມລະອຽດ: 1920x515 IPS panel for clear and vibrant visuals.
- ເວລາຕອບສະໜອງ: 3-5ms for smooth motion.
- Viewໃນມຸມ: ກວ້າງ 178° viewing angle ຮັບປະກັນຄຸນນະພາບຮູບພາບທີ່ສອດຄ່ອງຈາກທັດສະນະຕ່າງໆ.
- ອັດຕາການໂຫຼດຂໍ້ມູນຄືນໃໝ່: 60Hz standard refresh rate.
- ອັດຕາສ່ວນກົງກັນຂ້າມ: 1000:1 ສໍາລັບສີດໍາເລິກແລະສີຂາວສົດໃສ.
- ລຳໂພງໃນຕົວ: Integrated dual speakers provide audio output.

Figure 6: The monitor features a 178° full viewing angle and IPS technology for superior image quality.
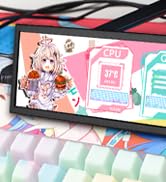
Figure 7: The Wisecoco monitor includes built-in speakers for convenience.
ໂໝດສະແດງຜົນ
The monitor supports both landscape and portrait modes, allowing for flexible integration into your setup. You can adjust the display orientation through your operating system's display settings.

Figure 8: The monitor supports both portrait and landscape display orientations.
ການຄວບຄຸມຈໍສະແດງຜົນ (OSD).
The monitor features physical buttons on the back for accessing the OSD menu and controlling basic functions:
- ທີ່ມາ: Switches between available video inputs (e.g., Mini HDMI 1, Mini HDMI 2).
- ປະລິມານ +/-: Adjusts the audio output level of the built-in speakers.
- ເມນູ: Accesses the OSD menu for advanced settings (brightness, contrast, color, etc.).
- ພະລັງງານ: ເປີດ ຫຼືປິດຈໍສະແດງຜົນ.
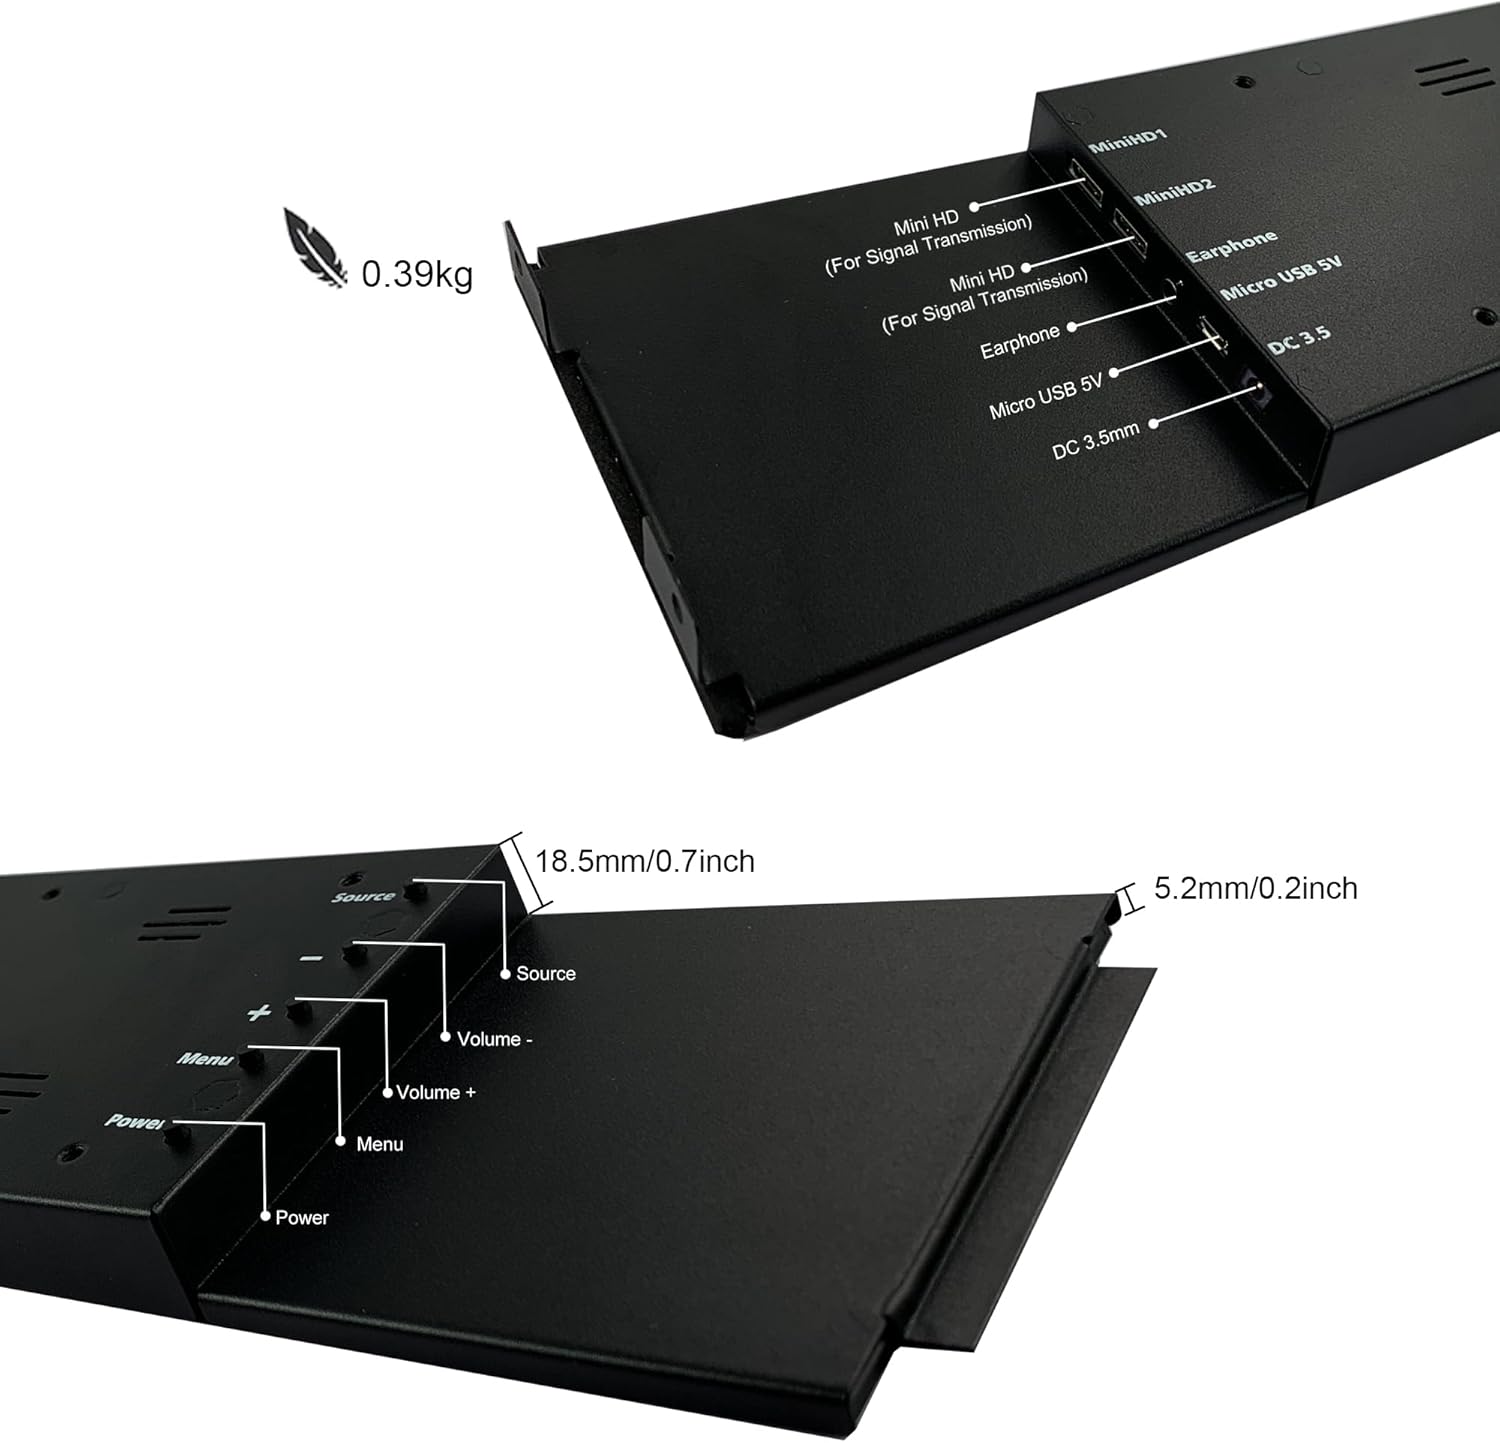
Figure 9: Location of control buttons and ports on the side of the monitor.
ບໍາລຸງຮັກສາ
ການບໍາລຸງຮັກສາທີ່ເຫມາະສົມຮັບປະກັນອາຍຸຍືນແລະການປະຕິບັດທີ່ດີທີ່ສຸດຂອງຈໍພາບຂອງທ່ານ.
- ທໍາຄວາມສະອາດຫນ້າຈໍ: ໃຊ້ຜ້າອ່ອນໆທີ່ບໍ່ມີຂົນທີ່ອອກແບບມາສະເພາະສຳລັບເຄື່ອງເອເລັກໂຕຣນິກ. ສຳລັບຮອຍທີ່ຝັງແໜ້ນ, ໃຫ້ເຊັດເບົາໆampen the cloth with water or a screen-cleaning solution. Avoid harsh chemicals, abrasive materials, or spraying liquid directly onto the screen.
- ທໍາຄວາມສະອາດທົ່ວໄປ: ເຊັດຈໍສະແດງຜົນ casing ດ້ວຍຜ້າອ່ອນ, ແຫ້ງ.
- ການລະບາຍອາກາດ: ໃຫ້ແນ່ໃຈວ່າຊ່ອງລະບາຍອາກາດຂອງຈໍສະແດງຜົນບໍ່ໄດ້ຖືກບລັອກເພື່ອປ້ອງກັນຄວາມຮ້ອນເກີນໄປ.
- ເງື່ອນໄຂສິ່ງແວດລ້ອມ: ຫຼີກລ່ຽງການໃຫ້ຈໍພາບຖືກອຸນຫະພູມສູງ, ຄວາມຊຸ່ມຊື່ນສູງ ຫຼື ແສງແດດໂດຍກົງ.
- ປິດເຄື່ອງເມື່ອບໍ່ໄດ້ໃຊ້: For extended periods of inactivity, it is recommended to power off the monitor.
ການແກ້ໄຂບັນຫາ
If you encounter issues with your wisecoco monitor, refer to the following common problems and solutions:
| ບັນຫາ | ສາເຫດທີ່ເປັນໄປໄດ້ | ການແກ້ໄຂ |
|---|---|---|
| ບໍ່ມີການສະແດງຜົນ / ຂໍ້ຄວາມ "ບໍ່ມີສັນຍານ" |
|
|
| Screen flashes red, blue, or green when PC sleeps | Specific display settings or driver interaction. | Access the monitor's OSD menu and navigate through settings. Sometimes simply accessing and exiting the menu can resolve this. Ensure GPU drivers are updated. |
| ບໍ່ມີສຽງຈາກລຳໂພງໃນຕົວ |
|
|
| Half of the screen not working | Hardware defect or severe connection issue. |
|
ຂໍ້ມູນຈໍາເພາະຂອງຜະລິດຕະພັນ
Detailed technical specifications for the wisecoco 12.6 Inch Bar LCD Screen HDMI Display Monitor:
| ຄຸນສົມບັດ | ຂໍ້ມູນຈໍາເພາະ |
|---|---|
| ຂະໜາດສິນຄ້າ | 1 x 4 x 13 ນິ້ວ |
| ນ້ໍາຫນັກລາຍການ | 1.74 ປອນ |
| ຜູ້ຜະລິດ | Wisecoco |
| ໝາຍເລກຕົວແບບ | R126F01-HB |
| ຂະຫນາດຈໍສະແດງຜົນຢືນ | 12.6 ນິ້ວ |
| ອັດຕາສ່ວນ | 32:9 |
| ສະບັບtage | 5 ໂວນ (DC) |
| ຄວາມລະອຽດ | 1920 x 515 |
| ຍີ່ຫໍ້ | wisecoco |
| ຂະໜາດໜ້າຈໍ | 12.6 ນິ້ວ |
| ລາຍລະອຽດຫນ້າຈໍ | ເຫຼື້ອມເປັນເງົາ |
ການຮັບປະກັນແລະການສະຫນັບສະຫນູນ
Wisecoco is committed to providing high-quality products and customer satisfaction.
- ການຮັບປະກັນ: ຜະລິດຕະພັນນີ້ມາພ້ອມກັບການຮັບປະກັນ 12 ເດືອນນັບຕັ້ງແຕ່ວັນທີຊື້.
- ການຄໍ້າປະກັນຄືນເງິນ: ມີການຮັບປະກັນການຄືນເງິນເປັນເວລາ 30 ມື້.
- ການຊ່ວຍເຫຼືອລູກຄ້າ: 24-hour customer support is available for any inquiries or assistance.
For warranty claims, technical support, or any other questions, please contact Wisecoco customer service through the official channels provided at the point of purchase or on the Wisecoco brand webເວັບໄຊ.

Figure 10: Wisecoco's commitment to customer satisfaction.