
1. ບົດແນະນຳ
This instruction manual provides essential information for the proper assembly, operation, and maintenance of your Tilta Full Camera Cage Basic Kit for the RED KOMODO-X camera. This kit is designed to enhance the durability, versatility, and handling of your camera setup. Please read this manual thoroughly before use to ensure optimal performance and longevity of your equipment.
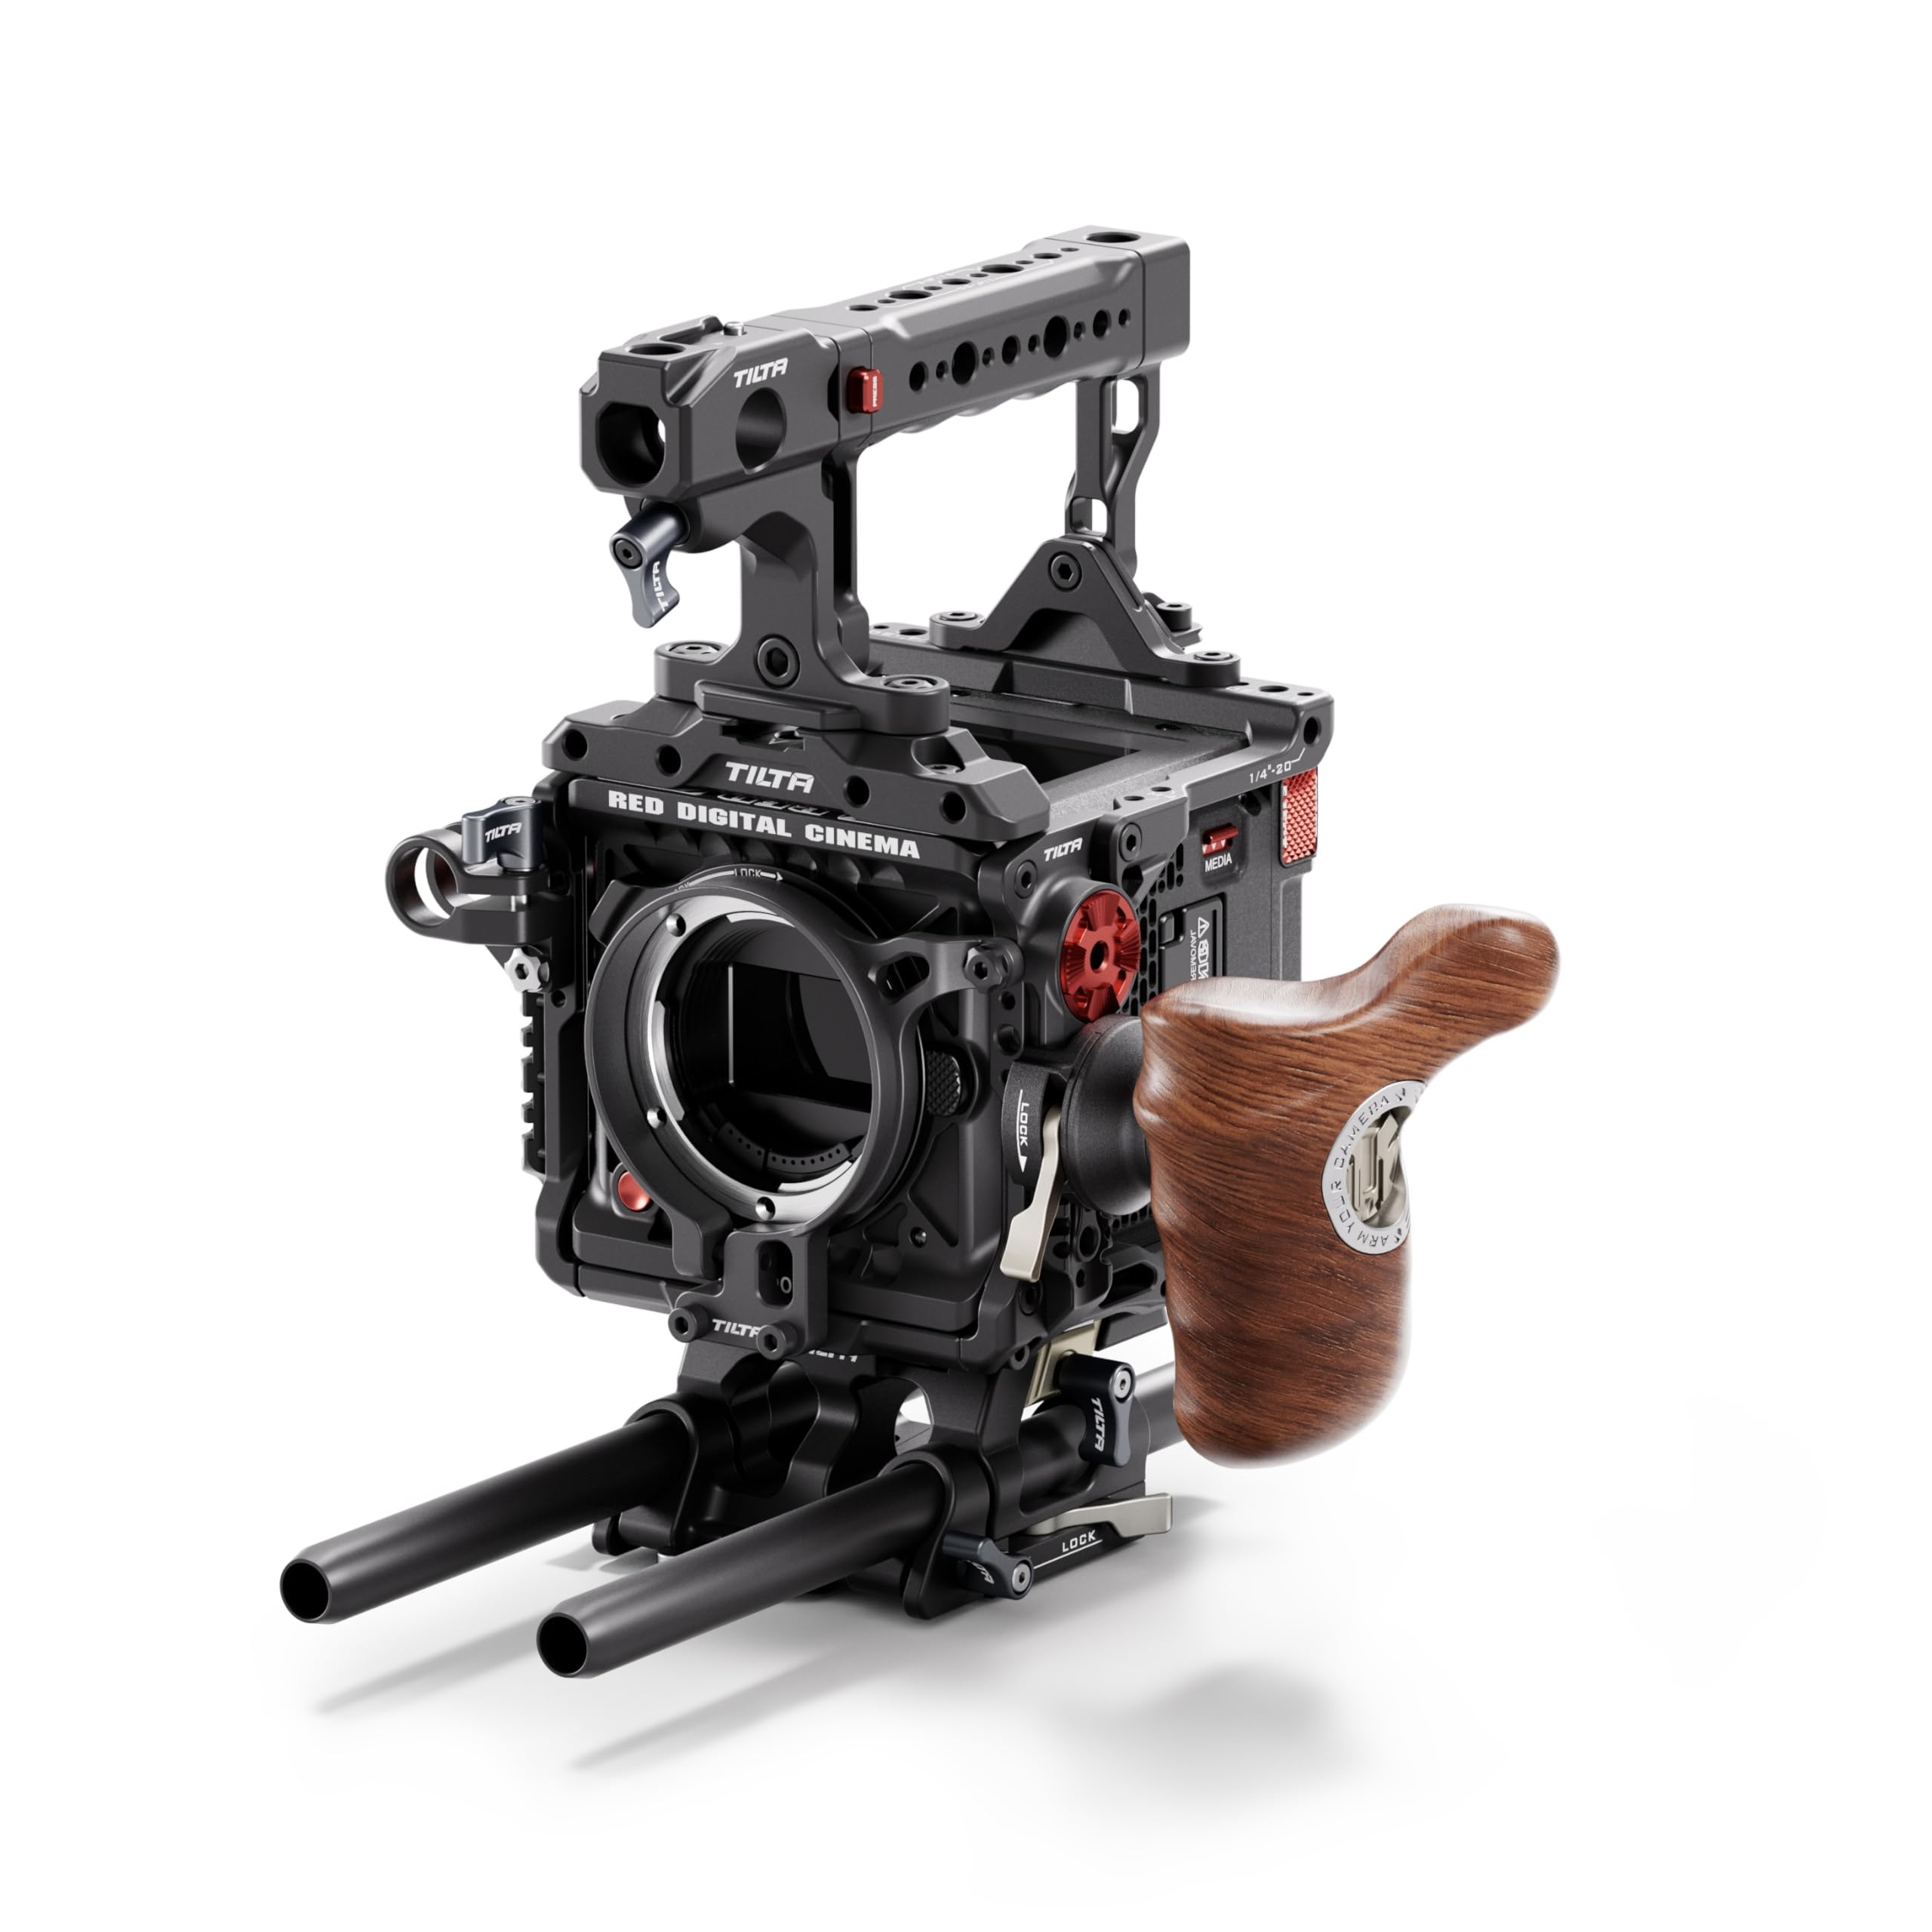
Figure 1.1: Tilta Full Camera Cage Basic Kit for RED KOMODO-X, fully assembled with camera and external monitor.
2. ສິ່ງທີ່ຢູ່ໃນກ່ອງ
The Tilta Full Camera Cage Basic Kit for RED KOMODO-X (Black) includes the following components:
- Full Camera Cage for RED KOMODO-X
- Foldable Top Handle
- Advanced Left Side Wooden Handle
- Quick Release Baseplate (TA-T53-QRBP-B)
- ຮອງຮັບອະແດັບເຕີເລນ
3. ການຕິດຕັ້ງແລະການປະກອບ
Follow these steps to assemble your camera cage kit:
3.1 Attaching the Camera Cage
- Ensure your RED KOMODO-X camera is powered off and any attached accessories are removed.
- Carefully align the camera with the bottom plate of the cage.
- Secure the camera to the cage using the provided screws. Ensure a snug fit without overtightening.
ຮູບທີ 3.1: ລະເບີດ view showing the modular components of the camera cage and how they fit around the RED KOMODO-X camera body.
3.2 Installing the Top Handle
- Attach the Foldable Top Handle to the top of the camera cage using the designated mounting points and screws.
- Ensure the handle is securely fastened for safe carrying and operation.

Figure 3.2: The foldable top handle attached to the camera cage, providing a secure grip and additional mounting options.
3.3 Attaching the Left Side Wooden Handle
- Mount the Advanced Left Side Wooden Handle to the NATO rail on the left side of the camera cage.
- ບີບອັດກົນໄກການລັອກໃຫ້ແໜ້ນເພື່ອຍຶດມືຈັບຢູ່ບ່ອນ.
3.4 Mounting the Quick Release Baseplate
- Attach the Quick Release Baseplate (TA-T53-QRBP-B) to the bottom of the camera cage.
- This baseplate allows for rapid transitions between tripod and handheld configurations.

Figure 3.3: The quick-release baseplate facilitates easy mounting and disassembly from tripods or other support systems.
3.5 Installing the Lens Adapter Support
- If using a lens adapter, attach the Lens Adapter Support to the front of the cage to provide additional stability for heavier lenses.
- Adjust the support to cradle the lens adapter securely.

Figure 3.4: A clamp-based lens adapter support provides secure and firm mounting for various lens setups.
4. ຄໍາແນະນໍາການດໍາເນີນງານ
The Tilta Full Camera Cage provides a robust framework for your RED KOMODO-X, offering numerous mounting points and enhanced ergonomics.
4.1 Accessory Mounting
- Utilize the multiple 1/4"-20, 3/8"-16, and M4 threads, NATO rails, and ARRI rosettes on the cage to attach various accessories such as monitors, microphones, lights, and wireless video transmitters.
- Ensure all accessories are securely fastened to prevent accidental detachment during operation.

Figure 4.1: The cage offers flexible mounting options for a wide range of camera accessories.
4.2 ການອອກແບບ ແລະ ການຈັດການ
- The Foldable Top Handle and Advanced Left Side Wooden Handle provide comfortable and secure grips for handheld shooting, improving stability and control.
- Adjust the position of the handles as needed for optimal balance and comfort.
4.3 Quick Release Functionality
- The Quick Release Baseplate allows for swift transitions between different camera support systems, such as tripods, gimbals, or shoulder rigs.
- Familiarize yourself with the quick-release mechanism before use in a production environment.
4.4 ຜະລິດຕະພັນເກີນview ວິດີໂອ
ວິດີໂອທີ 4.1: ຈົບແລ້ວview of the Tilta Camera Cage for RED KOMODO-X, demonstrating its features and assembly.
5. ບໍາລຸງຮັກສາ
- ທໍາຄວາມສະອາດ: Use a soft, dry cloth to wipe down the cage and handles. Avoid abrasive cleaners or solvents that could damage the finish.
- ການກວດກາ: Regularly inspect all screws and mounting points for tightness. Retighten as necessary to ensure secure operation.
- ການເກັບຮັກສາ: Store the camera cage in a clean, dry environment when not in use to prevent dust accumulation and potential damage.
6. ການແກ້ໄຂບັນຫາ
| ສະບັບ | ສາເຫດທີ່ເປັນໄປໄດ້ | ການແກ້ໄຂ |
|---|---|---|
| Cage feels loose on camera | Mounting screws are not fully tightened. | Ensure all camera mounting screws are securely tightened. Do not overtighten. |
| Accessories are not stable | Accessory mounting screws or clamps ແມ່ນວ່າງ. | Check and tighten all screws and clamps for attached accessories. |
| Difficulty attaching/detaching baseplate | Quick release mechanism is not fully disengaged or engaged. | Ensure the quick release lever is fully operated. Refer to the setup section for proper attachment. |
7. ຂໍ້ມູນຈໍາເພາະ
| ຄຸນສົມບັດ | ລາຍລະອຽດ |
|---|---|
| ຊື່ຕົວແບບ | TA-T53-A-B |
| ຍີ່ຫໍ້ | ທິວຕາ |
| ສີ | ດຳ |
| ອຸປະກອນທີ່ເຂົ້າກັນໄດ້ | RED KOMODO-X Camera |
| ນ້ໍາຫນັກລາຍການ | 4.92 ປອນ (ປະມານ 2.23 ກິໂລ) |
| ຂະໜາດພັບ | 5 x 6 x 13 ນິ້ວ (ປະມານ 12.7 x 15.2 x 33 ຊມ) |
| ຈຸດເຊື່ອມຕໍ່ | 1/4"-20, 3/8"-16, M4 threads, NATO rails, ARRI rosettes |
| ວັດສະດຸ | ອາລູມິນຽມ ນ້ຳໜັກເບົາ |
8. ການຮັບປະກັນແລະການສະຫນັບສະຫນູນ
- ການຮັບປະກັນ: ຜະລິດຕະພັນນີ້ມາພ້ອມກັບ a ຮັບປະກັນ 1 ປີຈໍາກັດ ຈາກວັນທີ່ຊື້. ກະລຸນາຮັກສາຫຼັກຖານການຊື້ຂອງທ່ານສໍາລັບການຮຽກຮ້ອງການຮັບປະກັນ.
- ສະຫນັບສະຫນູນ: For technical assistance, troubleshooting, or warranty inquiries, please contact Tilta customer support through their official webເວັບໄຊທ໌ຫຼືຮ້ານຂາຍຍ່ອຍບ່ອນທີ່ຜະລິດຕະພັນໄດ້ຖືກຊື້.