
1. ບົດແນະນຳ
Thank you for choosing the Aigo AC SE 120 Water Cooler. This All-in-One (AIO) liquid cooling system is designed to provide efficient thermal management for your CPU, ensuring stable performance and extended component lifespan. This manual provides detailed instructions for installation, operation, maintenance, and troubleshooting.
Please read this manual thoroughly before installation and use to ensure proper setup and to prevent any damage to your system.
2. ຂໍ້ມູນຄວາມປອດໄພ
- ກ່ອນທີ່ຈະຕິດຕັ້ງ ຫຼື ບຳລຸງຮັກສາອຸປະກອນຕ່າງໆ, ໃຫ້ຖອດສາຍໄຟອອກຈາກຄອມພິວເຕີຂອງທ່ານສະເໝີ.
- ຈັດການອົງປະກອບດ້ວຍຄວາມລະມັດລະວັງເພື່ອຫຼີກເວັ້ນການເສຍຫາຍ.
- ໃສ່ສາຍຮັດຂໍ້ມືປ້ອງກັນໄຟຟ້າສະຖິດເພື່ອປ້ອງກັນຄວາມເສຍຫາຍຈາກການປ່ອຍໄຟຟ້າສະຖິດ (ESD) ຕໍ່ອົງປະກອບທີ່ລະອຽດອ່ອນ.
- Do not open the sealed liquid cooling loop. Tampering with the unit may cause leaks and void your warranty.
- ໃຫ້ແນ່ໃຈວ່າສາຍເຄເບີ້ນທັງຫມົດຖືກເຊື່ອມຕໍ່ຢ່າງຖືກຕ້ອງແລະຖືກນໍາທາງເພື່ອຫຼີກເວັ້ນການລົບກວນກັບພາກສ່ວນການເຄື່ອນຍ້າຍ (ເຊັ່ນ: ໃບພັດລົມ).
- ຮັກສາໃຫ້ໄກຈາກເດັກນ້ອຍ.
3. ເນື້ອໃນຊຸດ
Verify that all components are present and in good condition before proceeding with installation.
- Aigo AC SE 120 Water Cooler Unit (Pump, Radiator, Fan pre-installed)
- Mounting Hardware for Intel Sockets (LGA 2066/ 2011-v3 / 2011 / 1700 / 1366 / 1200 / 115X)
- Mounting Hardware for AMD Sockets (FM1 / FM2 / FM2+ / AM2 / AM2+ / AM3 / AM3+ / AM4)
- ການວາງຄວາມຮ້ອນ (ໃຊ້ກ່ອນ ຫຼືໃສ່ໃນທໍ່)
- ຄູ່ມືຜູ້ໃຊ້

Image: Aigo AC SE 120 Water Cooler unit with its fan, radiator, pump, and various mounting brackets and screws for different CPU sockets.
4. ຂໍ້ມູນຈໍາເພາະ
| Socket Compatibility (Intel) | LGA 2066/ 2011-v3 / 2011 / 1700 / 1366 / 1200 / 115X |
| Socket Compatibility (AMD) | FM1 / FM2 / FM2+ / AM2 / AM2+ / AM3 / AM3+ / AM4 |
| ຂະໜາດບລັອກນໍ້າ | 71 x 66.5 x 45 ມມ |
| ຂະຫນາດຂອງຄວາມຮ້ອນ | 154 x 120 x 27 ມມ |
| Fan Dimensions | 120 x 120 x 25 ມມ |
| ຄວາມໄວປັ໊ມ | 3200 ± 10% RPM |
| ຄວາມໄວພັດລົມ | 800 ~ 1800 RPM |
| ກະແສລົມ | 64.05 CFM |
| TDP (ພະລັງງານການອອກແບບຄວາມຮ້ອນ) | 165W |
| ລະດັບສຽງ | 30 dBA ± 10% |
| ຄວາມກົດດັນຄົງທີ່ | 1.85 mmH2O |
| ປະເພດລູກປືນ | ເຊລາມິກ |
| ອັນດັບທີtage | 12V |
| ວິທີການເຮັດຄວາມເຢັນ | ນ້ຳ (ນ້ຳ) |
| ອຸປະກອນທີ່ເຂົ້າກັນໄດ້ | ເດັສທັອບ |
5. ການຕິດຕັ້ງແລະການຕິດຕັ້ງ
This section outlines the general steps for installing your Aigo AC SE 120 Water Cooler. Specific steps may vary slightly depending on your motherboard and PC case. Always refer to your motherboard and case manuals for detailed instructions.
5.1 Prepare the CPU Socket
- Intel Sockets: Attach the correct Intel backplate to the rear of your motherboard. Secure the standoffs through the motherboard holes from the front.
- ເຕົ້າຮັບ AMD: The cooler typically uses the existing AMD backplate. Remove the plastic retention clips from the stock AMD cooler mount, leaving the backplate in place. Install the appropriate AMD standoffs.
- Ensure the CPU is correctly seated in its socket.
- ທຳຄວາມສະອາດໜ້າຜິວ CPU ດ້ວຍເຫຼົ້າ isopropyl ເພື່ອເອົາກາວຄວາມຮ້ອນ ຫຼື ສິ່ງເສດເຫຼືອເກົ່າອອກ.
- Apply a thin, even layer of thermal paste to the center of the CPU's integrated heat spreader (IHS). If thermal paste is pre-applied to the water block, skip this step.
5.2 ຕິດຕັ້ງໝໍ້ນ້ຳ ແລະ ພັດລົມ
- Determine the optimal mounting location for the 120mm radiator in your PC case. Common locations include the rear exhaust or top exhaust.
- Mount the 120mm fan to the radiator using the provided screws. Ensure the fan is oriented to push or pull air in the desired direction (e.g., exhaust air out of the case).
- Secure the radiator assembly to your PC case using the appropriate screws.

ຮູບພາບ: ຂ້າງ view of the Aigo AC SE 120 Water Cooler, showing the radiator with a white fan attached, and the pump/water block unit.
5.3 Mount the Water Block
- Attach the correct mounting brackets to the water block/pump unit.
- Carefully place the water block onto the CPU, aligning the mounting holes with the standoffs.
- Secure the water block with the provided thumb screws or nuts, tightening them in a diagonal pattern until snug. Do not overtighten.
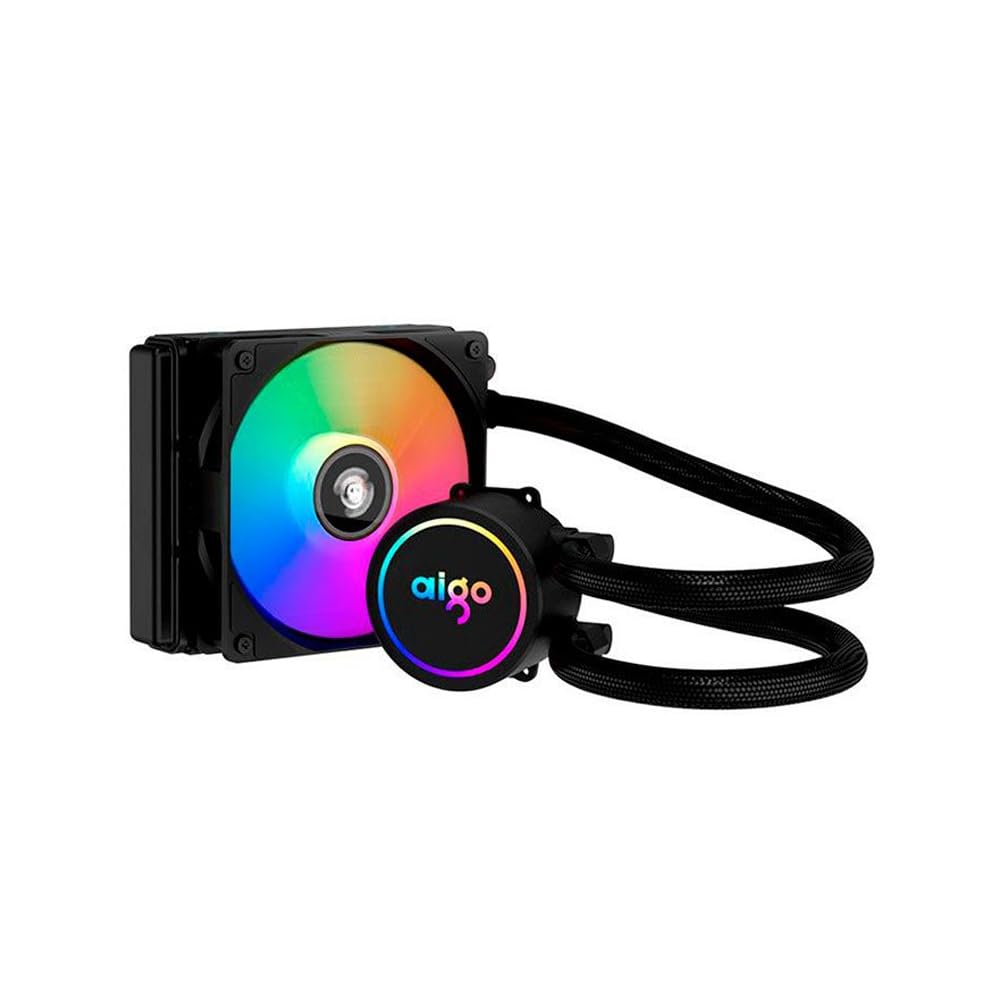
Image: The Aigo AC SE 120 Water Cooler showing the pump unit with an illuminated Aigo logo and a rainbow-colored fan on the radiator.
5.4 ເຊື່ອມຕໍ່ສາຍໄຟ
- Connect the pump power cable to a dedicated AIO_PUMP or CPU_FAN header on your motherboard. If your motherboard has neither, use a SYS_FAN header and ensure it is set to run at full speed in the BIOS.
- Connect the fan power cable to the CPU_FAN header on your motherboard. If your motherboard has multiple fan headers, consult your motherboard manual for the recommended CPU fan header.
- If your cooler has RGB lighting, connect the RGB cable to a compatible RGB header on your motherboard (e.g., 3-pin ARGB or 4-pin RGB, depending on the cooler's connector type).
- Route all cables neatly to avoid obstructing airflow or interfering with other components.
6. ຄໍາແນະນໍາການດໍາເນີນງານ
Once installed, the Aigo AC SE 120 Water Cooler operates automatically based on your motherboard's fan control settings.
- ການເປີດເຄື່ອງເບື້ອງຕົ້ນ: After installation, power on your computer. The pump and fan should start operating.
- ການຕັ້ງຄ່າ BIOS/UEFI: Access your motherboard's BIOS/UEFI settings to ensure the CPU_FAN and AIO_PUMP headers are configured correctly. It is recommended to set the pump header to run at full speed (100%) for optimal cooling performance. Fan speeds can be adjusted based on temperature curves for a balance of cooling and noise.
- ແສງ RGB: If connected to an RGB header, the lighting effects can typically be controlled via your motherboard's RGB software (e.g., ASUS Aura Sync, MSI Mystic Light, Gigabyte RGB Fusion, ASRock Polychrome Sync).
- ການຕິດຕາມ: Use system monitoring software to check CPU temperatures and ensure the cooler is functioning effectively.

ຮູບພາບ: ເທິງລົງລຸ່ມ view of the Aigo AC SE 120 Water Cooler, highlighting the illuminated Aigo logo on the pump and the rainbow lighting of the fan.
7. ບໍາລຸງຮັກສາ
Regular maintenance helps ensure optimal performance and longevity of your water cooler.
- ທໍາຄວາມສະອາດຂີ້ຝຸ່ນ: ເຮັດຄວາມສະອາດຄອກ radiator ແລະໃບພັດລົມເປັນໄລຍະເພື່ອປ້ອງກັນການສ້າງຂີ້ຝຸ່ນ, ເຊິ່ງສາມາດຂັດຂວາງການໄຫຼວຽນຂອງອາກາດແລະຫຼຸດຜ່ອນປະສິດທິພາບຄວາມເຢັນ. ໃຊ້ອາກາດບີບອັດຫຼືແປງອ່ອນ.
- ການກວດກາພັດລົມ: Check the fan for any signs of wear, damage, or excessive noise. Replace if necessary.
- ການກວດກາທໍ່: Visually inspect the hoses for any kinks, cracks, or signs of leakage. While AIOs are sealed, regular checks are recommended.
- ການວາງຄວາມຮ້ອນ: The thermal paste typically lasts for several years. If you notice a significant increase in CPU temperatures over time, consider reapplying fresh thermal paste. This requires carefully removing the water block, cleaning both surfaces, and applying new paste.
8. ການແກ້ໄຂບັນຫາ
If you encounter issues with your Aigo AC SE 120 Water Cooler, refer to the following common problems and solutions:
| ບັນຫາ | ສາເຫດທີ່ເປັນໄປໄດ້ | ການແກ້ໄຂ |
|---|---|---|
| ອຸນຫະພູມ CPU ສູງ |
|
|
| ພັດລົມບໍ່ໄດ້ປັ່ນ |
|
|
| Pump ບໍ່ແລ່ນ / ສຽງຜິດປົກກະຕິ |
|
|
| ແສງ RGB ບໍ່ເຮັດວຽກ |
|
|
9. ການຮັບປະກັນແລະການສະຫນັບສະຫນູນ
The Aigo AC SE 120 Water Cooler comes with a ຮັບປະກັນ 12 ເດືອນ ຈາກວັນທີ່ຊື້. ການຮັບປະກັນນີ້ກວມເອົາຄວາມບົກຜ່ອງດ້ານການຜະລິດແລະການເຮັດວຽກຜິດປົກກະຕິພາຍໃຕ້ເງື່ອນໄຂການນໍາໃຊ້ປົກກະຕິ.
ການຮັບປະກັນບໍ່ໄດ້ກວມເອົາ:
- Damage caused by improper installation, misuse, abuse, or neglect.
- ຄວາມເສຍຫາຍທີ່ເກີດຈາກການດັດແກ້ຫຼືການສ້ອມແປງທີ່ບໍ່ໄດ້ຮັບອະນຸຍາດ.
- ຄວາມເສຍຫາຍທີ່ເກີດຈາກໄພພິບັດທໍາມະຊາດຫຼືອຸປະຕິເຫດ.
For technical support, warranty claims, or further assistance, please contact your retailer or the Aigo customer service department. Please have your proof of purchase and product model number (ACSE120-BK) ready when contacting support.