
Daytech 1 Pack
Daytech Window Intercom System User Manual
Model: 1 Pack
1. ຜະລິດຕະພັນເກີນview
The Daytech Window Intercom System is designed to facilitate clear, two-way voice communication across barriers such as glass windows, commonly found in banks, ticket offices, hospitals, and retail stores. Its advanced technology ensures automatic identification of speech signals, eliminating the need for manual operation during conversations.
ຄຸນນະສົມບັດທີ່ສໍາຄັນ:
- Dual-Way Voice Intercom Communication: Utilizes auto dual-way intercommunication technology for seamless conversations without manual intervention.
- Independent Volume Adjustment: Allows separate volume control for both the inside and outside units, with convenient knob operation for precise sound levels and reduced static.
- High-Sensitive Microphone: Equipped with a high-quality speaker and a sensitive microphone, optimized for counter environments and clear dual-way communication.
- ການຕິດຕັ້ງປລັກ ແລະຫຼິ້ນ: Simple installation requiring only connection to a power adapter and the outside speaker. Features a flexible microphone cable for easy positioning.
ແອັບພລິເຄຊັນ:
This intercom system is suitable for a wide range of environments where communication through a barrier is necessary, including:
- Bank windows
- Ticket offices
- Hospital windows
- Post office windows
- Securities windows
- Embassy visa offices
- ລົດບັນທຸກອາຫານ
- ສະຖານີນໍ້າມັນ
- Schools, counters, and stores

Figure 1: Diverse applications of the Daytech Window Intercom system.
2. ເນື້ອໃນຊຸດ
Upon opening your Daytech Window Intercom package, please verify that all the following components are included:
- Main Intercom Unit with Gooseneck Microphone
- External Speaker Unit
- Power Adapter

Figure 2: Main intercom unit and external speaker.
3. ຄູ່ມືການຕິດຕັ້ງ
Follow these steps to set up your Daytech Window Intercom system:
- Position the Main Unit: Place the main intercom unit on the inside of the window or counter where the operator will be located. Ensure the gooseneck microphone is positioned for comfortable use.
- Position the External Speaker: Place the external speaker unit on the outside of the window or barrier, facing the customer.
- Connect the External Speaker: Plug the cable from the external speaker unit into the 'Outer' jack on the back of the main intercom unit.
- ເຊື່ອມຕໍ່ພະລັງງານ: Plug the power adapter into the 'Power' jack on the back of the main intercom unit, then plug the adapter into a standard electrical outlet.
- Optional Recording Connection: If desired, connect a recording device to the 'Rec' jack on the back of the main unit.

Figure 3: Connection points and features of the main unit.
ຄູ່ມືການຕັ້ງຄ່າດ້ວຍພາບ:
Video 1: A demonstration of the Daytech Window Intercom system, including its components, setup, and basic operation. This video highlights the ease of installation and the clear two-way communication capabilities.
4. ຄໍາແນະນໍາການດໍາເນີນງານ
Once the system is set up, follow these instructions for operation:
- ເປີດ/ປິດ: Locate the ON/OFF switch on the main unit and toggle it to the 'ON' position to power on the intercom. The power indicator light will illuminate.
- ປັບລະດັບສຽງ: Use the 'Inner Vol' knob to adjust the volume of the main unit's speaker (for the operator) and the 'Outer Vol' knob to adjust the volume of the external speaker (for the customer). Adjust both to a comfortable listening level.
- ເວົ້າຢ່າງຈະແຈ້ງ: Speak directly into the gooseneck microphone for optimal clarity. The system is designed for automatic two-way communication, so no buttons need to be pressed during conversation.
- ການຈັດຕຳແໜ່ງໄມໂຄຣໂຟນ: The gooseneck microphone can be rotated 360 degrees to achieve the best pickup angle for the operator.

Figure 4: Independent volume adjustment knobs.
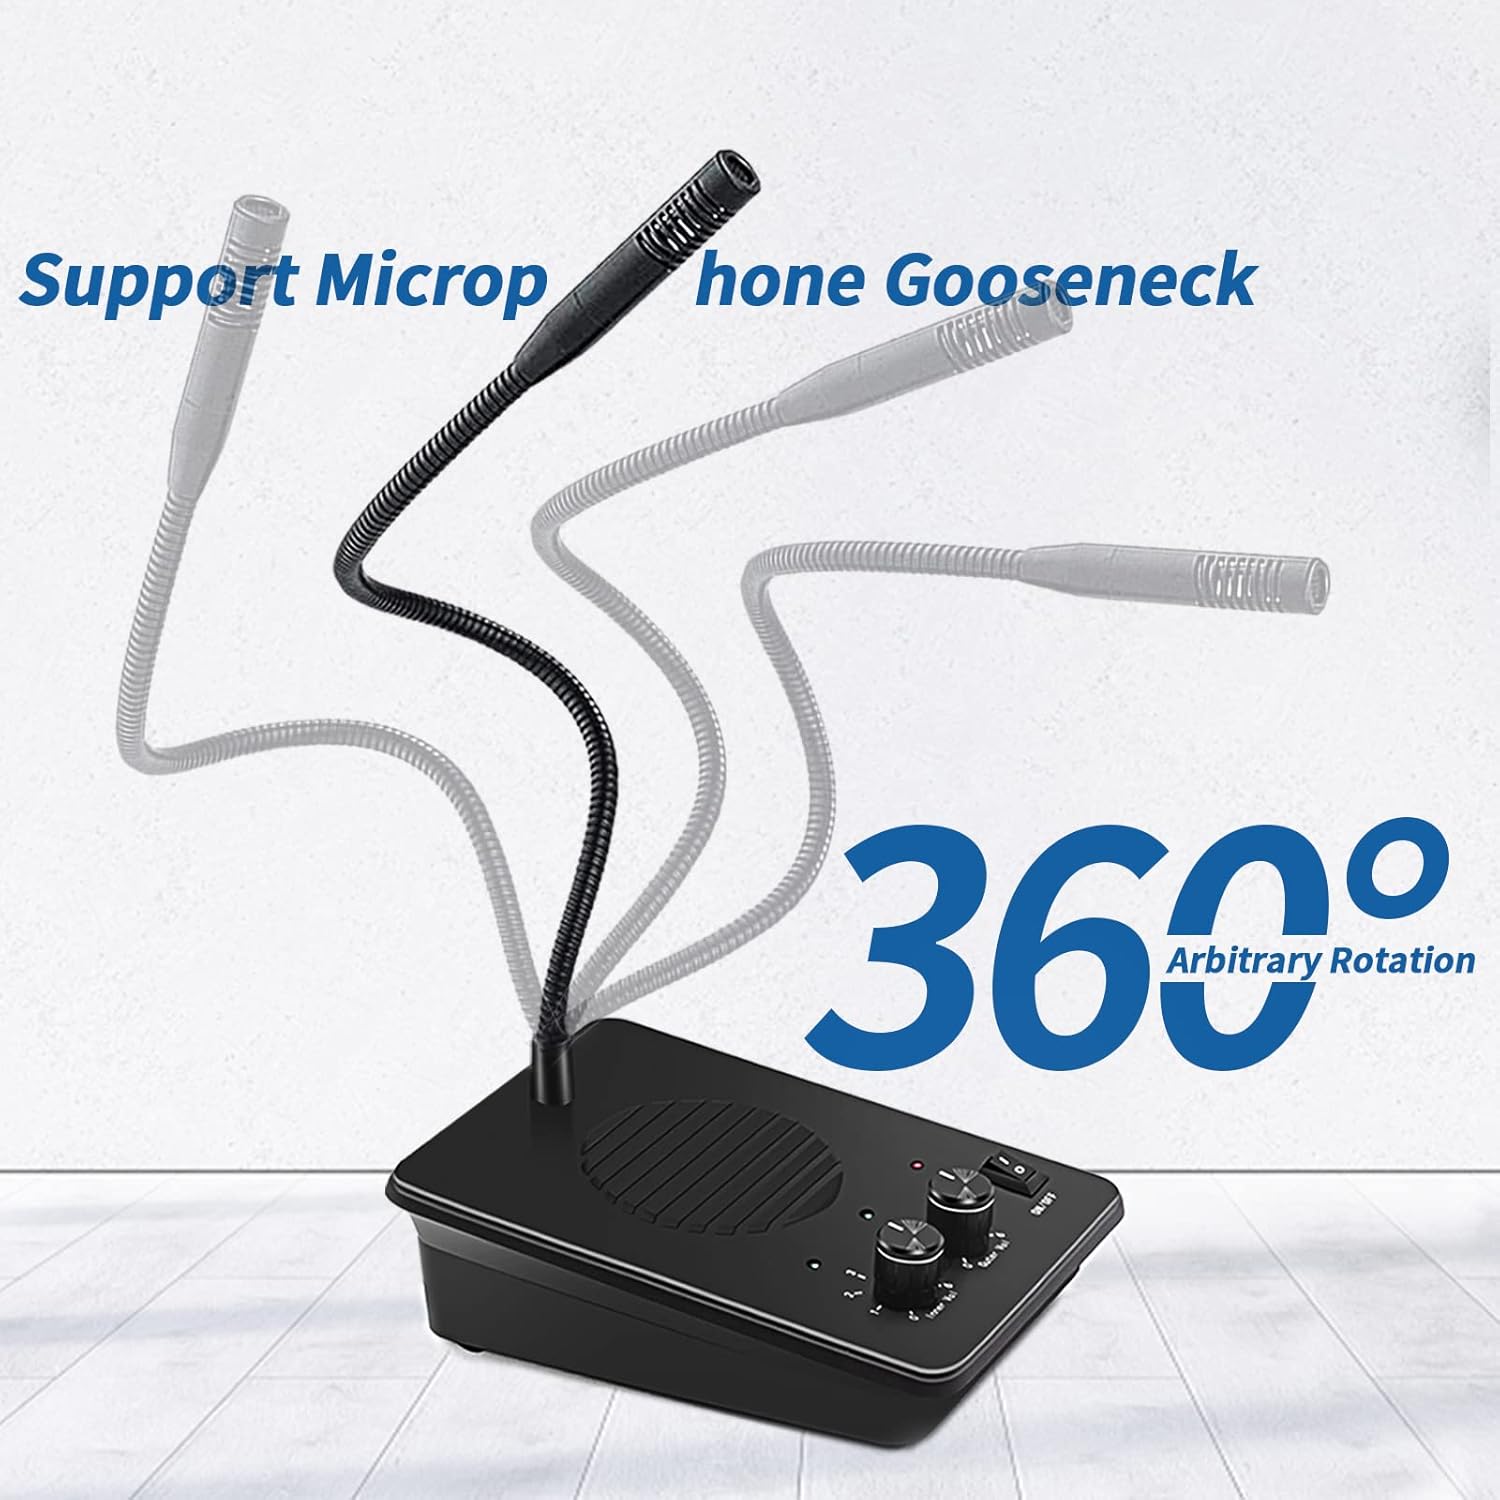
Figure 5: Flexible gooseneck microphone for optimal positioning.
5. ຂໍ້ມູນຈໍາເພາະ
| ຄຸນສົມບັດ | ລາຍລະອຽດ |
|---|---|
| ຍີ່ຫໍ້ | ເດເທັກ |
| ສີ | ດຳ |
| ແຫຼ່ງພະລັງງານ | Power Adapter |
| ຂະໜາດລາຍການ (L x W x H) | 6 x 5 x 6 ນິ້ວ |
| ເຕັກໂນໂລຊີການເຊື່ອມຕໍ່ | ໄຮ້ສາຍ |
| ປະເພດການຕິດຕັ້ງ | ສຽບເຂົ້າ |
| ນ້ໍາຫນັກລາຍການ | 7.04 ອອນ |
| ສະບັບtage | 12 ໂວນ (DC) |
| ວິທີການຄວບຄຸມ | ແຕະ |
| ອົງປະກອບລວມ | ຕູ້ລຳໂພງ |
Note: Some specifications may vary slightly. For the most accurate and up-to-date information, please refer to the product packaging or contact Daytech customer support.
6. ບໍາລຸງຮັກສາ
To ensure the longevity and optimal performance of your Daytech Window Intercom System, follow these simple maintenance guidelines:
- ທໍາຄວາມສະອາດ: Regularly wipe the main unit and external speaker with a soft, dry cloth to remove dust and debris. For stubborn marks, a slightly damp cloth can be used, but ensure the device is unplugged and completely dry before reconnecting power. Avoid using harsh chemicals or abrasive cleaners.
- ການດູແລສາຍໄຟ: Ensure all cables are not kinked, pinched, or placed under heavy objects. Proper cable management helps prevent damage and ensures consistent performance.
- ເງື່ອນໄຂສິ່ງແວດລ້ອມ: Operate and store the intercom in a dry environment, away from extreme temperatures, direct sunlight, and excessive humidity.
7. ການແກ້ໄຂບັນຫາ
If you encounter any issues with your Daytech Window Intercom System, please refer to the following common troubleshooting steps:
| ບັນຫາ | ສາເຫດທີ່ເປັນໄປໄດ້ | ການແກ້ໄຂ |
|---|---|---|
| ບໍ່ມີພະລັງງານ / ຫນ່ວຍງານບໍ່ເປີດ | ອະແດບເຕີໄຟບໍ່ໄດ້ເຊື່ອມຕໍ່ ຫຼືປລັກສຽບເກີດຄວາມຜິດພາດ. | Ensure the power adapter is securely plugged into the unit and a working electrical outlet. Check the ON/OFF switch. |
| No sound from either unit | Volume knobs set too low or cables not properly connected. | Increase both 'Inner Vol' and 'Outer Vol' knobs. Verify that the external speaker cable is securely plugged into the 'Outer' jack. |
| ສຽງບິດເບືອນຫຼືບໍ່ຈະແຈ້ງ | Volume set too high, microphone too far, or environmental interference. | Reduce volume levels. Ensure the operator is speaking directly into the gooseneck microphone. Check for strong electromagnetic interference nearby. |
| One-way communication only | Microphone issue on one side or cable connection problem. | Check the microphone positioning. Ensure all cables are firmly connected. If the issue persists, contact customer support. |
If these steps do not resolve the issue, please contact Daytech customer support for further assistance.
8. ການຮັບປະກັນແລະການສະຫນັບສະຫນູນ
Daytech products are designed for reliability and performance. For information regarding warranty coverage, technical support, or service, please refer to the warranty card included with your product or visit the official Daytech website. You may also contact Daytech customer service directly for assistance.
ຂໍ້ມູນຕິດຕໍ່:
- ຢ້ຽມຢາມ Daytech Store on Amazon ສໍາລັບຂໍ້ມູນຜະລິດຕະພັນແລະຊັບພະຍາກອນສະຫນັບສະຫນູນ.
Ask a question about this manual
Ask about setup, troubleshooting, compatibility, parts, safety, or missing instructions. Manuals+ will review the question and use this page’s manual context to help answer it.