1. ບົດແນະນຳ
ຂອບໃຈສໍາລັບການຊື້asing the Lanix LX240 V7 23.8-inch Full HD Monitor. This manual provides essential information for the safe and efficient use of your new monitor. Please read it thoroughly before installation and keep it for future reference.
2. ຂໍ້ມູນຄວາມປອດໄພ
ປະຕິບັດຕາມຄວາມລະມັດລະວັງດ້ານຄວາມປອດໄພຕໍ່ໄປນີ້ເພື່ອປ້ອງກັນຄວາມເສຍຫາຍຕໍ່ຈໍພາບ ແລະຮັບປະກັນຄວາມປອດໄພຂອງຜູ້ໃຊ້:
- ຢ່າໃຫ້ຈໍພາບຖືກຝົນ ຫຼື ຄວາມຊຸ່ມຊື່ນ ເພື່ອຫຼີກລ່ຽງໄຟໄໝ້ ຫຼື ໄຟຟ້າຊັອດ.
- ຫ້າມເປີດຈໍພາບ casing. ບໍ່ມີສ່ວນທີ່ຜູ້ໃຊ້ບໍລິການພາຍໃນ. ອ້າງອີງການບໍລິການທັງໝົດໃຫ້ກັບບຸກຄະລາກອນທີ່ມີຄຸນວຸດທິ.
- ວາງຈໍພາບຢູ່ເທິງພື້ນຜິວຮາບພຽງທີ່ໝັ້ນຄົງເພື່ອປ້ອງກັນບໍ່ໃຫ້ມັນຕົກ.
- ຮັບປະກັນການລະບາຍອາກາດທີ່ເຫມາະສົມຮອບຈໍ. ຫ້າມປິດຊ່ອງລະບາຍອາກາດ.
- ໃຊ້ພຽງແຕ່ອະແດັບເຕີພະລັງງານທີ່ສະໜອງໃຫ້ກັບຈໍພາບເທົ່ານັ້ນ.
- ຖອດປລັກສຽບໄຟອອກຈາກປລັກສຽບໄຟ ຖ້າຈໍສະແດງຜົນຈະບໍ່ຖືກໃຊ້ເປັນໄລຍະເວລາທີ່ຍາວນານ.
3. ເນື້ອໃນຊຸດ
ກວດສອບວ່າລາຍການທັງຫມົດແມ່ນມີຢູ່ໃນສະພາບທີ່ດີໃນເວລາທີ່ການປົດຫຸ້ມຫໍ່:
- Lanix LX240 V7 Monitor
- Power Adapter
- ສາຍ HDMI
- ຄູ່ມືຜູ້ໃຊ້ (ເອກະສານນີ້)

Image: Lanix LX240 V7 Monitor packaging box, showing the monitor model and key features.
4. ຕັ້ງຄ່າ
4.1 ການປະກອບຂາຕັ້ງ
ປະຕິບັດຕາມຂັ້ນຕອນເຫຼົ່ານີ້ເພື່ອແນບຂາຕັ້ງກັບຈໍພາບຂອງທ່ານ:
- ເອົາຈໍພາບອອກຈາກການຫຸ້ມຫໍ່ຢ່າງລະມັດລະວັງ, ໂດຍຮັກສາໃຫ້ມັນປອດໄພ.
- ຕິດຖານຂາຕັ້ງເຂົ້າກັບຄໍຂາຕັ້ງ. ຮັດໃຫ້ແໜ້ນດ້ວຍສະກູຖ້າມີ.
- ຈັດວາງຂາຕັ້ງທີ່ປະກອບເຂົ້າກັບຊ່ອງຍຶດຕິດຢູ່ດ້ານຫຼັງຂອງຈໍພາບ.
- Gently push the stand into the slot until it clicks into place or secure with screws.

ຮູບພາບ: ດ້ານຫລັງ view of the Lanix LX240 V7 monitor, showing the stand attachment point and port area.
4.2 ການເຊື່ອມຕໍ່ Monitor
ເຊື່ອມຕໍ່ຈໍກັບຄອມພິວເຕີຂອງທ່ານໂດຍໃຊ້ສາຍທີ່ເໝາະສົມ:
- ການເຊື່ອມຕໍ່ພະລັງງານ: ເຊື່ອມຕໍ່ອະແດບເຕີໄຟກັບອິນພຸດໄຟຂອງຈໍພາບ, ຈາກນັ້ນສຽບອະແດັບເຕີໃສ່ປລັກສຽບໄຟ.
- ການເຊື່ອມຕໍ່ວິດີໂອ:
- HDMI: ເຊື່ອມຕໍ່ປາຍໜຶ່ງຂອງສາຍ HDMI ກັບຜອດ HDMI ໃນຈໍພາບຂອງເຈົ້າ ແລະອີກສົ້ນໜຶ່ງກັບຜອດ HDMI ໃນຄອມພິວເຕີຂອງທ່ານ.
- VGA: Connect one end of the VGA cable to the VGA port on your monitor and the other end to the VGA port on your computer.
- ການເຊື່ອມຕໍ່ສຽງ (ຖ້າມີ): The monitor has integrated speakers. If using HDMI, audio will transmit automatically. For VGA, ensure your computer's audio output is configured correctly.
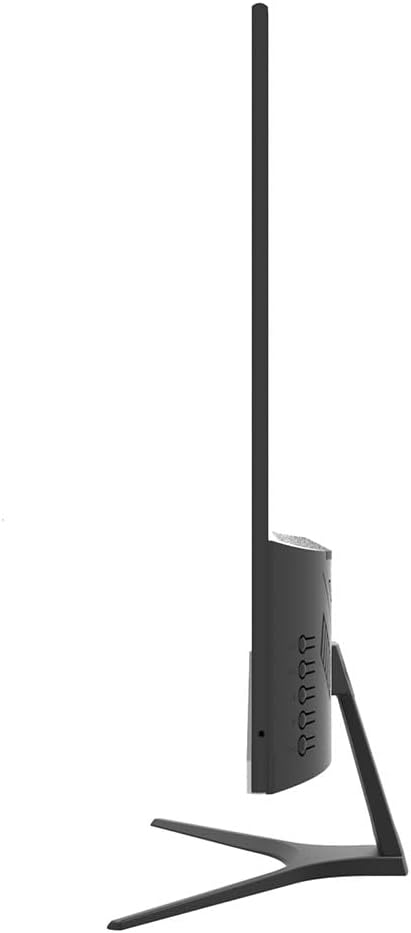
ຮູບພາບ: ຂ້າງ view of the Lanix LX240 V7 monitor, illustrating the location of input ports and control buttons.
5. ຄໍາແນະນໍາການດໍາເນີນງານ
5.1 ການເປີດ/ປິດ
ກົດປຸ່ມເປີດປິດຢູ່ໃນຈໍສະແດງຜົນເພື່ອເປີດຫຼືປິດມັນ. ໄຟຕົວຊີ້ວັດພະລັງງານຈະສະຫວ່າງເມື່ອຈໍພາບເປີດຢູ່.
5.2 ການເລືອກແຫຼ່ງປ້ອນຂໍ້ມູນ
If you have multiple devices connected, you may need to manually select the input source:
- Press the "Input" or "Source" button on the monitor (refer to the side view image for button locations).
- Use the navigation buttons to select between HDMI and VGA inputs.
- Press the "Menu" or "OK" button to confirm your selection.
5.3 ເມນູການສະແດງເທິງໜ້າຈໍ (OSD).
ເມນູ OSD ຊ່ວຍໃຫ້ທ່ານສາມາດປັບການຕັ້ງຄ່າຈໍພາບຕ່າງໆໄດ້:
- Press the "Menu" button to open the OSD.
- Use the navigation buttons (usually up/down or left/right arrows) to browse through menu options such as Brightness, Contrast, Color Settings, Aspect Ratio, etc.
- Press "Menu" or "OK" again to enter a sub-menu or confirm a setting.
- Press the "Exit" or "Menu" button repeatedly to close the OSD.

ຮູບພາບ: ທາງຫນ້າ view of the Lanix LX240 V7 monitor, showcasing its display area and slim bezels.
6. ບໍາລຸງຮັກສາ
ການບຳລຸງຮັກສາທີ່ເໝາະສົມຮັບປະກັນອາຍຸການໃຊ້ງານຂອງຈໍພາບຂອງທ່ານ:
- ທໍາຄວາມສະອາດຫນ້າຈໍ: ເຊັດໜ້າຈໍຢ່າງອ່ອນໂຍນດ້ວຍຜ້າອ່ອນໆ, ບໍ່ມີເຈັ້ຍ. ສໍາລັບຮອຍແຂງ, ງampen the cloth slightly with water or a specialized screen cleaner. Never spray liquid directly onto the screen.
- ທໍາຄວາມສະອາດ Casing: ໃຊ້ຜ້າອ່ອນໆເຊັດຈໍສະແດງຜົນ casing. ຫຼີກລ້ຽງການເຮັດຄວາມສະອາດຂັດຫຼືສານລະລາຍ.
- ການເກັບຮັກສາ: ຖ້າເກັບຮັກສາຈໍພາບໄວ້ເປັນເວລາດົນ, ໃຫ້ຖອດສາຍເຄເບີນທັງໝົດອອກ ແລະ ເກັບໄວ້ໃນບ່ອນທີ່ເຢັນ, ແຫ້ງ, ດີກວ່າໃນບັນຈຸພັນຕົ້ນສະບັບຂອງມັນ.
7. ການແກ້ໄຂບັນຫາ
ອ້າງອີງໃສ່ຕາຕະລາງຕໍ່ໄປນີ້ສໍາລັບບັນຫາທົ່ວໄປແລະການແກ້ໄຂຂອງພວກເຂົາ:
| ບັນຫາ | ສາເຫດທີ່ເປັນໄປໄດ້ | ການແກ້ໄຂ |
|---|---|---|
| ບໍ່ມີຮູບພາບໃນ ໜ້າ ຈໍ | ຈໍພາບບໍ່ໄດ້ເປີດ; ແຫຼ່ງປ້ອນຂໍ້ມູນບໍ່ຖືກຕ້ອງ; ສາຍວິດີໂອວ່າງ. | Ensure power cable is connected and monitor is turned on. Select correct input source (HDMI/VGA). Check video cable connections. |
| ຮູບພາບມືດ/ສະຫວ່າງເກີນໄປ | ການຕັ້ງຄ່າຄວາມສະຫວ່າງ/ຄວາມຄົມຊັດບໍ່ຖືກຕ້ອງ. | ປັບການຕັ້ງຄ່າຄວາມສະຫວ່າງ ແລະຄວາມຄົມຊັດຜ່ານເມນູ OSD. |
| ບໍ່ມີສຽງຈາກລຳໂພງ | Audio settings incorrect; Volume too low. | Check monitor's volume settings in OSD. Ensure computer's audio output is set to the monitor (for HDMI) or external speakers (for VGA). |
| ຮູບພາບທີ່ກະພິບ ຫຼື ບໍ່ສະຖຽນ | Loose video cable; Incorrect refresh rate. | Ensure video cable is securely connected. Check your computer's display settings for the correct refresh rate (60Hz). |
8. ຂໍ້ມູນຈໍາເພາະ
| ຊື່ຕົວແບບ | LX240 V7 |
| ຂະໜາດໜ້າຈໍ | 23.8 inches (23.6 inches actual) |
| ປະເພດແຜງ | LED |
| ຄວາມລະອຽດ | 1920 x 1080 (Full HD) |
| ອັດຕາສ່ວນ | 1.78:1 (16:9) |
| ອັດຕາການໂຫຼດຂໍ້ມູນຄືນໃໝ່ | 60 Hz |
| ເວລາຕອບສະຫນອງ | 5 ມິນລິວິນາທີ |
| ຄວາມສະຫວ່າງ | 250 cd/m² |
| ອັດຕາສ່ວນກົງກັນຂ້າມ | 3000:1 |
| Viewໃນມຸມ | 178 ອົງສາ |
| ການເຊື່ອມຕໍ່ | 1x HDMI, 1x VGA |
| ລຳໂພງໃນຕົວ | ແມ່ນແລ້ວ |
| ການບໍລິໂພກພະລັງງານ | 22 ວັດ |
| ຂະໜາດ (H x W x D) | Approx. 21cm x 25cm x 5cm (screen only, based on image) |
| ນ້ຳໜັກ | 2.71 ກິໂລກຣາມ |
ຮູບພາບ: ທາງຫນ້າ view of the Lanix LX240 V7 monitor with height, width, and depth measurements indicated.
9. ການຮັບປະກັນແລະການສະ ໜັບ ສະ ໜູນ
ຂໍ້ມູນການຮັບປະກັນ: The Lanix LX240 V7 monitor comes with a 1-year manufacturer's warranty. This warranty covers defects in materials and workmanship under normal use. It does not cover damage caused by misuse, accidents, unauthorized modifications, or external causes.
ການຊ່ວຍເຫຼືອລູກຄ້າ: For technical assistance, warranty claims, or service inquiries, please contact Lanix customer support. Refer to the official Lanix webເວັບໄຊ ຫຼືເອກະສານການຊື້ຂອງເຈົ້າສຳລັບລາຍລະອຽດການຕິດຕໍ່.