
1. ການແນະນໍາ ແລະຫຼາຍກວ່າview
This manual provides detailed instructions for the setup, operation, and maintenance of your AVer CAM550 Video Conferencing Camera. The CAM550 is a sophisticated 4K dual-lens camera designed to enhance video conferencing experiences in medium to large meeting rooms through advanced artificial intelligence (AI) features.
The camera integrates a Pan-Tilt-Zoom (PTZ) lens with 12X optical zoom and a secondary AI lens offering a 95° field of view, enabling comprehensive room coverage and intelligent participant framing. Its versatile connectivity options, including USB, HDMI, and IP streaming, ensure seamless integration into various conferencing setups.

ຮູບ 1: ດ້ານຫນ້າ view of the AVer CAM550 Video Conferencing Camera.
2. ຄຸນນະສົມບັດທີ່ສໍາຄັນ
The AVer CAM550 incorporates several features designed for an optimized conferencing experience:
- Dynamic Auto Framing: A secondary AI lens detects all participants, and new participants trigger the PTZ lens to dynamically re-frame all individuals for optimal visibility.
- ຂອບທີ່ຕັ້ງໄວ້ລ່ວງໜ້າ: Tracks both a preset area and the active speaker.
- Simultaneous 3-Way Output: Supports concurrent output via USB, HDMI, and IP connections.
- ການຄວບຄຸມທ່າທາງ: Allows intuitive camera controls and AI function activation by holding up one finger on either side of your face.
- HDMI Picture-in-Picture (PIP) Function: Enables simultaneous viewing of the speaker and a panoramic room view.
- Smart Gallery: Utilizes AI technology to crop participants' faces, offering individual visibility in the meeting room. Users can select between headshot and half-body modes.
- Cableless Access to Meetings: AVer virtual USB streaming technology allows IP streaming to USB via a single RJ45 cable, reducing cable clutter.
- Audio Tracking Support: Integrates with third-party ceiling microphones (e.g., Shure/Sennheiser) via the AVer Preset Link function.
3. ຄູ່ມືການຕິດຕັ້ງ
3.1 ການຫຸ້ມຫໍ່ແລະການກວດສອບອົງປະກອບ
Before proceeding with installation, carefully unpack all components and verify that the following items are present:
- AVer CAM550 Camera Unit
- Power Adapter
- ສາຍ USB
- ຣີໂໝດຄວບຄຸມ (ຖ້າມາພ້ອມກັບຮຸ່ນຂອງທ່ານ)
- ເອກະສານ (ຄູ່ມືເລີ່ມຕົ້ນດ່ວນ, ບັດຮັບປະກັນ)
3.2 ການຈັດວາງທາງດ້ານຮ່າງກາຍ
Position the CAM550 camera in a central location within your meeting room to ensure optimal coverage. The camera can be mounted on a display, wall, or ceiling using appropriate mounting hardware (sold separately). Ensure the camera has a clear line of sight to all participants.

Figure 2: AVer CAM550 installed in a conference room setting.
3.3 ການເຊື່ອມຕໍ່ກ້ອງຖ່າຍຮູບ
- ການເຊື່ອມຕໍ່ພະລັງງານ: Connect the power adapter to the camera and then to a power outlet.
- ການເຊື່ອມຕໍ່ USB: For direct connection to a computer, plug the USB 3.1 cable into the camera and an available USB port on your computer.
- ການເຊື່ອມຕໍ່ HDMI: To enable dual display or for direct video output, connect an HDMI cable from the camera to your display device.
- IP Connection: For network streaming and virtual USB functionality, connect an RJ45 Ethernet cable from the camera to your network.
3.4 ການຕິດຕັ້ງຊອບແວ (ຖ້າມີ)
The AVer CAM550 is generally plug-and-play with most operating systems. However, for advanced features, firmware updates, or specific configurations, please visit the official AVer website to download any necessary software or drivers.
4. ຄໍາແນະນໍາການດໍາເນີນງານ
4.1 Basic Camera Control
Once connected, the camera should be recognized by your video conferencing software. You can typically control basic pan, tilt, and zoom functions directly from your software interface or using the provided remote control.
4.2 Dynamic Auto Framing and Smart Gallery
The CAM550's AI features automatically adjust the camera's view to include all participants or focus on individual speakers. The Smart Gallery function can create individual frames for each participant, enhancing visibility in larger meetings. These features are typically enabled and configured within the camera's utility software or your conferencing platform settings.
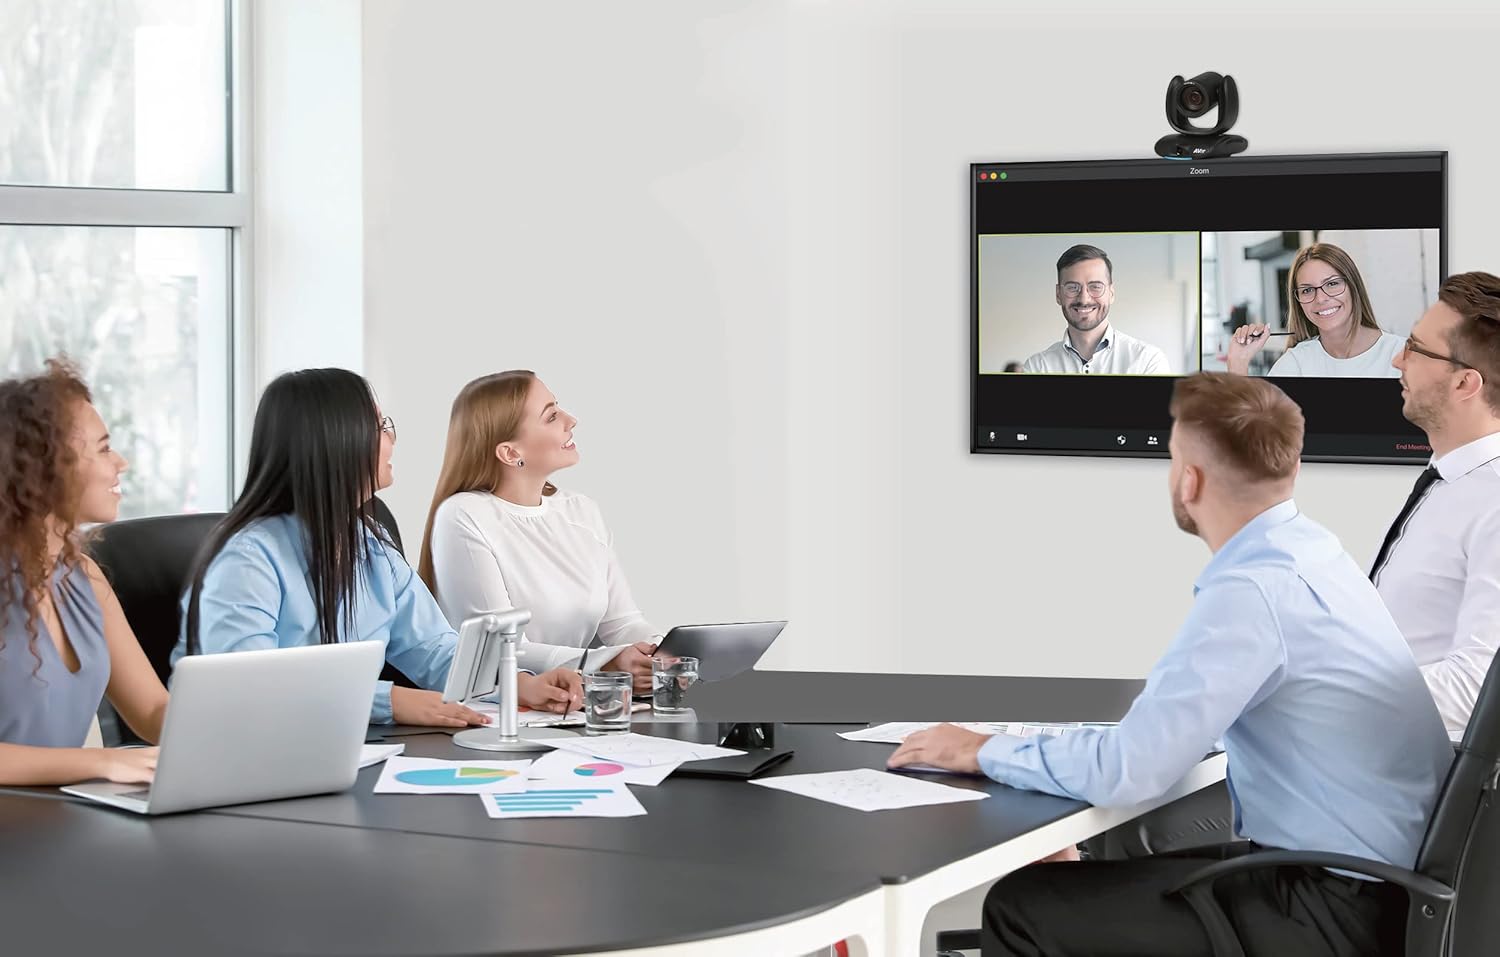
Figure 3: Smart Gallery feature in action, showing individual participant views.
4.3 ການຄວບຄຸມທ່າທາງ
To activate certain AI functions or camera controls without a remote, the CAM550 supports gesture control. Hold up one finger on either side of your face to trigger predefined actions. Refer to the camera's software settings for a list of available gestures and their corresponding functions.
4.4 HDMI Picture-in-Picture (PIP)
When using the HDMI output, the PIP function allows you to display the main speaker's view alongside a wide-angle panoramic view of the room. This provides context and ensures no participant is missed.
4.5 Virtual USB Streaming
Leverage AVer's virtual USB streaming technology to transmit video and audio over an IP network, converting it to a USB signal at the receiving end. This allows for flexible camera placement and reduced USB cable runs.
5. ບໍາລຸງຮັກສາ
To ensure the longevity and optimal performance of your AVer CAM550 camera, follow these maintenance guidelines:
- ທໍາຄວາມສະອາດ: Gently wipe the camera lens and body with a soft, dry, lint-free cloth. Avoid using harsh chemicals or abrasive materials.
- ການເກັບຮັກສາ: ເມື່ອບໍ່ໄດ້ໃຊ້ເປັນເວລາດົນ, ໃຫ້ເກັບຮັກສາກ້ອງໄວ້ໃນບ່ອນເຢັນ, ແຫ້ງ, ຫ່າງຈາກແສງແດດໂດຍກົງ ແລະ ອຸນຫະພູມທີ່ຮ້າຍກາດ.
- ການອັບເດດເຟີມແວ: Regularly check the AVer website for firmware updates. Keeping your camera's firmware up-to-date ensures access to the latest features and performance enhancements.
6. ການແກ້ໄຂບັນຫາ
If you encounter issues with your AVer CAM550, refer to the following common troubleshooting steps:
- ບໍ່ມີຜົນຜະລິດວິດີໂອ:
- Ensure all cables (power, USB, HDMI, IP) are securely connected.
- ກວດສອບວ່າກ້ອງຖ່າຍຮູບເປີດຢູ່.
- Check your computer's device manager or conferencing software settings to confirm the camera is recognized and selected as the active video source.
- ຄຸນນະພາບຮູບພາບທີ່ບໍ່ດີ:
- ເຮັດຄວາມສະອາດເລນກ້ອງຖ່າຍຮູບ.
- Ensure adequate lighting in the meeting room.
- Check video resolution settings in your conferencing software.
- ຄຸນສົມບັດ AI ບໍ່ເຮັດວຽກ:
- ໃຫ້ແນ່ໃຈວ່າເຟີມແວຂອງກ້ອງຖ່າຍຮູບເປັນລຸ້ນລ້າສຸດ.
- Verify that AI features are enabled in the camera's utility software.
- Ensure participants are clearly visible to the camera and not obscured.
- ບໍ່ມີສຽງ:
- If using external microphones, ensure they are properly connected and selected as the audio input in your conferencing software.
- Check volume levels on both the camera (if applicable) and your computer/conferencing system.
For further assistance, consult the AVer support webເວັບໄຊ ຫຼືຕິດຕໍ່ບໍລິການລູກຄ້າຂອງເຂົາເຈົ້າ.
7. ຂໍ້ມູນຈໍາເພາະ
| ຂໍ້ມູນຈໍາເພາະ | ລາຍລະອຽດ |
|---|---|
| ໝາຍເລກຕົວແບບ | ກຊ .550 |
| ປະເພດກ້ອງຖ່າຍຮູບ | Dual Lens (PTZ + AI Lens) |
| ຄວາມລະອຽດວິດີໂອ | 4K (main lens) |
| Optical Zoom | 12X (PTZ lens) |
| ຊູມທັງໝົດ | 24X (PTZ lens) |
| AI Lens Field of View (FOV) | 95° |
| ອັດຕາເຟຣມ | 30 fps |
| ການເຊື່ອມຕໍ່ | USB 3.1, HDMI, IP |
| ຂະໜາດ (LxWxH) | 10.7 x 10.2 x 10 ນິ້ວ |
| ນ້ຳໜັກ | 10.35 ປອນ |
| ຜູ້ຜະລິດ | AVer Information Inc |
8. ການຮັບປະກັນແລະການສະຫນັບສະຫນູນ
For information regarding the product warranty, please refer to the warranty card included with your AVer CAM550 or visit the official AVer webເວັບໄຊ. ສໍາລັບການສະຫນັບສະຫນູນດ້ານວິຊາການ, ການລົງທະບຽນຜະລິດຕະພັນ, ຫຼືຊັບພະຍາກອນເພີ່ມເຕີມ, ກະລຸນາໄປຢ້ຽມຢາມ www.averusa.com or contact AVer customer service directly.