1. ບົດແນະນຳ
Thank you for choosing the Xigmatek Lux M Micro-ATX Mini Tower PC Case. This manual provides detailed instructions for the installation, operation, and maintenance of your new PC chassis. Please read this manual carefully before beginning the assembly process to ensure proper installation and to maximize the performance and longevity of your system.
The Lux M case is designed to offer a robust and aesthetically pleasing housing for your computer components, featuring a tempered glass side panel, a metallic front panel with a unique cut-out pattern, and pre-installed fixed RGB fans for optimal cooling and visual appeal. It supports Micro-ATX and Mini-ITX motherboards and is compatible with various cooling solutions, including water cooling.
2. ຂໍ້ມູນຄວາມປອດໄພ
ກະລຸນາສັງເກດການລະມັດລະວັງດ້ານຄວາມປອດໄພດັ່ງຕໍ່ໄປນີ້ໃນລະຫວ່າງການຕິດຕັ້ງແລະການດໍາເນີນງານ:
- Always disconnect the power supply from the wall outlet before installing or removing any components to prevent electric shock.
- Handle all components with care. Avoid touching circuit boards directly; hold them by their edges.
- Wear an anti-static wrist strap when handling sensitive electronic components to prevent electrostatic discharge (ESD) damage.
- Keep the case and components away from liquids, excessive heat, and direct sunlight.
- ຮັບປະກັນການລະບາຍອາກາດທີ່ເໝາະສົມອ້ອມຮອບເຄສຄອມພິວເຕີເພື່ອປ້ອງກັນການຮ້ອນເກີນໄປ.
- Keep small parts and screws out of reach of children.
3. ເນື້ອໃນຊຸດ
ກວດສອບວ່າລາຍການທັງຫມົດແມ່ນມີຢູ່ໃນຊຸດຂອງທ່ານ. ຖ້າລາຍການໃດຂາດຫາຍໄປຫຼືເສຍຫາຍ, ກະລຸນາຕິດຕໍ່ຮ້ານຂາຍຍ່ອຍຂອງທ່ານ.
- Xigmatek Lux M Micro-ATX Mini Tower PC Case
- ກ່ອງອຸປະກອນເສີມ (ມີສະກູ, ຕົວຍຶດ, ສາຍເຄເບີ້ນ, ແລະອື່ນໆ)
- ຄູ່ມືຜູ້ໃຊ້ (ເອກະສານນີ້)
4. ຜະລິດຕະພັນເກີນview
Familiarize yourself with the various parts of your Xigmatek Lux M PC case.
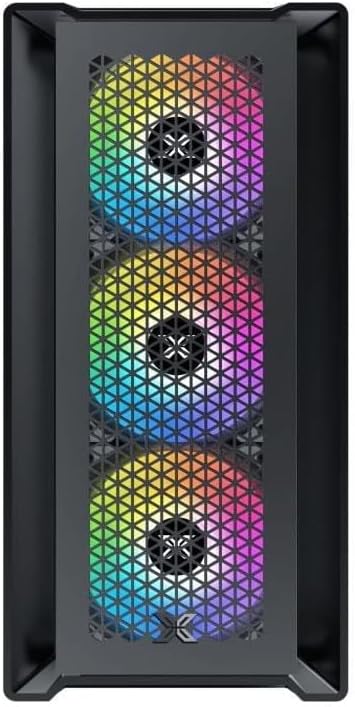
ຮູບ 4.1: ດ້ານຫນ້າ View. This image displays the front of the Xigmatek Lux M case, highlighting the metallic mesh panel with a triangular design and the three pre-installed 120mm fixed RGB fans.

Figure 4.2: Angled Top-Front View. This perspective shows the tempered glass side panel, offering a clear view of the interior, and the top panel with its I/O ports (USB, audio) and power button.
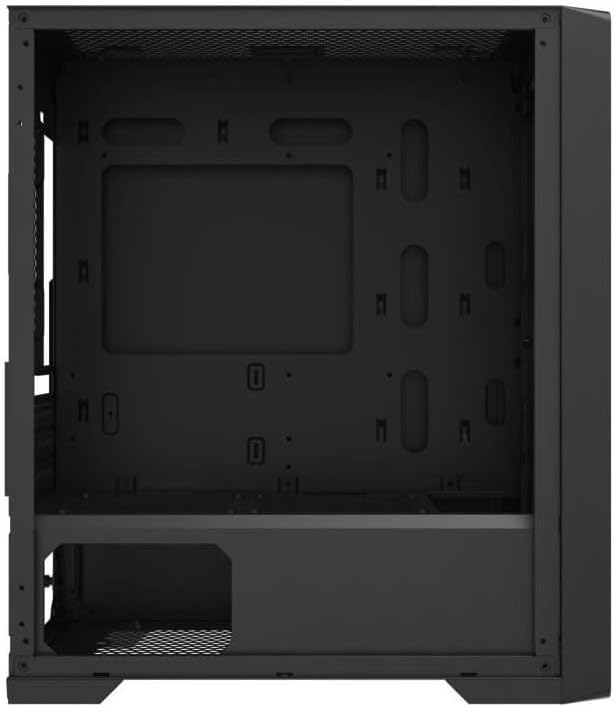
Figure 4.3: Interior Layout. The internal structure of the case, featuring the motherboard mounting tray, cutouts for cable management, and the power supply shroud at the bottom.
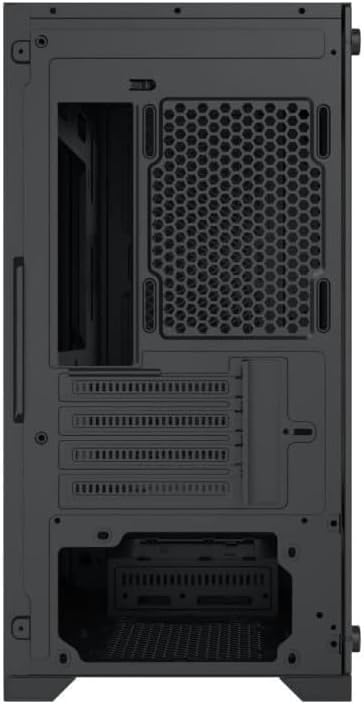
ຮູບ 4.4: ດ້ານຫລັງ View. This image illustrates the rear of the case, including the expansion slots for graphics cards and other add-in cards, the rear fan mounting area, and the power supply mounting bracket.
5. ການຕິດຕັ້ງແລະການຕິດຕັ້ງ
Follow these steps to install your computer components into the Xigmatek Lux M case.
5.1. ການກະກຽມກໍລະນີ
- ວາງກະເປົ໋າໄວ້ເທິງພື້ນຜິວທີ່ຮາບພຽງ ແລະ ໝັ້ນຄົງ.
- Remove the tempered glass side panel by unscrewing the thumb screws and carefully lifting it off. Set it aside on a soft, non-abrasive surface.
- Remove the opposite steel side panel by unscrewing the thumb screws and sliding it backward.
5.2. ການຕິດຕັ້ງເມນບອດ
The Lux M supports Micro-ATX and Mini-ITX motherboards.
- ຕິດຕັ້ງແຜ່ນປ້ອງກັນ I/O (ຖ້າບໍ່ໄດ້ຕິດຕັ້ງໄວ້ລ່ວງໜ້າໃນເມນບອດຂອງທ່ານ) ເຂົ້າກັບຊ່ອງເປີດດ້ານຫຼັງຂອງເຄສ.
- Align the motherboard with the pre-installed standoffs. Ensure all screw holes on the motherboard match the standoffs.
- Secure the motherboard using the provided motherboard screws. Do not overtighten.
5.3. ການຕິດຕັ້ງຫນ່ວຍບໍລິການສະຫນອງພະລັງງານ (PSU).
PSU ຕິດຕັ້ງຢູ່ທາງຫລັງຂອງເຄສ.
- Slide the PSU into its designated compartment from the rear of the case.
- Align the PSU's screw holes with the holes on the case's rear panel.
- ຍຶດ PSU ດ້ວຍສະກູທີ່ໃຫ້ມາ.
5.4. Storage Drive Installation (2.5"/3.5" Drives)
The case supports 2x 2.5"/3.5" storage drives.
- Locate the drive cage beneath the PSU shroud or dedicated 2.5" mounting points behind the motherboard tray.
- For 3.5" HDDs, slide the drive into a drive tray (if applicable) and secure it with screws.
- For 2.5" SSDs, secure them directly to the mounting points using the provided screws.
5.5. Graphics Card (VGA) and Expansion Card Installation
ກໍລະນີຮອງຮັບກາຟິກກາດຍາວເຖິງ 320 ມມ.
- ເອົາຝາປິດຊ່ອງຂະຫຍາຍທີ່ຈຳເປັນອອກຈາກດ້ານຫຼັງຂອງເຄສ.
- Insert your graphics card or other expansion card into the appropriate PCIe slot on your motherboard.
- Secure the card to the case using the expansion slot screws.
5.6. Cooling System Installation (Optional)
The Lux M comes with 4x 120mm X24F fixed RGB fans. It supports additional cooling options.
- CPU Cooler: Max height of 160mm. Install your CPU cooler according to its manufacturer's instructions.
- ສະຫນັບສະຫນູນລັງສີ: The case supports radiators of 360mm, 240mm, or 120mm. Refer to your radiator's manual for installation. Common mounting locations include the front and top panels.
5.7. ການຄຸ້ມຄອງສາຍໄຟ
ໃຊ້ຈຸດຕັດສາຍໄຟ ແລະ ຈຸດມັດສາຍໄຟຢູ່ທາງຫຼັງຖາດເມນບອດເພື່ອຈັດລະບຽບສາຍໄຟ. ສິ່ງນີ້ຊ່ວຍປັບປຸງການໄຫຼວຽນຂອງອາກາດ ແລະ ຄວາມງາມ.
5.8. ສະພາສຸດທ້າຍ
- Once all components are installed and cables are managed, reattach the steel side panel and secure it with thumb screws.
- Carefully reattach the tempered glass side panel and secure it with thumb screws.
6. ຄໍາແນະນໍາການດໍາເນີນງານ
After completing the installation, connect your peripherals (monitor, keyboard, mouse) and power cable to the PC. Press the power button located on the top panel of the case to start your system.
The pre-installed X24F RGB fans feature fixed RGB lighting, which will illuminate automatically upon system power-on. No additional software or controller is required for their basic operation.
Ensure that the case's ventilation is not obstructed to maintain optimal airflow and cooling performance.
7. ບໍາລຸງຮັກສາ
ການບໍາລຸງຮັກສາເປັນປົກກະຕິຈະຊ່ວຍຮັບປະກັນອາຍຸຍືນແລະການປະຕິບັດທີ່ດີທີ່ສຸດຂອງອົງປະກອບ PC ຂອງທ່ານ.
- ທໍາຄວາມສະອາດຂີ້ຝຸ່ນ: ເຮັດຄວາມສະອາດການກັ່ນຕອງຂີ້ຝຸ່ນເປັນໄລຍະ (ຖ້າມີ) ແລະພາຍໃນຂອງກໍລະນີໂດຍໃຊ້ອາກາດບີບອັດຫຼືແປງອ່ອນ. ການສະສົມຂອງຝຸ່ນສາມາດຂັດຂວາງການໄຫຼວຽນຂອງອາກາດແລະນໍາໄປສູ່ຄວາມຮ້ອນເກີນ.
- ການອະນາໄມພາຍນອກ: ເຊັດພື້ນຜິວພາຍນອກດ້ວຍຜ້າອ່ອນໆ, ງamp cloth. Avoid harsh chemicals that may damage the finish or tempered glass.
- ແກ້ວ Tempered: Clean the tempered glass panel with a glass cleaner and a microfiber cloth to avoid scratches and streaks.
8. ການແກ້ໄຂບັນຫາ
ຖ້າທ່ານພົບບັນຫາໃນລະຫວ່າງ ຫຼື ຫຼັງຈາກການຕິດຕັ້ງ, ໃຫ້ພິຈາລະນາຂັ້ນຕອນການແກ້ໄຂບັນຫາທົ່ວໄປຕໍ່ໄປນີ້:
- ບໍ່ມີພະລັງງານ:
- ໃຫ້ແນ່ໃຈວ່າສາຍໄຟໄດ້ເຊື່ອມຕໍ່ກັບທັງ PSU ແລະປລັກສຽບຝາຢ່າງແໜ້ນໜາແລ້ວ.
- ກວດສອບວ່າສະວິດ PSU ຢູ່ໃນຕຳແໜ່ງ 'ເປີດ'.
- ກວດສອບວ່າສາຍສະວິດໄຟຂອງແຜງດ້ານໜ້າໄດ້ເຊື່ອມຕໍ່ກັບຫົວແຜງດ້ານໜ້າຂອງເມນບອດຢ່າງຖືກຕ້ອງ.
- Fans Not Spinning / RGB Not Lighting:
- Ensure all fan power cables are securely connected to the motherboard or a fan controller.
- For RGB, confirm that any necessary RGB headers are connected to the motherboard (though the included fans are fixed RGB and should light up with power).
- ບໍ່ມີການສະແດງຜົນອອກ:
- Verify that your monitor cable is connected to the graphics card (if installed) and not the motherboard's integrated graphics port.
- ຣີເຊັດບັດກາຟິກໃນຊ່ອງ PCIe ຂອງມັນ.
- ຄວາມຮ້ອນເກີນ:
- ຮັບປະກັນວ່າພັດລົມທຸກໂຕກຳລັງໝຸນ ແລະ ໝຸນຢ່າງຖືກຕ້ອງ ເພື່ອໃຫ້ມີການໄຫຼວຽນຂອງອາກາດທີ່ດີທີ່ສຸດ (ດູດ/ລະບາຍອາກາດອອກ).
- Clean any dust filters and internal components.
- Verify that the CPU cooler is properly seated and making good contact with the CPU.
For more complex issues, consult your component manuals or seek assistance from Xigmatek support or a qualified technician.
9. ຂໍ້ມູນຈໍາເພາະ
| ຄຸນສົມບັດ | ຂໍ້ມູນຈໍາເພາະ |
|---|---|
| ຍີ່ຫໍ້ | Xigmatek |
| ຊື່ຕົວແບບ | Lux M |
| ໝາຍເລກຕົວແບບ | EN48540 |
| ປະເພດກໍລະນີ | ຫໍມິນິ |
| ຄວາມເຂົ້າກັນໄດ້ຂອງເມນບອດ | Micro-ATX, Mini-ITX |
| ວັດສະດຸ | Tempered Glass (side panel), Metal (front panel) |
| ສີ | ດຳ |
| ພັດລົມທີ່ຕິດຕັ້ງໄວ້ລ່ວງໜ້າ | 4 x 120mm X24F Fixed RGB Fans |
| ສະຫນັບສະຫນູນ radiator | 360mm, 240mm, 120mm |
| ຄວາມສູງຂອງ CPU Cooler ສູງສຸດ | 160ມມ |
| ຄວາມຍາວ VGA ສູງສຸດ | 320ມມ |
| ຄວາມຍາວ PSU ສູງສຸດ | 165ມມ |
| ການເກັບຮັກສາ Bays | 2x 2.5"/3.5" |
| ຄຸນນະສົມບັດພິເສດ | RGB Lighting, Triangular Mesh Front Design |
10. ການຮັບປະກັນແລະການສະຫນັບສະຫນູນ
Xigmatek products are manufactured to the highest quality standards. For warranty information and technical support, please refer to the warranty card included with your product or visit the official Xigmatek webເວັບໄຊ. ກະລຸນາຮັກສາຫຼັກຖານການຊື້ຂອງທ່ານສໍາລັບການຮຽກຮ້ອງການຮັບປະກັນ.
For further assistance, you may contact Xigmatek customer support through their official channels.