REXING H6
ຄູ່ມືຜູ້ໃຊ້ກ້ອງຖ່າຍຮູບຕິດຕາມເສັ້ນທາງ REXING Woodlens H6
ຮູບແບບ: H6
1. ບົດແນະນຳ
The REXING Woodlens H6 is an advanced dual-camera trail camera designed for capturing high-quality video and still images of wildlife, property, or other outdoor subjects. Featuring both a 4K Ultra HD lens for daytime recording and an FHD Infrared lens for night vision, the H6 ensures clear visuals in various lighting conditions. Its robust, weather-resistant design and long standby time make it an ideal solution for extended outdoor surveillance.
2. ຜະລິດຕະພັນເກີນview ແລະຄຸນນະສົມບັດທີ່ສໍາຄັນ
- ລະບົບກ້ອງຄູ່: Captures 4K Ultra HD video during the day and FHD Infrared video at night with simultaneous audio recording. Designed to avoid IR CUT switching sounds that might disturb wildlife.
- ການຖ່າຍຮູບຄວາມລະອຽດສູງ: Supports up to 20MP still images and cinematic video quality.
- Integrated LCD & Speaker: Features a built-in 2.4-inch LCD screen and speaker for direct viewing and editing of recordings without external devices.
- Advanced Night Vision: Equipped with 35M IR Flash and double 850nm high-powered Infrared lights, illuminating subjects up to 65 feet away for clear night images.
- ຄວາມໄວກະຕຸ້ນໄວ: Responds to motion within 0.2 seconds via 110° PIR sensors (Front + Side Sensor).
- ຕົວເລືອກການບັນທຶກທີ່ມີຄວາມຍືດຫຍຸ່ນ: Allows manual scheduling for recording start/stop times and supports time-lapse videos and photos.
- Durable and Secure Design: IP66 rated sturdy open/close case protects against rain and dust. The camera can be password-protected and secured with a lock.
- ຂະຫຍາຍເວລາສະແຕນບາຍ: Supports up to 512GB SD card and offers up to 12 months of standby time.

ຮູບ 2.1: ດ້ານຫນ້າ view of the REXING Woodlens H6 Trail Camera, showcasing its camouflage design and dual lenses.
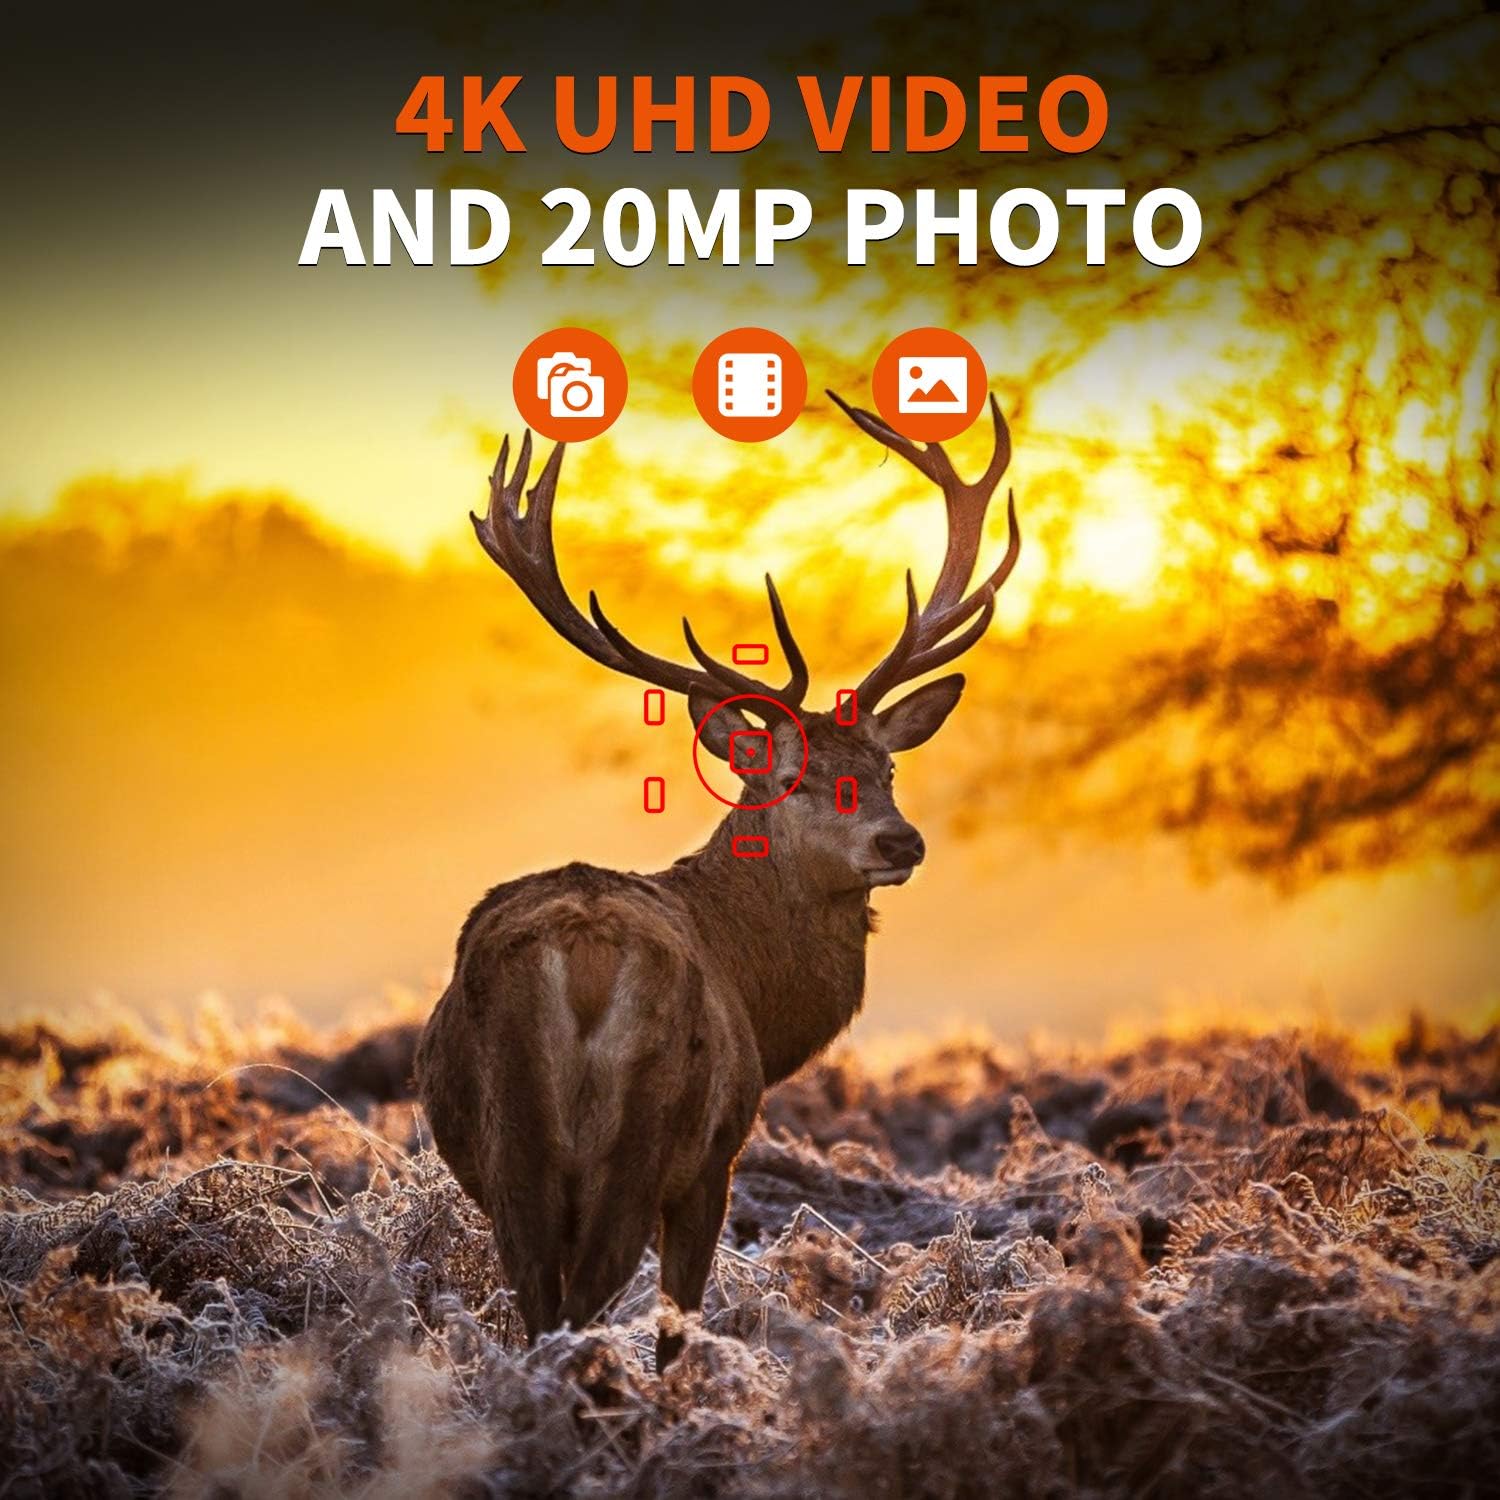
Figure 2.2: The REXING Woodlens H6 captures stunning 4K UHD video and 20MP photos, as demonstrated by this image of a deer in its natural habitat.
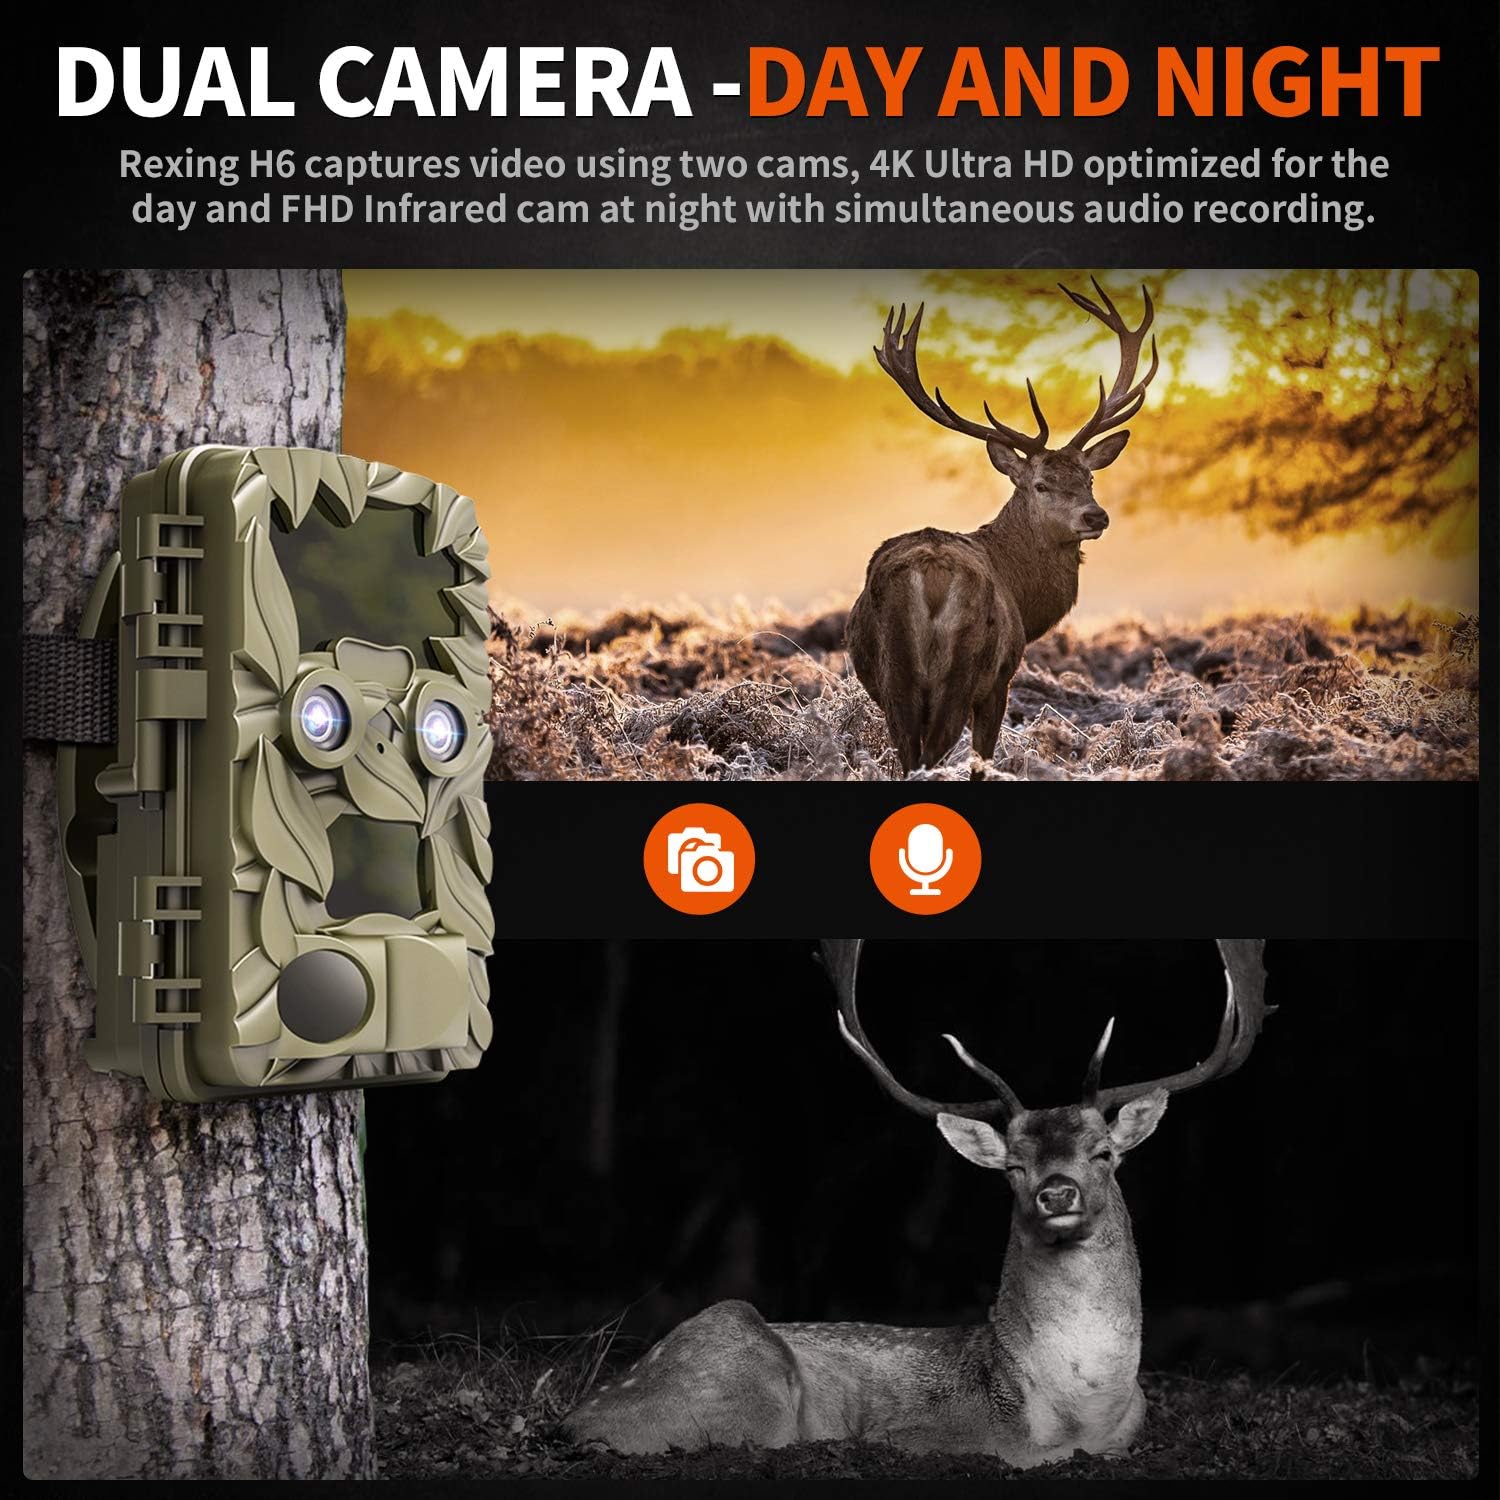
Figure 2.3: The H6 features a dual camera system, optimized for both day (4K) and night (FHD Infrared) recording, ensuring comprehensive surveillance around the clock.

Figure 2.4: Enhanced night vision capabilities of the H6, capturing clear images of wildlife up to 35 meters away in low light conditions, without disturbing sounds.

Figure 2.5: The H6 boasts a 120-degree detection angle and an ultra-fast 0.2-second trigger speed, ensuring no motion is missed.

Figure 2.6: Built to withstand the elements, the H6 is IP56 rated, making it resistant to heavy rain, ice, snow, dust, and mud.

Figure 2.7: The H6 is designed for low power consumption, compatible with 8x AA batteries, providing up to 12 months of standby time.

Figure 2.8: The REXING Woodlens H6 is versatile, suitable for multiple applications including wildlife monitoring, farm surveillance, and security.
3. ເນື້ອໃນຊຸດ
ກະລຸນາກວດສອບເນື້ອໃນຂອງຊຸດເພື່ອໃຫ້ແນ່ໃຈວ່າລາຍການທັງຫມົດມີຢູ່:
- REXING Woodlens H6 Trail Camera
- ສາຍຍຶດ
- ສາຍ USB
- ສາຍ AV
- ຄູ່ມືຜູ້ໃຊ້
- (Optional: 8x AA Batteries - check product packaging)
4. ຕັ້ງຄ່າ
4.1 ການຕິດຕັ້ງຫມໍ້ໄຟ
- Open the camera's outer casing ໂດຍການປົດລັອກຄລິບຂ້າງ.
- ຊອກຫາຊ່ອງໃສ່ຫມໍ້ໄຟ.
- Insert 8x AA batteries, ensuring correct polarity (+/-) as indicated inside the compartment.
- ປິດຝາປິດຊ່ອງໃສ່ຫມໍ້ໄຟຢ່າງປອດໄພ.
4.2 ການໃສ່ SD Card
- ເມື່ອກ້ອງຖ່າຍຮູບເປີດຢູ່, ໃຫ້ຊອກຫາຊ່ອງໃສ່ບັດ SD.
- Insert a compatible SD card (up to 512GB) into the slot until it clicks into place. Ensure the card is inserted in the correct orientation.
- It is recommended to format the SD card via the camera's menu before first use.
4.3 ຕິດຕັ້ງກ້ອງ
- Select a suitable location for the camera, such as a tree or pole, ensuring a clear view ຂອງພື້ນທີ່ທີ່ຕ້ອງການ.
- ສຽບສາຍຍຶດທີ່ສະໜອງໃຫ້ຜ່ານຊ່ອງສຽບຢູ່ດ້ານຫຼັງຂອງກ້ອງ.
- Securely fasten the strap around the tree or pole, adjusting the camera's angle as needed.
- Alternatively, the camera can be wall-mounted using appropriate hardware (not included) via the mounting point.
4.4 ການເປີດເຄື່ອງເບື້ອງຕົ້ນ
- ຫຼັງຈາກຕິດຕັ້ງແບັດເຕີຣີ ແລະ SD card ແລ້ວ, ໃຫ້ສະຫຼັບກ້ອງຖ່າຍຮູບໄປທີ່ຕຳແໜ່ງ "ON".
- The LCD screen will power on, and you can begin configuring settings.
5. ຄໍາແນະນໍາການດໍາເນີນງານ
5.1 ການນໍາທາງເມນູ
Use the control buttons (MENU, UP, DOWN, LEFT, RIGHT, OK, SHOT) located next to the LCD screen to navigate through the camera's settings and modes.
- ເມນູ: ເຂົ້າເຖິງເມນູການຕັ້ງຄ່າຕົ້ນຕໍ.
- ຂຶ້ນລົງ: ນຳທາງຜ່ານຕົວເລືອກເມນູ.
- ຊ້າຍຂວາ: Adjusts values or selects sub-options.
- ຕົກລົງ: ຢືນຢັນການເລືອກ.
- ແຊງ: Manually takes a photo or starts/stops video recording in preview ໂໝດ.
5.2 ຮູບແບບການບັນທຶກ
The H6 supports various recording modes:
- ຮູບແບບ: Captures still images (up to 20MP).
- ໂໝດວິດີໂອ: Records video (4K UHD day, FHD night).
- ໂໝດຮູບ + ວິດີໂອ: Captures a still image followed by a video clip upon detection.
- ໂໝດ Time Lapse: Captures photos or videos at set intervals to create time-lapse sequences.
5.3 Setting Up Scheduled Recording
To set specific times for the camera to operate:
- ໃສ່ MENU.
- Navigate to the "Timer" or "Schedule" setting.
- Set the desired start and end times for recording. The camera will only be active during these periods.
5.4 Viewing and Managing Recordings
ການບັນທຶກສາມາດ viewed directly on the camera or on an external device:
- ການຫຼິ້ນໃນກ້ອງຖ່າຍຮູບ: Use the built-in 2.4-inch LCD screen and navigation buttons to review ຮູບພາບແລະວິດີໂອ captured.
- ການເຊື່ອມຕໍ່ໂທລະທັດ: Connect the camera to a TV using the provided AV cable to view recordings on a larger screen.
- ການເຊື່ອມຕໍ່ຄອມພິວເຕີ: Connect the camera to a computer via the USB cable, or remove the SD card and insert it into a card reader, to transfer and view files.
5.5 ການປົກປ້ອງລະຫັດຜ່ານ
To prevent unauthorized access to your camera settings and recordings:
- ໃສ່ MENU.
- Navigate to the "Password" or "Security" setting.
- Set a 4-digit PIN. Remember this PIN as it will be required to access the camera.
Video 5.1: Official product video demonstrating the features and operation of the REXING Woodlens H6 Trail Camera, including its dual lens capabilities, night vision, and user interface.
6. ບໍາລຸງຮັກສາ
- ທໍາຄວາມສະອາດ: Use a soft, dry cloth to clean the camera body and lenses. Avoid abrasive cleaners or solvents.
- ການປ່ຽນແບັດເຕີຣີ: Replace all batteries simultaneously when the low battery indicator appears to ensure optimal performance and prevent leakage.
- ການຄຸ້ມຄອງບັດ SD: Regularly back up important recordings and format the SD card periodically to maintain optimal recording performance and prevent data corruption.
- ການເກັບຮັກສາ: ເມື່ອບໍ່ໄດ້ໃຊ້ງານເປັນເວລາດົນ, ໃຫ້ຖອດແບັດເຕີຣີອອກ ແລະ ເກັບຮັກສາກ້ອງຖ່າຍຮູບໄວ້ໃນບ່ອນທີ່ເຢັນ, ແຫ້ງ ແລະ ຫຼີກລ່ຽງແສງແດດໂດຍກົງ.
7. ການແກ້ໄຂບັນຫາ
| ບັນຫາ | ສາເຫດທີ່ເປັນໄປໄດ້ | ການແກ້ໄຂ |
|---|---|---|
| ກ້ອງຖ່າຍຮູບບໍ່ເປີດ. | ຫມໍ້ໄຟຕ່ໍາຫຼືຕາຍ; ການຕິດຕັ້ງຫມໍ້ໄຟບໍ່ຖືກຕ້ອງ. | ປ່ຽນແບັດເຕີຣີທັງໝົດດ້ວຍແບັດເຕີຣີໃໝ່, ຮັບປະກັນວ່າຂົ້ວທີ່ຖືກຕ້ອງ. |
| Camera stops functioning after installation / No data recorded. | SD card full or corrupted; incorrect SD card insertion; camera settings preventing recording. | Format the SD card (backup data first); ensure SD card is properly inserted; check recording mode and schedule settings. Ensure sufficient battery power. |
| ຄຸນນະພາບຮູບພາບ/ວິດີໂອບໍ່ດີໃນຕອນກາງຄືນ. | IR lights obstructed; subject too far; low battery affecting IR performance. | Ensure clear line of sight for IR lights; position camera closer to subjects (within 65ft); replace batteries. |
| Camera not triggering motion. | PIR sensor obstructed; sensitivity setting too low; subject outside detection range. | Clear obstructions from PIR sensors; increase PIR sensitivity in settings; ensure subjects pass within the 110° detection angle. |
| Camera screen counts down and switches off. | This is normal behavior for the camera to enter monitoring mode after a brief display. | No action required. The camera is functioning as designed. |
| No Wi-Fi connectivity. | The REXING Woodlens H6 model does not feature Wi-Fi connectivity. | This model requires direct connection via AV/USB cable or SD card removal for data transfer. |
8. ຂໍ້ມູນຈໍາເພາະ
| ຄຸນສົມບັດ | ລາຍລະອຽດ |
|---|---|
| ຍີ່ຫໍ້ | REXING |
| ຕົວແບບ | H6 |
| ຄວາມລະອຽດການຖ່າຍວິດີໂອ | 2160p (4K UHD) |
| ການແກ້ໄຂປະສິດທິພາບ | 20 MP |
| ເທັກໂນໂລຍີເຊັນເຊີຮູບພາບ | CMOS |
| ວິໄສທັດກາງຄືນ | 35M IR Flash, Double 850nm High Powered Infrared Light |
| ມຸມກວດຈັບ PIR | 110° (Front + Side Sensor) |
| ຄວາມໄວຜົນກະທົບຕໍ່ | 0.2 ວິນາທີ |
| ຈໍສະແດງຜົນ | Built-in 2.4-inch LCD |
| ການເກັບຮັກສາ | SD ກາດ (ສູງສຸດ 512GB) |
| ແຫຼ່ງພະລັງງານ | 8x AA Batteries (12 Month Standby) |
| ການເຊື່ອມຕໍ່ | AV Output, USB |
| ການຈັດອັນດັບການປົກປ້ອງສາກົນ | IP66 |
| ຂະໜາດບັນຈຸລາຍການ | 7.68 x 4.92 x 3.9 ນິ້ວ |
| ນ້ໍາຫນັກຊຸດ | 0.61 ກິໂລກຣາມ |
| UPC | 810046601815 |
9. ການຮັບປະກັນແລະການສະຫນັບສະຫນູນ
For warranty information and technical support, please refer to the official REXING webເວັບໄຊ ຫຼືຕິດຕໍ່ບໍລິການລູກຄ້າຂອງເຂົາເຈົ້າໂດຍກົງ. ຮັກສາໃບຮັບເງິນການຊື້ຂອງທ່ານໄວ້ເປັນຫຼັກຖານການຊື້ສໍາລັບການຮຽກຮ້ອງການຮັບປະກັນໃດໆ.
ຂໍ້ມູນຕິດຕໍ່:
- Webເວັບໄຊ: www.rexingusa.com (ກະລຸນາກວດສອບເຈົ້າໜ້າທີ່ website for the most current information)
- ອີເມວ: ອ້າງເຖິງ webເວັບໄຊທ໌ສໍາລັບອີເມລ໌ສະຫນັບສະຫນູນ.
- ໂທລະສັບ: ອ້າງເຖິງ webເວັບໄຊທ໌ສຳລັບເບີໂທລະສັບສະໜັບສະໜູນ.
Ask a question about this manual
Ask about setup, troubleshooting, compatibility, parts, safety, or missing instructions. Manuals+ will review the question and use this page’s manual context to help answer it.