
1. ບົດແນະນຳ
This manual provides essential information for the installation, operation, and maintenance of your ASUS Prime A520M-K motherboard. The ASUS Prime A520M-K is a Micro-ATX motherboard designed for AMD AM4 socket processors, supporting 3rd Gen AMD Ryzen processors. It features DDR4 memory support, PCIe expansion, and multiple display outputs for a reliable computing experience.
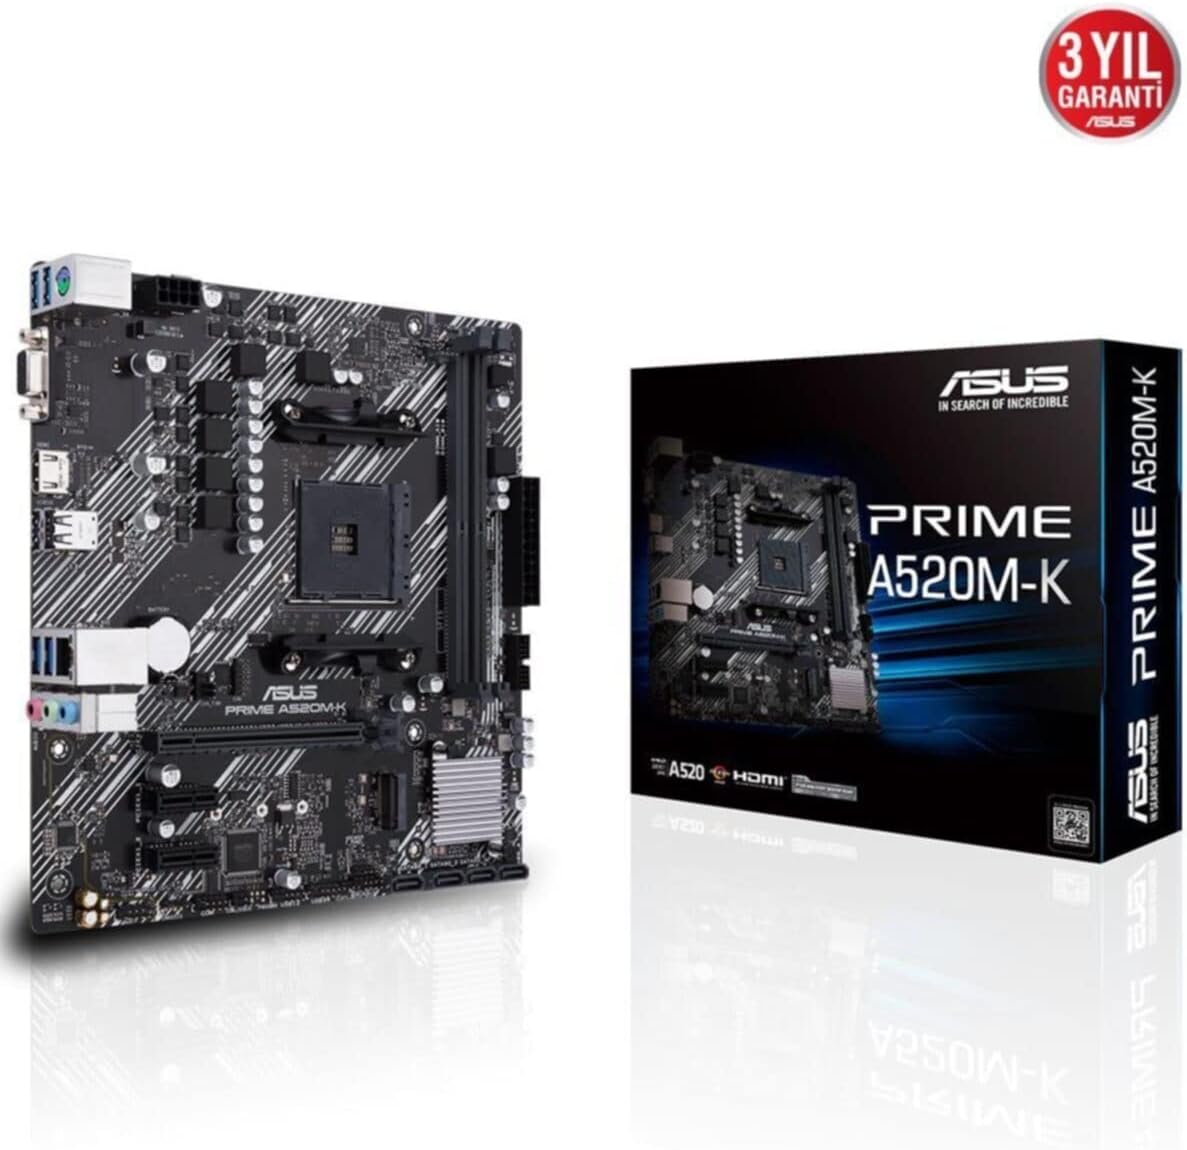
Figure 1: ASUS Prime A520M-K Motherboard and Retail Box.
2. ການຕິດຕັ້ງແລະການຕິດຕັ້ງ
Careful installation is crucial for optimal performance. Ensure your system components are compatible with the ASUS Prime A520M-K motherboard.
2.1. ການຕິດຕັ້ງໂປເຊດເຊີ
The motherboard features an AMD AM4 socket. Align your AMD AM4 processor with the socket, ensuring the triangular markers on the CPU and socket match. Gently place the CPU into the socket without applying force, then secure it with the retention lever.
2.2. ການຕິດຕັ້ງຫນ່ວຍຄວາມຈໍາ
The ASUS Prime A520M-K supports up to 64GB of DDR4 RAM across two DIMM slots. Insert DDR4 memory modules into the slots, ensuring they are properly seated until the clips on both ends lock into place.
2.3. ບັດການຂະຫຍາຍ
Utilize the PCIe expansion slots for graphics cards or other expansion cards. Align the card with the slot and press firmly until it is fully seated. Secure the card with a screw to the chassis.
2.4. Storage Devices
Connect SATA storage devices (HDDs/SSDs) to the available SATA 6Gb/s ports using SATA data cables. Ensure power cables from your power supply are also connected to these devices.
2.5. ການເຊື່ອມຕໍ່ພະລັງງານ
Connect the 24-pin ATX main power connector and the 8-pin ATX 12V power connector from your power supply to the corresponding ports on the motherboard.
2.6. ຕົວເຊື່ອມຕໍ່ແຜງໜ້າ
Connect your chassis's front panel cables (power button, reset button, USB ports, audio jacks, LED indicators) to the designated headers on the motherboard. Refer to the motherboard diagram for precise locations.
2.7. ແຜງ I/O ດ້ານຫຼັງ
The rear I/O panel includes various ports for peripherals:
- D-SUB (VGA) Port: For connecting to older monitors.
- HDMI Port: For connecting to modern displays.
- ພອດ USB 2.0: For connecting peripherals like keyboards and mice.
- LAN Port: ສໍາລັບການເຊື່ອມຕໍ່ເຄືອຂ່າຍ.
- ສຽງ Jacks: For speakers, headphones, and microphones.

Figure 2: Rear I/O panel with D-SUB, HDMI, USB, LAN, and audio ports.
ວິດີໂອ 1: ຜະລິດຕະພັນເກີນview of the ASUS Prime A520M-K Motherboard, demonstrating key features and connectivity options for easy installation.
3. ຄໍາແນະນໍາການດໍາເນີນງານ
ເມື່ອອົງປະກອບທັງໝົດຖືກຕິດຕັ້ງ ແລະເຊື່ອມຕໍ່ແລ້ວ, ທ່ານສາມາດເປີດໄຟໃນລະບົບຂອງທ່ານໄດ້.
3.1. First Boot
Upon the first boot, the system may enter the BIOS/UEFI setup utility. This allows you to configure system settings, boot order, and monitor hardware status. Press the designated key (usually Del or F2) during startup to access the BIOS.
3.2. ການຕິດຕັ້ງລະບົບປະຕິບັດການ
Install your preferred operating system (e.g., Windows) from a bootable USB drive or DVD. Follow the on-screen instructions provided by the operating system installer.
3.3. ການຕິດຕັ້ງໄດເວີ
After installing the operating system, install the necessary drivers for the motherboard's chipset, audio, LAN, and any other integrated components. These drivers are typically provided on a support DVD or can be downloaded from the ASUS official webເວັບໄຊ.
4. ບໍາລຸງຮັກສາ
ການບຳລຸງຮັກສາແບບປົກກະຕິຈະຊ່ວຍຮັບປະກັນການໃຊ້ງານທີ່ຍາວນານ ແລະ ຄວາມໝັ້ນຄົງຂອງເມນບອດຂອງທ່ານ.
- ການກຳຈັດຂີ້ຝຸ່ນ: ເຮັດຄວາມສະອາດຝຸ່ນຈາກເມນບອດເປັນໄລຍະໆແລະອົງປະກອບຕ່າງໆໂດຍໃຊ້ອາກາດບີບອັດ. ກວດໃຫ້ແນ່ໃຈວ່າລະບົບປິດ ແລະຖອດປລັກອອກກ່ອນທຳຄວາມສະອາດ.
- ອັບເດດ BIOS/UEFI: Keep your BIOS/UEFI firmware updated to benefit from performance improvements, bug fixes, and support for new hardware. Download updates only from the official ASUS webເວັບໄຊ.
- ການຄຸ້ມຄອງສາຍໄຟ: Ensure all cables are neatly routed and secured to prevent obstruction of airflow and accidental disconnections.
- ແບັດເຕີຣີ CMOS: The motherboard uses a small lithium-ion battery (CR2032) to retain BIOS settings and system time. If your system consistently loses time or BIOS settings, this battery may need replacement.
5. ການແກ້ໄຂບັນຫາ
ຖ້າເຈົ້າພົບບັນຫາ, ເບິ່ງຂັ້ນຕອນການແກ້ໄຂບັນຫາທົ່ວໄປຕໍ່ໄປນີ້:
- ບໍ່ມີພະລັງງານ: Check all power connections, including the 24-pin and 8-pin connectors to the motherboard, and ensure the power supply is switched on.
- ບໍ່ມີການສະແດງຜົນ: Verify that your monitor is connected to the correct display output (D-SUB or HDMI) on the motherboard or dedicated graphics card. Reseat the graphics card and RAM modules.
- ລະບົບບໍ່ສະຖຽນ/ຂັດຂ້ອງ: This can be caused by incompatible RAM, overheating, or outdated drivers. Check RAM compatibility, ensure proper cooling, and update all drivers.
- ລະຫັດ POST ຜິດພາດ: If your motherboard has diagnostic LEDs or a POST code display, consult the ASUS website or full manual for the meaning of specific codes.
- ຣີເຊັດ BIOS: To reset BIOS settings to default, locate the CLRTC (Clear CMOS) jumper on the motherboard and follow the instructions in the full manual, or remove the CMOS battery for a few minutes.
6. ຂໍ້ມູນຈໍາເພາະ
Detailed technical specifications for the ASUS Prime A520M-K motherboard:
| ຄຸນສົມບັດ | ຂໍ້ມູນຈໍາເພາະ |
|---|---|
| ຍີ່ຫໍ້ | ASUS |
| ຊຸດ | PRIME A520M-K |
| ໝາຍເລກຕົວແບບ | 90MB1500-M0EAY0 |
| ເຕົ້າສຽບ CPU | ເຕົ້າຮັບ AM4 |
| ໂປເຊດເຊີທີ່ເຂົ້າກັນໄດ້ | ຊັອກເກັດ AMD AM4 ລຸ້ນທີ 3 AMD Ryzen |
| ປະເພດຊິບເຊັດ | AMD A520 |
| ເທກໂນໂລຍີຫນ່ວຍຄວາມຈໍາ RAM | DDR4 SDRAM |
| Memory Slots | 2 x DIMM |
| Max Memory ຮອງຮັບ | 64GB |
| ຄວາມໄວໂມງຄວາມຈຳ | 2133 MHz (ຖານ) |
| ຈຳນວນຂອງ USB 2.0 Ports | 2 (I/O ຫລັງ) |
| ຜົນຜະລິດວິດີໂອ | D-SUB, HDMI |
| ປັດໄຈແບບຟອມ | Micro ATX |
| ຂະໜາດສິນຄ້າ (LxWxH) | 8.9 x 8.7 x 0.79 ນິ້ວ |
| ນ້ໍາຫນັກລາຍການ | 1.19 ປອນ |
| ສີ | ດຳ |
| ເວທີ | Windows |
| ວັນທີທໍາອິດທີ່ມີ | ວັນທີ 18 ສິງຫາ 2020 |
7. ການຮັບປະກັນແລະການສະຫນັບສະຫນູນ
The ASUS Prime A520M-K motherboard typically comes with a manufacturer's warranty. Please refer to the warranty card included with your product or visit the official ASUS support website for detailed warranty terms and conditions. For technical assistance, driver downloads, and further support, please visit the ຮອງຮັບ ASUS webເວັບໄຊ.

Figure 3: ASUS Prime A520M-K Motherboard, indicating a 3-year warranty.