HoldPeak HP-890CN
HoldPeak HP-890CN Digital Multimeter User Manual
Model: HP-890CN
1. ບົດແນະນຳ
Thank you for choosing the HoldPeak HP-890CN Digital Multimeter. This device is designed for stable and reliable performance, featuring an anti-drop design and a clear 25mm high LCD display. It is capable of measuring various electrical parameters including DC/AC voltage, diode, resistance, capacitance, frequency, duty cycle, temperature, and hFE, along with a non-contact voltage (NCV) detection function. Please read this manual thoroughly before use to ensure safe and proper operation.
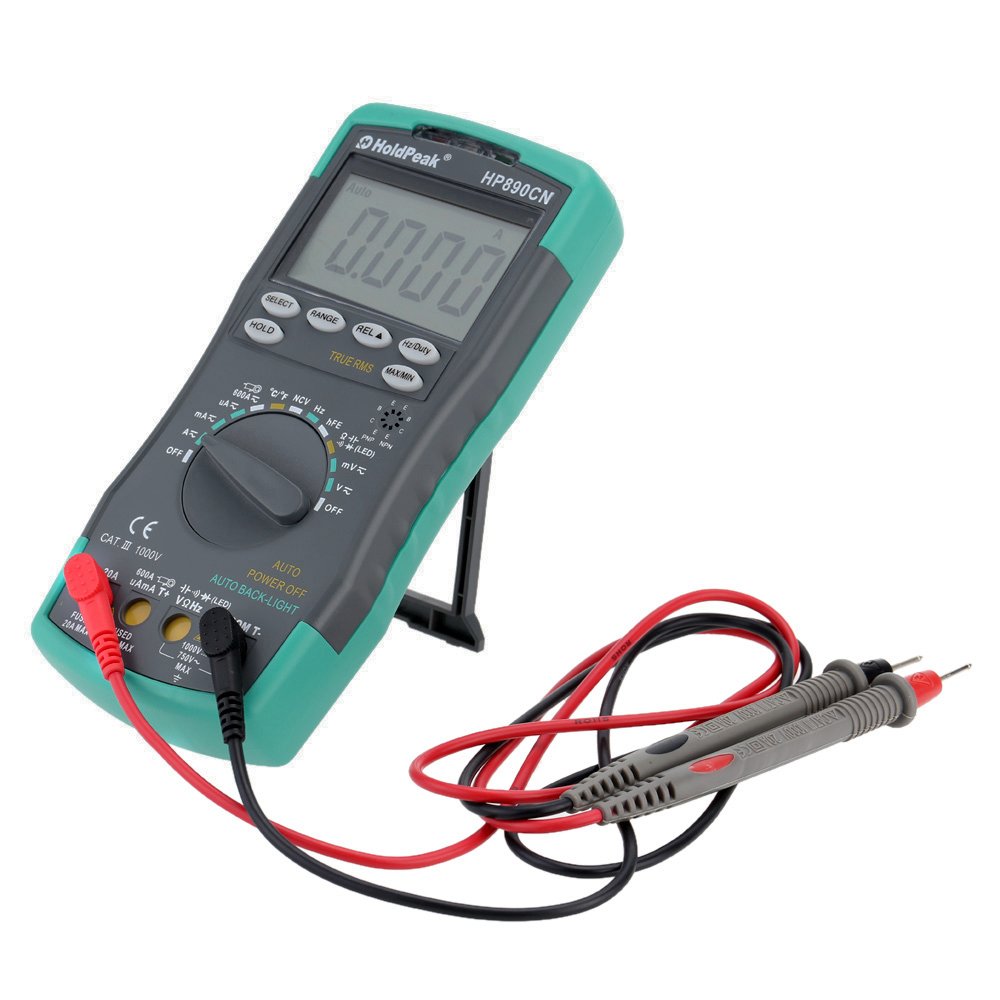
Figure 1: HoldPeak HP-890CN Digital Multimeter
2. ຂໍ້ມູນຄວາມປອດໄພ
WARNING: To avoid electrical shock or damage to the meter, please observe the following safety precautions:
- Always remove test leads from the circuit before opening the case or battery cover.
- Do not operate the meter with the case or battery cover open.
- To prevent damage or injury, ensure quick-acting fuses with the specified amp and volt ratings are installed.
- This device complies with IEC 1010-1 1000V CAT III, Pollution Degree 2 standards.
- ໃຊ້ຟັງຊັນ ແລະ ຂອບເຂດທີ່ຖືກຕ້ອງສະເໝີສຳລັບການວັດແທກ.
- ບໍ່ເຄີຍໃຊ້ voltage ຫຼື ກະແສໄຟຟ້າທີ່ເກີນຂອບເຂດຈຳກັດສູງສຸດທີ່ລະບຸໄວ້.
- ຈົ່ງລະມັດລະວັງໃນເວລາເຮັດວຽກກັບ voltages ຂ້າງເທິງ 30V AC RMS, ສູງສຸດ 42V, ຫຼື 60V DC. vol ເຫຼົ່ານີ້tages ເຮັດໃຫ້ເກີດອັນຕະລາຍຊ໊ອກ.
- ຮັກສານິ້ວມືໄວ້ທາງຫຼັງຂອງສິ່ງກີດຂວາງໂພຣບໃນລະຫວ່າງການວັດແທກ.

ຮູບ 2: ດ້ານຫລັງ view of the multimeter showing safety warnings and battery compartment.
3. ຜະລິດຕະພັນເກີນview
The HoldPeak HP-890CN Digital Multimeter features a large LCD display and intuitive controls for ease of use. Below is a diagram illustrating the main components and their functions.

Figure 3: Labeled diagram of the HP-890CN Multimeter.
ອົງປະກອບທີ່ສໍາຄັນ:
- ຈໍ LCD: Shows measurement readings, units, and function indicators. Features smart backlight.
- ປຸ່ມຟັງຊັນ: ສະວິດໝຸນເພື່ອເລືອກຟັງຊັນການວັດແທກ (Vol)tagອີ, ກະແສໄຟຟ້າ, ຄວາມຕ້ານທານ, ແລະອື່ນໆ).
- Input Jacks:
- COM: ຊ່ອງສຽບເຂົ້າທົ່ວໄປສຳລັບສາຍທົດສອບສີດຳ.
- VΩHz: ການປ້ອນຂໍ້ມູນສໍາລັບ voltage, resistance, frequency, capacitance, diode, and temperature measurements (red test lead).
- mA: Input for current measurements up to 600mA (red test lead).
- 20A: Input for current measurements up to 20A (red test lead).
- ປຸ່ມ:
- ເລືອກ: Toggles between functions within a single rotary switch position (e.g., AC/DC, Diode/Continuity).
- ຊ່ອງຫວ່າງ: Manually selects measurement range (auto-ranging is default).
- REL (Relative Value): Measures relative changes.
- Hz/Duty: ເລືອກການວັດແທກຄວາມຖີ່ ຫຼື ວົງຈອນໜ້າທີ່.
- ຖື: ຢຸດການອ່ານໜ້າຈໍປັດຈຸບັນ.
- TRUE RMS: Indicates True RMS measurement capability for AC.
- MAX / MIN: ບັນທຶກການອ່ານສູງສຸດ ແລະ ຕໍ່າສຸດ.
- ພື້ນທີ່ກະຕຸ້ນ NCV: ສໍາລັບການບໍ່ຕິດຕໍ່ voltage ການຊອກຄົ້ນຫາ.
- hFE Testing Interface: ຊັອກເກັດສຳລັບການທົດສອບທຣານຊິດເຕີ.
- Kickstand: ຂາຕັ້ງປະສົມປະສານເພື່ອຄວາມສະດວກສະບາຍ viewing (rotates 180 degrees).
4. ຕັ້ງຄ່າ
4.1 ການຕິດຕັ້ງຫມໍ້ໄຟ
The multimeter requires either two 1.5V AAA batteries or one 9V 6F22 battery (not included). The specific battery type included with your product may vary. To install or replace batteries:
- ກວດໃຫ້ແນ່ໃຈວ່າມັລຕິມິເຕີຖືກປິດໄວ້ ແລະຫົວການທົດສອບທັງໝົດຖືກຕັດການເຊື່ອມຕໍ່.
- ຊອກຫາຊ່ອງໃສ່ຫມໍ້ໄຟຢູ່ດ້ານຫຼັງຂອງເຄື່ອງວັດແທກ.
- ໃຊ້ໄຂຄວງເພື່ອຄາຍສະກູທີ່ຍຶດຝາປິດແບັດເຕີຣີອອກ.
- ເອົາຝາປິດຫມໍ້ໄຟອອກ.
- Insert the new batteries, observing the correct polarity (+ and -).
- ປ່ຽນຝາແບັດເຕີລີ່ ແລະຮັດສະກູໃຫ້ແໜ້ນ.

ຮູບທີ 4: ພາຍໃນ view of the multimeter, showing the battery compartment.
4.2 ການເຊື່ອມຕໍ່ຜູ້ນໍາການທົດສອບ
Always connect the black test lead to the COM jack. Connect the red test lead to the appropriate input jack based on the measurement you intend to perform:
- ສໍາລັບ Voltage, Resistance, Capacitance, Frequency, Diode, and Temperature: Connect the red lead to the VΩHz jack.
- For Current up to 600mA: Connect the red lead to the mAµA jack.
- For Current up to 20A: Connect the red lead to the 20A jack.
5. ຄໍາແນະນໍາການດໍາເນີນງານ
Before taking any measurements, ensure the test leads are correctly connected and the function switch is set to the desired measurement type.
5.1 ເປີດ/ປິດ
Rotate the function switch from the OFF position to any desired measurement function to turn the meter ON. Rotate it back to OFF to power it down. The meter features an auto power-off function to conserve battery life.
5.2 ການວັດແທກ DC Voltagອີ (V=)
- Set the function switch to the V= position.
- ເຊື່ອມຕໍ່ສາຍທົດສອບສີດຳເຂົ້າກັບຊ່ອງສຽບ COM ແລະ ສາຍທົດສອບສີແດງເຂົ້າກັບຊ່ອງສຽບ VΩHz.
- Connect the test probes across the component or circuit to be measured, in parallel.
- ອ່ານ voltage ມູນຄ່າຢູ່ໃນຈໍສະແດງຜົນ LCD.
5.3 ການວັດແທກ AC Voltage (V~)
- ຕັ້ງຄ່າສະຫຼັບຟັງຊັນເປັນຕຳແໜ່ງ V~.
- ເຊື່ອມຕໍ່ສາຍທົດສອບສີດຳເຂົ້າກັບຊ່ອງສຽບ COM ແລະ ສາຍທົດສອບສີແດງເຂົ້າກັບຊ່ອງສຽບ VΩHz.
- Connect the test probes across the component or circuit to be measured, in parallel.
- ອ່ານ voltage value on the LCD display. This meter provides True RMS readings for AC voltage.

ຮູບທີ 5: ການວັດແທກແຮງດັນໄຟຟ້າ ACtage ຈາກປລັກໄຟຟ້າ.
5.4 Measuring DC/AC Current (A= / A~)
CAUTION: Always connect the meter in series with the circuit when measuring current. Ensure the circuit is de-energized before connecting the meter.
- Set the function switch to the A= or A~ position. Use the SELECT button to toggle between DC and AC if necessary.
- ເຊື່ອມຕໍ່ຫົວການທົດສອບສີດໍາກັບ COM Jack.
- ສຳລັບກະແສໄຟຟ້າສູງເຖິງ 600mA, ໃຫ້ເຊື່ອມຕໍ່ສາຍທົດສອບສີແດງເຂົ້າກັບ mAµA ແຈັກ. ສຳລັບກະແສໄຟຟ້າສູງເຖິງ 20A, ໃຫ້ເຊື່ອມຕໍ່ສາຍທົດສອບສີແດງເຂົ້າກັບ 20A jack.
- Break the circuit and connect the test probes in series with the circuit.
- ນຳໃຊ້ພະລັງງານໃສ່ວົງຈອນ ແລະ ອ່ານຄ່າກະແສໄຟຟ້າຢູ່ໜ້າຈໍ LCD.
5.5 ການວັດແທກຄວາມຕ້ານທານ (Ω)
- ຕັ້ງຄ່າສະຫຼັບຟັງຊັນເປັນຕໍາແຫນ່ງ Ω.
- ເຊື່ອມຕໍ່ສາຍທົດສອບສີດຳເຂົ້າກັບຊ່ອງສຽບ COM ແລະ ສາຍທົດສອບສີແດງເຂົ້າກັບຊ່ອງສຽບ VΩHz.
- Connect the test probes across the component to be measured. Ensure the component is de-energized.
- ອ່ານຄ່າຄວາມຕ້ານທານໃນຈໍສະແດງຜົນ LCD.
5.6 ການວັດແທກຄວາມຈຸ (F)
- Set the function switch to the capacitance (F) position.
- ເຊື່ອມຕໍ່ສາຍທົດສອບສີດຳເຂົ້າກັບຊ່ອງສຽບ COM ແລະ ສາຍທົດສອບສີແດງເຂົ້າກັບຊ່ອງສຽບ VΩHz.
- Connect the test probes across the capacitor. Ensure the capacitor is fully discharged before measurement.
- ອ່ານຄ່າ capacitance ໃນຈໍສະແດງຜົນ LCD.
5.7 ຄວາມຖີ່ໃນການວັດແທກ (Hz) / ຮອບວຽນການເຮັດວຽກ (%)
- Set the function switch to the Hz/% position.
- ເຊື່ອມຕໍ່ສາຍທົດສອບສີດຳເຂົ້າກັບຊ່ອງສຽບ COM ແລະ ສາຍທົດສອບສີແດງເຂົ້າກັບຊ່ອງສຽບ VΩHz.
- ເຊື່ອມຕໍ່ໂພຣບທົດສອບຜ່ານແຫຼ່ງສັນຍານ.
- Press the Hz/Duty button to toggle between frequency and duty cycle measurements.
- ອ່ານຄ່າໃນຈໍສະແດງຜົນ LCD.
5.8 ທົດສອບ Diode
- Set the function switch to the Diode/Continuity position. Press SELECT to choose Diode Test.
- ເຊື່ອມຕໍ່ສາຍທົດສອບສີດຳເຂົ້າກັບຊ່ອງສຽບ COM ແລະ ສາຍທົດສອບສີແດງເຂົ້າກັບຊ່ອງສຽບ VΩHz.
- ເຊື່ອມຕໍ່ໂພຣບສີແດງເຂົ້າກັບຂົ້ວບວກ ແລະ ໂພຣບສີດຳເຂົ້າກັບຂົ້ວລົບຂອງໄດໂອດ.
- ອ່ານຕໍ່ voltage drop on the LCD display. Reverse the probes to check for open circuit (OL).
5.9 ການທົດສອບຄວາມຕໍ່ເນື່ອງ
- Set the function switch to the Diode/Continuity position. Press SELECT to choose Continuity Test.
- ເຊື່ອມຕໍ່ສາຍທົດສອບສີດຳເຂົ້າກັບຊ່ອງສຽບ COM ແລະ ສາຍທົດສອບສີແດງເຂົ້າກັບຊ່ອງສຽບ VΩHz.
- ເຊື່ອມຕໍ່ໂພຣບທົດສອບຜ່ານວົງຈອນ ຫຼື ອົງປະກອບ.
- ຖ້າຄວາມຕ້ານທານຕໍ່າກວ່າປະມານ 50Ω, ສຽງກະດິ່ງຈະດັງຂຶ້ນ, ຊີ້ບອກເຖິງຄວາມຕໍ່ເນື່ອງ.
5.10 Temperature Measurement (°C/°F)
- ຕັ້ງຄ່າສະຫຼັບຟັງຊັນເປັນຕຳແໜ່ງ °C/°F.
- Connect the K-type thermocouple probe to the VΩHz and COM jacks, observing polarity.
- ວາງປາຍເຄື່ອງວັດແທກອຸນຫະພູມໄວ້ເທິງ ຫຼື ໃກ້ກັບວັດຖຸທີ່ຈະວັດແທກອຸນຫະພູມ.
- Read the temperature on the LCD display. Use the SELECT button to switch between Celsius and Fahrenheit.
5.11 hFE Test (Transistor Test)
- ຕັ້ງຄ່າສະຫຼັບຟັງຊັນໄປຫາຕຳແໜ່ງ hFE.
- Insert the transistor's Emitter, Base, and Collector leads into the corresponding holes in the hFE socket, ensuring correct NPN or PNP type.
- ອ່ານຄ່າ hFE (ກຳລັງໄຟຟ້າກະແສตรง) ໃນໜ້າຈໍ LCD.
5.12 ບໍ່ຕິດຕໍ່ Voltage (NCV) ການກວດຫາ
- Set the function switch to the NCV position.
- Move the NCV induction area of the meter close to the conductor being tested.
- ຖ້າ AC voltage is detected (90V to 1000V AC RMS), the NCV red indicator will light up, and the buzzer will sound. The intensity of the sound and light indicates the strength of the detected voltage.
5.13 ໜ້າທີ່ພິເສດ
- ຖື: ກົດເພື່ອຢຸດການອ່ານປັດຈຸບັນຢູ່ເທິງໜ້າຈໍ. ກົດອີກຄັ້ງເພື່ອປ່ອຍ.
- REL (Relative Value): Press to store the current reading as a reference. Subsequent measurements will show the difference from this reference.
- MAX / MIN: Press to enter MAX/MIN mode. The meter will display the maximum or minimum reading recorded since entering this mode. Press again to cycle between MAX, MIN, and current reading.
6. ບໍາລຸງຮັກສາ
6.1 ການທໍາຄວາມສະອາດ
ເຊັດແມັດດ້ວຍການໂຄສະນາamp cloth and mild detergent. Do not use abrasives or solvents. Keep the contacts of the input jacks clean.
6.2 ການທົດແທນຫມໍ້ໄຟ
When the battery symbol appears on the LCD, the batteries need to be replaced. Refer to section 4.1 for battery installation instructions.
6.3 ການທົດແທນຟິວ
WARNING: To avoid electrical shock, disconnect the test leads before opening the case. Replace fuses only with quick-acting fuses of the specified type and rating.
The meter is protected by two fuses:
- F1: 600mA/250V fast-blow fuse for the mAµA input.
- F2: 20A/250V fast-blow fuse for the 20A input.
ເພື່ອທົດແທນ fuse:
- Turn the meter OFF and disconnect all test leads.
- ຖອດຝາປິດແລະ ໝໍ້ ໄຟອອກ.
- Unscrew the screws holding the back case and carefully open the meter.
- Carefully remove the old fuse by gently prying it from its clips.
- Install a new fuse of the correct type and rating.
- ປະກອບມິເຕີຄືນໃໝ່, ຮັບປະກັນວ່າສະກູທັງໝົດຖືກຂັນໃຫ້ແໜ້ນແລ້ວ.
7. ການແກ້ໄຂບັນຫາ
- Random values in mV mode: It is normal for the display to show random values in mV mode when the input terminals are open (not connected to a circuit). Simply short the input terminals to zero the reading. This will not affect measurement results.
- ບໍ່ມີຈໍສະແດງຜົນ ຫຼື ມືດມົວລົງ: ກວດສອບລະດັບແບັດເຕີຣີ. ປ່ຽນແບັດເຕີຣີຖ້າແບັດເຕີຣີຕໍ່າ.
- No reading in current mode: Check if the fuse is blown. Replace if necessary (refer to section 6.3). Ensure test leads are connected to the correct current input jack (mAµA or 20A) and in series with the circuit.
- "OL" ສະແດງ: Indicates an overload (measurement exceeds the selected range) or an open circuit.
8. ຂໍ້ມູນຈໍາເພາະ
| ພາລາມິເຕີ | ຂໍ້ມູນຈໍາເພາະ |
|---|---|
| ຍີ່ຫໍ້ | HoldPeak |
| ຕົວແບບ | HP-890CN |
| ສີ | Gray + Blue-Green |
| ວັດສະດຸ | ພາດສະຕິກ |
| ຈໍສະແດງຜົນສູງສຸດ | 6000 ນັບ |
| ການຄວບຄຸມໄລຍະ | Range ອັດຕະໂນມັດ |
| ຂະໜາດໜ້າຈໍ | 60 × 35 ມມ |
| ຊິງຕັນດີຊີ Voltage | 60mV/600mV/6V/60V/600V/1000V |
| AC Voltage (RMS ແທ້) | 60mV/600mV/6V/60V/600V/750V |
| ກະແສໄຟຟ້າ DC | 600µA/6000µA/60mA/600mA/6A/20A |
| AC Current (RMS ແທ້) | 600µA/6000µA/60mA/600mA/6A/20A |
| ການຕໍ່ຕ້ານ | 600Ω/6KΩ/60KΩ/600KΩ/6MΩ/60MΩ |
| ຄວາມຈຸ | 9.999nF/99.99nF/999.9nF/9.999µF/99.99µF/999.9µF/9.99mF/99.99mF |
| ຄວາມຖີ່ | 9.999Hz/99.99Hz/999.9Hz/9.999KHz/99.99KHz/999.9KHz/9.999MHz |
| ວົງຈອນຫນ້າທີ່ | 0.1% ຫາ 99.9% |
| ອຸນຫະພູມ | -20 ~ 1000 ° C / -4 ~ 2222 ° F |
| ທົດສອບ Diode | ແມ່ນແລ້ວ |
| Buzzer ຄວາມຕໍ່ເນື່ອງ | ແມ່ນແລ້ວ |
| ການທົດສອບ transistor hFE | 0-1000 |
| ການກວດຫາ NCV | 90V ~ 1000V AC rms |
| ການສະຫນອງພະລັງງານ | 2 * 1.5V AAA batteries / 1 * 9V 6F22 battery (not included) |
| ສະພາບແວດລ້ອມການດໍາເນີນງານ | 0-40°C (32-104°F) |
| ສະພາບແວດລ້ອມການເກັບຮັກສາ | -20-60 ° C (-4-140 ° F) |
| ຂະໜາດສິນຄ້າ (L×W×H) | Approx. 19 × 8.5 × 3.5 cm (7.67 × 3.35 × 1.37 inches) |
| ນ້ຳໜັກສິນຄ້າ | 300 ກຣາມ (10.58 ອອນສ໌) |
| ຜູ້ຜະລິດ | MIS-E0833 |
| UPC | 783950206936, 791592905193 |
9. ເນື້ອໃນຊຸດ
ຊຸດປະກອບມີລາຍການຕໍ່ໄປນີ້:
- 1 * HoldPeak HP-890CN Digital Multimeter
- 1 * ຖົງເກັບຮັກສາ
- 1 * Pair of Test Leads (Red and Black)
- 1 * K-Type Thermocouple Probe
- 1 * ຄູ່ມືຜູ້ໃຊ້ພາສາອັງກິດ

ຮູບທີ 6: ເຄື່ອງວັດມິເຕີ ແລະ ອຸປະກອນເສີມຕ່າງໆທີ່ມີໃຫ້.

Figure 7: Included storage bag for the multimeter.
10. ການຮັບປະກັນແລະການສະຫນັບສະຫນູນ
For warranty information or technical support, please refer to the documentation provided with your purchase or contact the seller/manufacturer directly. Keep your purchase receipt as proof of purchase.
Ask a question about this manual
Ask about setup, troubleshooting, compatibility, parts, safety, or missing instructions. Manuals+ will review the question and use this page’s manual context to help answer it.