
1. ບົດແນະນຳ
This manual provides detailed instructions for installing, configuring, and maintaining your GIGABYTE GA-B150M-D3H Micro ATX motherboard. The GA-B150M-D3H is designed to support 6th Generation Intel Core Processors and features Dual Channel DDR4 memory, PCIe Gen3 x4 M.2 connector, SATA Express, and 8-channel HD audio with Audio Noise Guard.
Please read this manual thoroughly before beginning installation to ensure proper setup and operation.
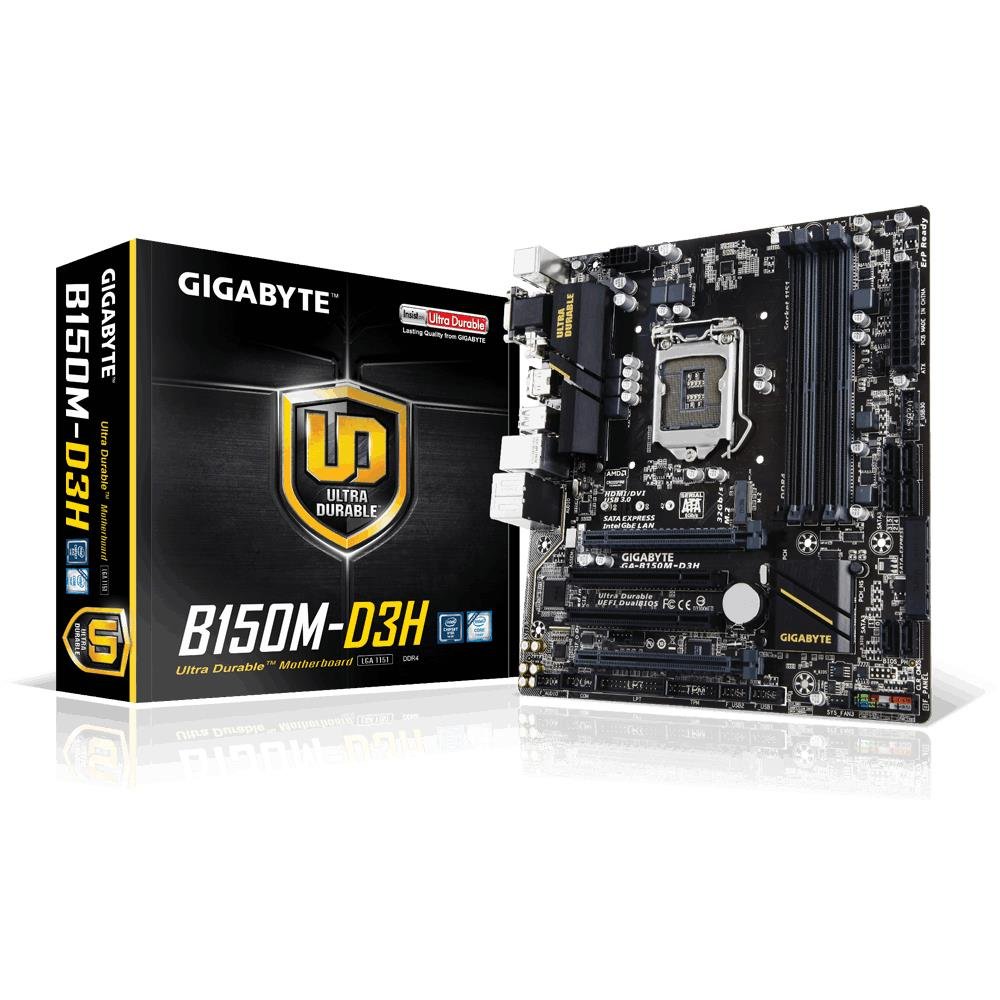
Image 1.1: GIGABYTE GA-B150M-D3H Micro ATX Motherboard. This image displays the overall layout of the motherboard, highlighting its compact Micro ATX form factor and various component slots.
2. ຂໍ້ມູນຄວາມປອດໄພ
Observe the following safety precautions to prevent damage to the motherboard and injury to yourself:
- ຖອດສາຍໄຟອອກຈາກຝາຜະໜັງສະເໝີກ່ອນທີ່ຈະແຕະໃສ່ອົງປະກອບໃດໆ.
- ໃສ່ສາຍແຂນຕ້ານສະຖິດ ຫຼືແຕະວັດຖຸໂລຫະທີ່ມີພື້ນດິນເລື້ອຍໆເພື່ອປ່ອຍກະແສໄຟຟ້າສະຖິດ.
- ຈັບເມນບອດໂດຍຂອບຂອງມັນເພື່ອຫຼີກເວັ້ນການສໍາຜັດກັບອົງປະກອບທີ່ລະອຽດອ່ອນ.
- ຮັກສາເມນບອດຢູ່ຫ່າງຈາກຄວາມຊຸ່ມຊື່ນ ແລະອຸນຫະພູມທີ່ຮຸນແຮງ.
- ຮັບປະກັນການລະບາຍອາກາດທີ່ເຫມາະສົມພາຍໃນກໍລະນີຄອມພິວເຕີເພື່ອປ້ອງກັນຄວາມຮ້ອນເກີນ.
3. ເນື້ອໃນຊຸດ
ກວດສອບວ່າລາຍການທັງຫມົດແມ່ນມີຢູ່ໃນຊຸດ motherboard ຂອງທ່ານ:
- GIGABYTE GA-B150M-D3H Motherboard
- ຄູ່ມືຜູ້ໃຊ້
- I / O ໄສ້
- ສາຍ SATA
- Driver CD/DVD
Note: Contents may vary slightly depending on region or revision.
4. ແຜນຜັງຂອງເມນບອດ
Familiarize yourself with the various components and connectors on the GA-B150M-D3H motherboard.
Image 4.1: GIGABYTE GA-B150M-D3H Motherboard Layout. This image provides a visual reference for the location of key components such as the CPU socket, DIMM slots, PCIe slots, SATA ports, and M.2 connector.
ອົງປະກອບທີ່ສໍາຄັນ:
- LGA 1151 CPU Socket: For 6th Generation Intel Core Processors.
- ຊ່ອງສຽບ DDR4 DIMM (4): Supports Dual Channel DDR4 memory up to 2133 MHz.
- ສະລັອດຕິງ PCIe: Includes PCIe Gen3 x16 for graphics cards and PCIe x1 slots for expansion.
- M.2 Connector: Supports PCIe NVMe & SATA SSDs with up to 32Gb/s data transfer.
- SATA Express Connector: For up to 16Gb/s data transfer.
- ຜອດ SATA 6Gb/s: For connecting traditional SATA storage devices.
- 24-Pin ATX Power Connector: ການປ້ອນຂໍ້ມູນພະລັງງານຕົ້ນຕໍ.
- 8-Pin ATX 12V Power Connector: CPU power input.
- ສ່ວນຫົວກະດານໜ້າ: For power button, reset button, LED indicators, and USB ports.
- ຕົວເຊື່ອມຕໍ່ສຽງ: 8-channel HD Audio with high quality capacitors and Audio Noise Guard.
5. ການຕິດຕັ້ງແລະການຕິດຕັ້ງ
ປະຕິບັດຕາມຂັ້ນຕອນເຫຼົ່ານີ້ສໍາລັບການຕິດຕັ້ງທີ່ເຫມາະສົມຂອງ motherboard ແລະອົງປະກອບຂອງທ່ານ.
5.1. ການຕິດຕັ້ງ CPU
- Locate the LGA 1151 CPU socket.
- ເປີດແລັບຊັອກເກັດ CPU ແລະຍົກແຜ່ນໂຫຼດ.
- ວາງ CPU ກັບຊັອກເກັດຢ່າງລະມັດລະວັງ, ໃຫ້ແນ່ໃຈວ່າສາມຫຼ່ຽມຄໍາໃນ CPU ກົງກັບສາມຫຼ່ຽມຢູ່ໃນເຕົ້າຮັບ. ຢ່າບັງຄັບ CPU ເຂົ້າໄປໃນເຕົ້າສຽບ.
- ຫຼຸດແຜ່ນໂຫຼດລົງ ແລະ ຍຶດມັນດ້ວຍ lever.
5.2. ການຕິດຕັ້ງ CPU Cooler
Refer to your CPU cooler's instruction manual for specific installation steps. Ensure thermal paste is applied correctly between the CPU and cooler base.
5.3. ການຕິດຕັ້ງຫນ່ວຍຄວາມຈໍາ (RAM)
- ເປີດຄລິບຢູ່ທັງສອງສົ້ນຂອງຊ່ອງ DDR4 DIMM.
- ວາງໂມດູນໜ່ວຍຄວາມຈຳກັບຊ່ອງສຽບ, ຮັບປະກັນວ່າຮອຍບັ້ງຢູ່ໃນໂມດູນກົງກັບກະແຈໃນຊ່ອງສຽບ.
- ກົດລົງໃຫ້ແໜ້ນທັງສອງສົ້ນຂອງໂມດູນໜ່ວຍຄວາມຈຳຈົນກວ່າຄລິບຈະເຂົ້າໃສ່.
- For dual-channel performance, install memory modules in matching colored slots (e.g., DIMM1 and DIMM2).
5.4. Installing Expansion Cards
- Remove the metal bracket from the desired PCIe slot on your computer case.
- Align the expansion card with the PCIe slot and press down firmly until it is seated correctly.
- Secure the card with a screw to the computer case.
5.5. ການເຊື່ອມຕໍ່ອຸປະກອນການເກັບຮັກສາ
- ອຸປະກອນ SATA: Connect one end of the SATA data cable to a SATA 6Gb/s port on the motherboard and the other end to your hard drive or SSD. Connect the SATA power cable from your power supply to the device.
- M.2 SSD: ສຽບ M.2 SSD ເຂົ້າໄປໃນຊ່ອງສຽບ M.2 ໃນມຸມຫນຶ່ງ, ຫຼັງຈາກນັ້ນຄ່ອຍໆຍູ້ມັນລົງແລະຍຶດມັນດ້ວຍ screw ສະຫນອງໃຫ້.
- SATA Express: If using a SATA Express device, connect it to the designated SATA Express connector.
5.6. ການເຊື່ອມຕໍ່ຕົວເຊື່ອມຕໍ່ Front Panel
Connect the cables from your computer case's front panel (power button, reset button, HDD LED, power LED, front USB, front audio) to the corresponding headers on the motherboard. Refer to the motherboard layout diagram for exact locations and pin assignments.
5.7. ການເຊື່ອມຕໍ່ການສະຫນອງພະລັງງານ
- ເຊື່ອມຕໍ່ຕົວເຊື່ອມຕໍ່ໄຟຫຼັກ ATX 24-pin ຈາກແຫຼ່ງຈ່າຍໄຟຂອງທ່ານເຂົ້າກັບຊັອກເກັດໄຟ 24-pin ເທິງເມນບອດ.
- Connect the 8-pin ATX 12V CPU power connector to the 8-pin socket near the CPU.
- ໃຫ້ແນ່ໃຈວ່າການເຊື່ອມຕໍ່ພະລັງງານທັງຫມົດແມ່ນປອດໄພ.
6. ຄໍາແນະນໍາການດໍາເນີນງານ
6.1. First Boot
After assembling all components, connect your monitor, keyboard, and mouse. Power on the system. The system should display the GIGABYTE splash screen and then enter the BIOS/UEFI setup or attempt to boot from a connected storage device.
6.2. ຕັ້ງຄ່າ BIOS/UEFI
ເພື່ອເຂົ້າສູ່ການຕັ້ງຄ່າ BIOS/UEFI, ກົດປຸ່ມ DEL key repeatedly during the boot process when the GIGABYTE logo appears. Here you can configure system settings, boot order, and monitor hardware status. The GA-B150M-D3H features GIGABYTE UEFI Dual BIOS for enhanced reliability.
6.3. ການຕິດຕັ້ງໄດເວີ
After installing your operating system, install the necessary drivers for the motherboard components. These can be found on the included driver CD/DVD or downloaded from the official GIGABYTE website. Key drivers include chipset, audio (Realtek ALC892 codec), LAN, and any integrated graphics drivers.
6.4. ການຕິດຕັ້ງລະບົບປະຕິບັດການ
Insert your operating system installation media (USB drive or DVD) and configure the boot order in the BIOS/UEFI to boot from it. Follow the on-screen instructions to install your preferred operating system (e.g., Windows 8.1, Windows 10).
7. ບໍາລຸງຮັກສາ
7.1. ທໍາຄວາມສະອາດ
Regularly clean the interior of your computer case to prevent dust buildup, which can lead to overheating. Use compressed air to remove dust from fans, heatsinks, and motherboard components. Ensure the system is powered off and unplugged before cleaning.
7.2. ການອັບເດດ BIOS
GIGABYTE periodically releases BIOS updates to improve system stability, compatibility, and performance. Visit the official GIGABYTE website for your motherboard model (GA-B150M-D3H) to check for the latest BIOS version and follow the provided instructions for updating. Exercise caution during BIOS updates, as an interruption can render the motherboard inoperable.
8. ການແກ້ໄຂບັນຫາ
ພາກສ່ວນນີ້ແກ້ໄຂບັນຫາທົ່ວໄປທີ່ທ່ານອາດຈະພົບ.
8.1. ບໍ່ມີພະລັງງານ / ລະບົບບໍ່ເປີດ
- Check if the power supply is connected correctly to the motherboard (24-pin and 8-pin connectors).
- ໃຫ້ແນ່ໃຈວ່າສະວິດການສະຫນອງພະລັງງານຢູ່ໃນຕໍາແຫນ່ງເປີດ.
- ກວດສອບວ່າສາຍປຸ່ມເປີດເຄື່ອງດ້ານໜ້າຖືກເຊື່ອມຕໍ່ກັບຫົວແມ່ບອດຢ່າງຖືກຕ້ອງ.
- ທົດສອບແຫຼ່ງຈ່າຍໄຟດ້ວຍລະບົບອື່ນ ຫຼື ເຄື່ອງທົດສອບແຫຼ່ງຈ່າຍໄຟ.
8.2. ບໍ່ມີການສະແດງຜົນອອກ
- Ensure the monitor is connected to the correct graphics output (either integrated graphics on the motherboard or a dedicated graphics card).
- ຣີເຊັດບັດກາຟິກ ແລະໂມດູນໜ່ວຍຄວາມຈຳຄືນໃໝ່.
- Try booting with only one memory module installed.
- ກວດສອບວ່າຈໍພາບເປີດຢູ່ ແລະ ຕັ້ງເປັນແຫຼ່ງສັນຍານເຂົ້າທີ່ຖືກຕ້ອງ.
8.3. ຄວາມບໍ່ສະຖຽນລະພາບຂອງລະບົບ / ການຂັດຂ້ອງ
- ກວດເບິ່ງອຸນຫະພູມ CPU ແລະ GPU ເພື່ອຮັບປະກັນວ່າພວກມັນຢູ່ໃນຂອບເຂດຈໍາກັດການເຮັດວຽກທີ່ປອດໄພ.
- ກວດສອບວ່າໄດຣເວີທັງໝົດໄດ້ຖືກຕິດຕັ້ງ ແລະ ອັບເດດແລ້ວ.
- ເປີດໃຊ້ເຄື່ອງມືວິນິດໄສຄວາມຈຳເພື່ອກວດສອບ RAM ທີ່ຜິດພາດ.
- Ensure the power supply provides sufficient and stable power to all components.
9. ຂໍ້ມູນຈໍາເພາະ
Detailed technical specifications for the GIGABYTE GA-B150M-D3H motherboard:
| ຄຸນສົມບັດ | ຂໍ້ມູນຈໍາເພາະ |
|---|---|
| ຊື່ຕົວແບບ | GA-B150M-D3H |
| ປັດໄຈແບບຟອມ | Micro ATX (24.4ຊມ x 22.5ຊມ) |
| ເຕົ້າສຽບ CPU | LGA 1151 |
| ໂປເຊດເຊີທີ່ເຂົ້າກັນໄດ້ | ໂປເຊດເຊີ Intel Core ລຸ້ນທີ 6 |
| ຊິບເຊັດ | Intel B150 Express Chipset |
| ເທັກໂນໂລຢີຄວາມຈຳ | DDR4 |
| Memory Slots | 4 x DDR4 DIMM sockets (Dual Channel) |
| ຄວາມອາດສາມາດຫນ່ວຍຄວາມຈໍາສູງສຸດ | 16 GB |
| ຄວາມໄວໂມງຄວາມຈຳ | 2133 MHz |
| PCIe Slots | 1 x PCI Express x16, 1 x Total PCIe Ports |
| ການໂຕ້ຕອບການເກັບຮັກສາ | PCIe Gen3 x4 M.2, SATA Express, SATA 6Gb/s |
| ຕົວແປງສັນຍານສຽງ | Realtek ALC892 codec, 8-channel HD Audio |
| ພອດ USB | Total 8 USB Ports (including USB 2.0) |
| ຕົວເຊື່ອມຕໍ່ພະລັງງານຫຼັກ | 24-Pin ATX |
| ຕົວເຊື່ອມຕໍ່ພະລັງງານ CPU | 8-Pin ATX 12V |
| ຄຸນນະສົມບັດເປັນເອກະລັກ | GIGABYTE UEFI Dual BIOS, Audio Noise Guard with LED Trace Path Lighting, App Center (Easy Tune, Cloud Station) |
10. ການຮັບປະກັນແລະການສະຫນັບສະຫນູນ
For warranty information, please refer to the warranty card included in your product package or visit the official GIGABYTE webເວັບໄຊ. ເງື່ອນໄຂການຮັບປະກັນອາດຈະແຕກຕ່າງກັນໄປຕາມພາກພື້ນ.
For technical support, driver downloads, BIOS updates, and further product information, please visit the GIGABYTE official support webເວັບໄຊ:
https://www.gigabyte.com/Support
When contacting support, please have your motherboard model (GA-B150M-D3H) and serial number ready.